


Difficulté
Modérée
Étapes
4
Temps nécessaire
00:30:00

En cours
Ce tutoriel est en cours de création. Revenez de temps en temps pour voir les modifications.

Ce tutoriel a été créé par la communauté
User contributed
Outils
Pièces
-
-
Placer un bac de récupération (5L) sous le radiateur coté gauche
-
Déconnecter la durite inférieure du radiateur, laisser le liquide s'écouler dans le bac
-
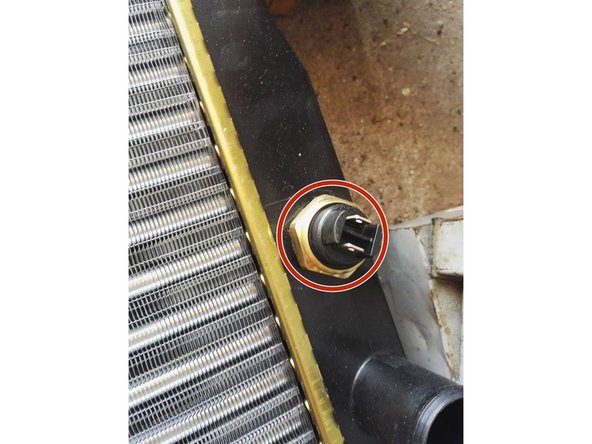
Déconnecter également les 2 cosses arrivant au manocontact
-
-
-
Déconnecter la durite supérieure du radiateur
-
Déconnecter la durite allant au vase d'expansion
-
Dévisser les 2 vis de fixation supérieure du radiateur
-
Dévisser les 2 écrous de fixation inférieurs du radiateur
-
Déposer le radiateur
-
-
-
Monter le manocontact sur le nouveau radiateur (Neuf, ou le récupérer sur l'ancien)
-
Démonter le ventilateur de l'ancien radiateur et le monter sur le nouveau
-
Mettre en place le nouveau radiateur, revisser les 2 vis et 2 écrous de fixation
-
Reconnecter les durites inférieures et supérieures, ainsi que celle du bocal de liquide de refroidissement
-
Reconnecter les 2 cosses au manocontact
-


Annulation : je n'ai pas terminé ce tutoriel.
3 autres ont terminé cette réparation.