


Difficulté
Modérée
Étapes
9
Temps nécessaire
00:45:00 - 01:00:00

Ce tutoriel a été créé par la communauté
User contributed
Introduction
Tutoriel réalisé sur Skoda Fabia 1.4 TDi (moteur BNV, bougies 11V)
-
-
Ouvrir le capot
-
Enlever le cache moteur, ainsi que l'insonorisant en mousse
-
-
-
Les 3 bougies sont alimentées par un unique faisceau rigide (en plastique tout de même).
-
Maintenant que vous avez repérer les bougies, vous allez devoir patienter une semaine !
-
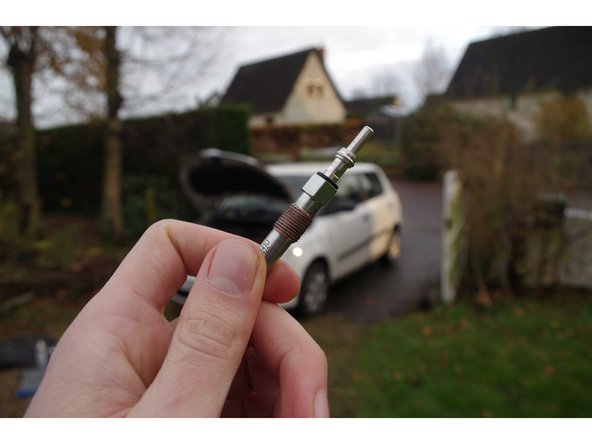
Et oui, car pendant une semaine, vous allez devoir vaporiser un dégrippant dans le logement des bougies (bougies encore à l'intérieur).
-
Cette action est cruciale pour ne pas casser les bougies à l'intérieur de la culasse. Le dégrippant va pénétrer au fur et à mesure que vous allez faire des trajets (chauffe, donc dilatation du moteur, puis refroidissement, contraction).
-
Ce mouvement de dilatation/contraction va permettre au dégrippant de pénétrer toujours plus loin dans le logement des bougies, et lubrifier le filetage des bougies, de sorte à vous faciliter la tâche lors du desserrage.
-
Donc si vous roulez tous les jours, vaporisez les 3 premiers jours et attendez la semaine suivante pour effectuer l'opération. Si vous roulez moins souvent, je vous conseille d'attendre plus longtemps pour que la voiture ait fait au moins 5 cycles de chauffe refroidissement (et pas que des petits trajets !)
-
La dernière photo montre une vaporisation avec le faisceau d'alimentation enlevé, ce n'est pas nécessaire pour cette première phase. Vous pouvez tout à fait vaporiser avec le faisceau encore mis sur les bougies. (cela évite de débrancher la batterie à chaque application !).
-
-
-
C'est le jour J ! Vous avez patiemment vaporisé du dégrippant ces derniers jours sur le logement des bougies, vous pouvez maintenant attaquer le desserrage avec sérénité !
-
Il faut faire l'opération avec le moteur CHAUD ! A l'inverse des bougies d'allumage (pour les moteurs essence), le remplacement des bougies de préchauffage se fait moteur chaud (cela dépend en fait des métaux utilisés pour les bougies). Dans tous les cas, un petit mail au constructeur des bougies vous permettra de connaitre les infos importantes.
-
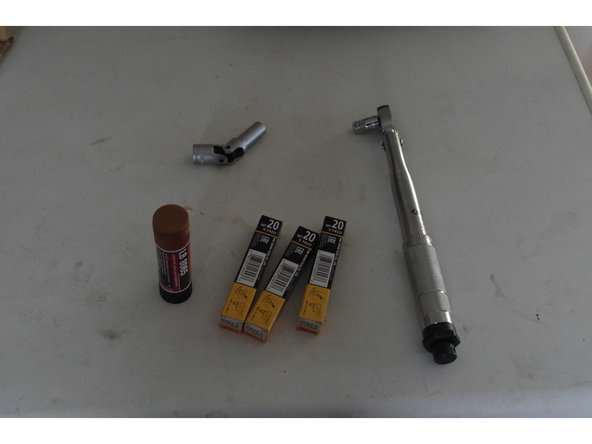
Encore faut-il être bien équipé ! Ici le matériel nécessaire :
-
Une clé dynamométrique (attention à la gamme de serrage, nous voulons seulement quelques Nm !) plusieurs clés commencent à 28N.m ce qui est déjà trop !
-
Les bougies de préchauffages en questions
-
une clé à bougie, ici, du 10mm
-
un graisse de cuivre, spéciale pour les haute température.
-
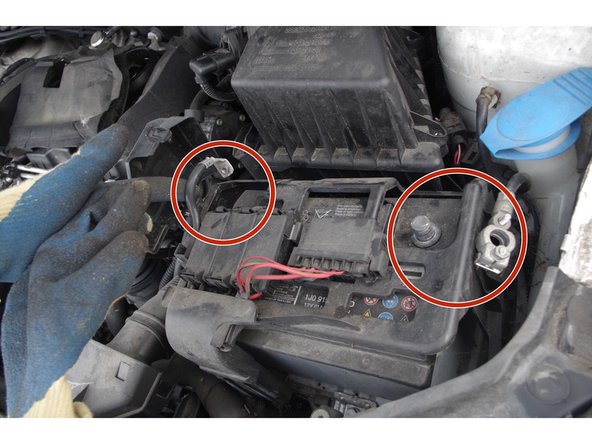
Avant toute opération sur les bougies, déconnectez la batterie.
-
-
-
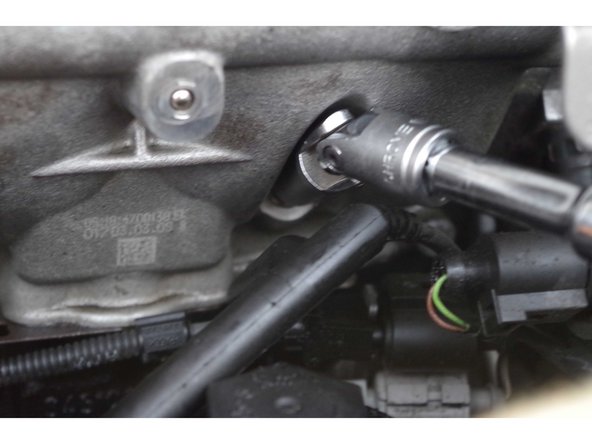
On enlève d'abord le faisceau d'alimentation, et on aperçoit la tête de chaque bougies.
-
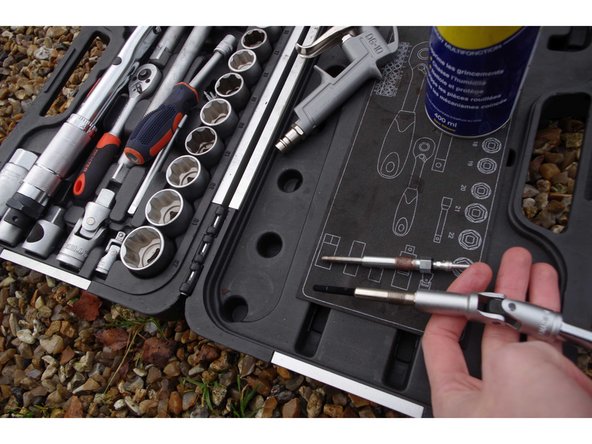
C'est alors qu'on se prépare à desserrer les bougies. C'est alors que vous sortez votre chère clé dynamométrique, et que vous y associez autant de ralonge que nécessaire. J'ai ici eu besoin de 2 rallonges courtes (parce que j'en avais pas de grande !), suivie du cardan de clé à bougie.
-
-
-
C'est le moment crucial ! Surtout attention à ne pas forcer trop fort !
-
Vous pouvez au préalable demander au constructeur des bougies (de celle que vous avez acheté) un couple de cisaillement, c'est à dire le couple maxi avant qu'elles ne cassent. Pour les miennes, le couple maxi était de 40N.m. Ma clé faisant du 5-25Nm, je savais que la clé déclencherait avant que je ne puisse casser les bougies dans la culasse.
-
(cela dit, ce couple est valable pour les bougies que j'avais en main, pas celle qui était dans le moteur, mais l'ordre de grandeur doit être le même ...)
-
Commencez par desserrer à la clé, mais dès que vous pouvez, desserrez à la main, pour ne pas abimer le filetage de la bougie.
-
Une fois totalement desserée, vous pouvez prudemment la retirer, et faire très attention que rien ne tombe dans le logement maintenant vide !
-
Si malgré toutes les précautions que vous avez pris, la bougie ne se desserre pas, NE PAS FORCER ! Soit vous remettez l'opération à plus tard, avec à nouveau une copieuse application de dégrippant, sinon tant pis, allez chez le garagiste, vous aurez fait ce que vous pouviez ! (et cela avant que la bougie ne casse !)
-
-
-
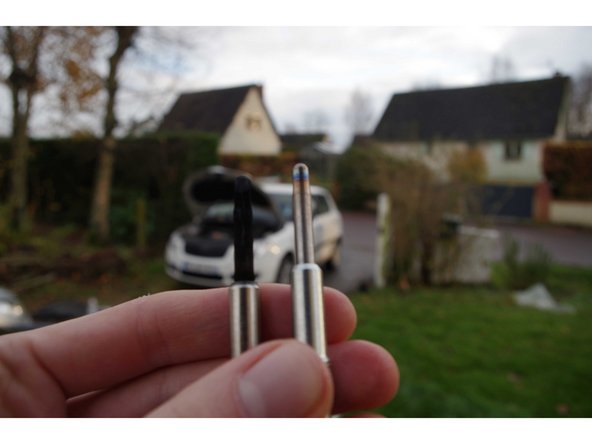
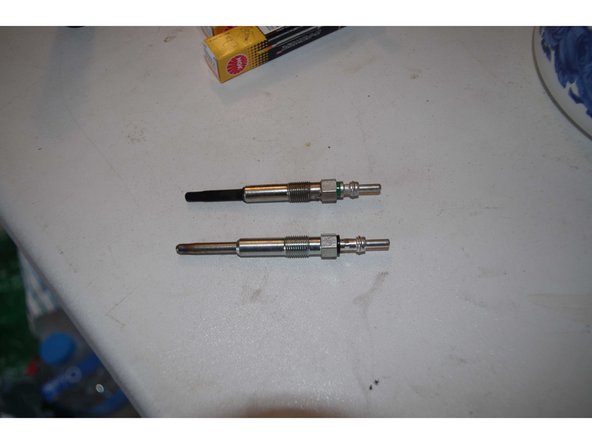
Vient alors le moment de grâce où vous pouvez comparer vos achats avec ce que vous aviez réellement dans le moteur !
-
Je vous laisse deviner laquelle est la neuve, laquelle à 80 000 km !
-
Vous remarquerez que sur la photo 2, on voit que les bougies n'ont pas exactement la même longueur, mais c'est bien la longueur de la tête qui diffère (1 ou 2 mm !). Le reste, le corps, le filetage etc sont bien les même. C'est ce qui importe.
-
-
-
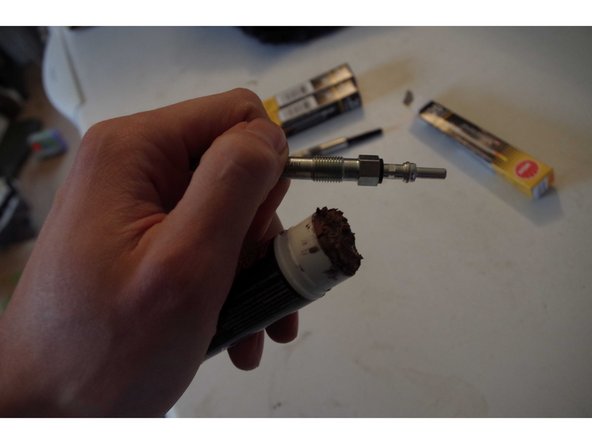
C'est là qu'on peut utiliser la graisse haute température au cuivre. Elle servira à faciliter le desserrage si vous faites à nouveau l'opération, et améliore aussi le serrage.
-
Notez qu'il faut essayer de passer le moins de temps possible avec le moteur à ciel ouvert ! Une bougie a été enlevé, la chambre de combustion est donc à l'air libre ! Il va de soit qu'on ne fait pas l'opération quand il pleut (si on est dehors !).
-
Je ne tenterais pas non plus de mettre quelque chose dans le logement, de peur que ça ne peluche ou que des parasites tombent dans le logement.
-
Il est important aussi d'avoir nettoyer le contour du logement (par exemple avec un compresseur) pour éviter ces problèmes.
-
-
-
Opération inverse ! Commencez par visser la bougie sans la clé, pour ne pas abimer le pas de vis.
-
Une fois que vous sentez que vous ne pouvez pas aller plus loin avec vos petits doigts, utilisez la clé, réglée au bon couple en mode serrage !!
-
Le couple vous aura été communiqué par le constructeur auparavant. Pour moi ici, le couple de serrage est entre 13.5 et 16.5 N.m
-
Procédez au démontage et à la repose des bougies neuves pas à pas, l'une après l'autre pour vos 3 bougies.
-
-
-
Vos 3 bougies ont été remplacées, vous pouvez remettre le faisceau d'alimentation puis rebrancher la batterie.
-
Replacez également l'insonorisant moteur, puis démarrez !
-


L'opération doit être méticuleusement préparée :
1. Vaporisation de dégrippant pendant une semaine avant l'opération
2. Nettoyage du logement des bougies avant le remplacement (afin que rien ne s'introduise dans le moteur).
3. il faut impérativement s'équiper d'une clé dynamométrique pour pouvoir desserrer sereinement (sans risquer de casser les bougies dans le culasse) et serrez au bon couple que le constructeur préconise.
4. Dans tous les cas, un petit mail au constructeur pour valider les infos que vous avez vous rassurera ! Il vous donnera précisément le couple de serrage et peut être le couple de cisaillement.
Pour vous aider, plusieurs vidéos (de constructeurs) existent sur internet. Elles résument bien les opérations et insistent sur les points important.
Annulation : je n'ai pas terminé ce tutoriel.
Une autre personne a terminé cette réparation.