


Introduction
Comment remplacer une vitre latérale avant sur Peugeot 106 phase 1, 3 portes.
Pièces
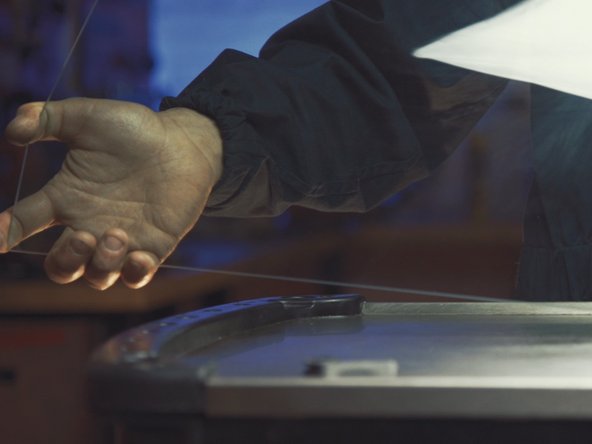
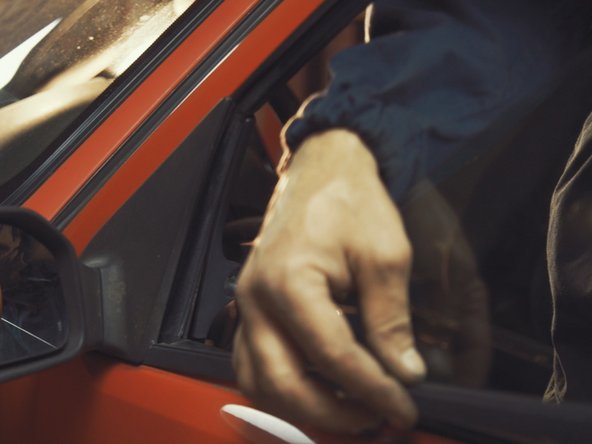
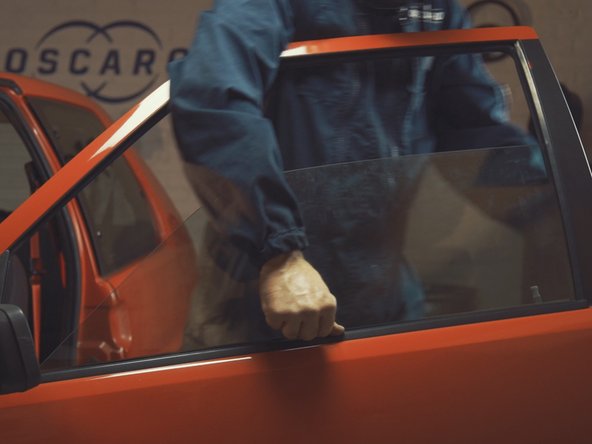
Vidéo d'introduction
-
-
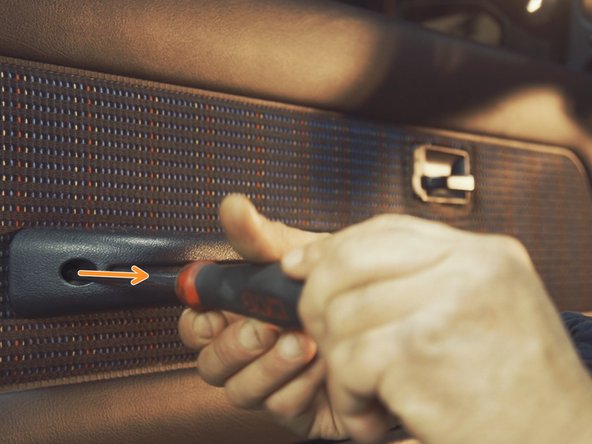
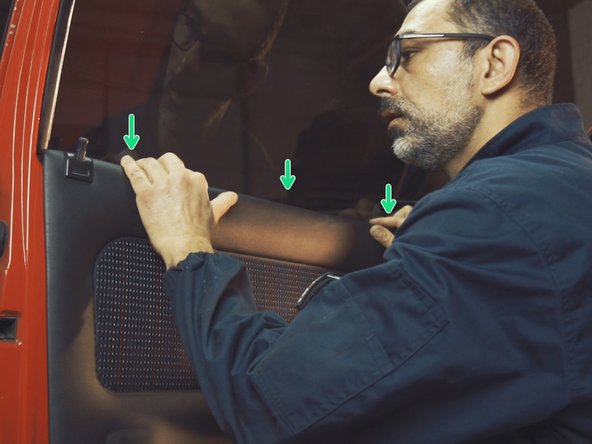
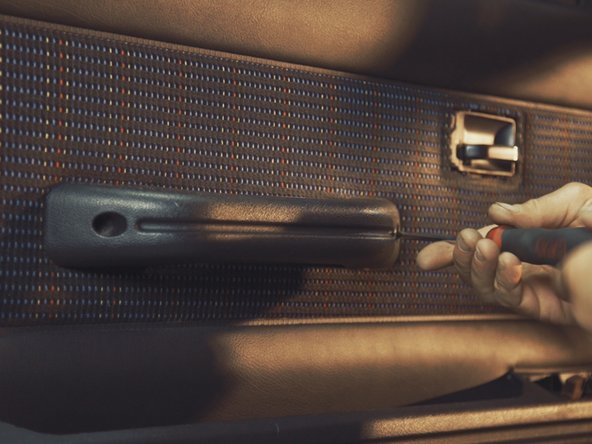
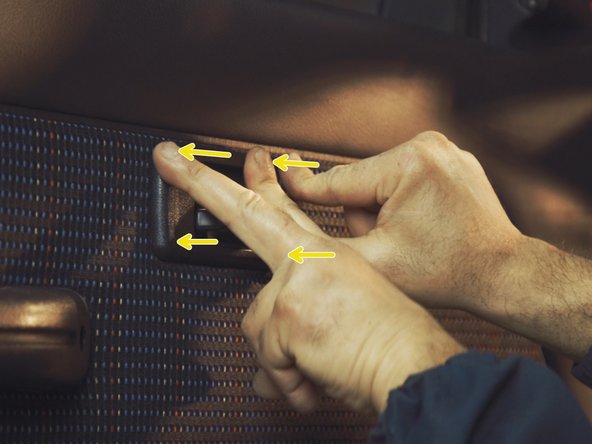
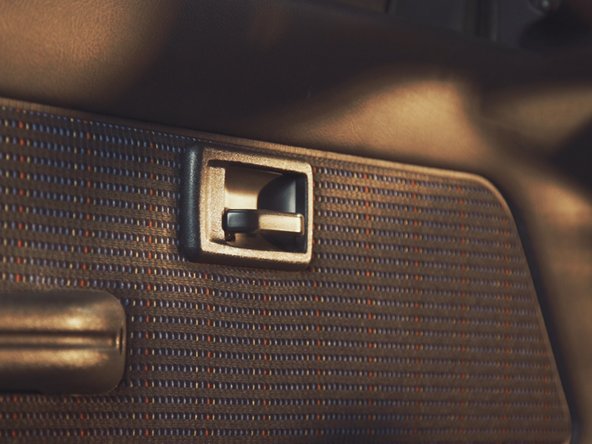
A l'aide d'une spatule, dégrafer l'entourage de la poignée intérieur
-
-
-
Dévisser les deux vis de l'accoudoir avec un Torx T30
-
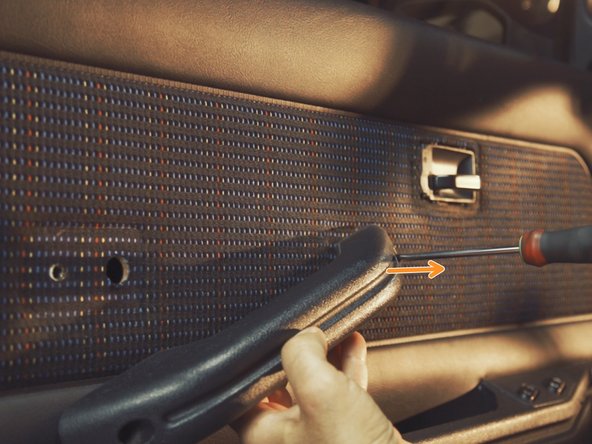
Déposer l'accoudoir en tirant dessus
-
-
-
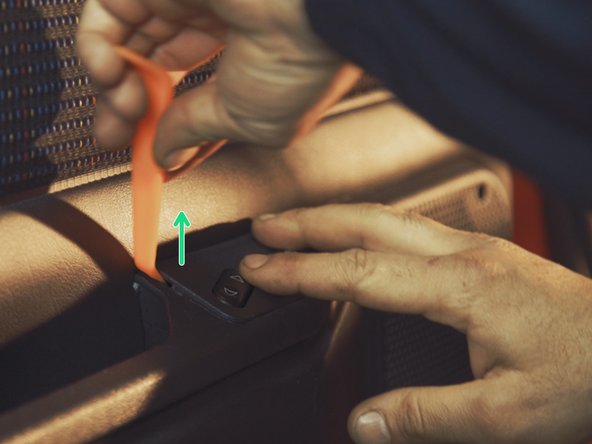
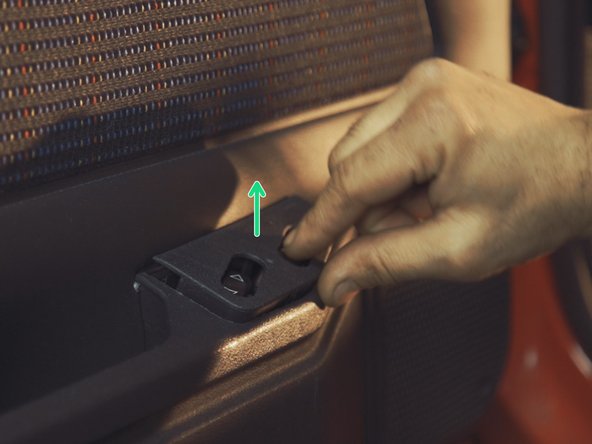
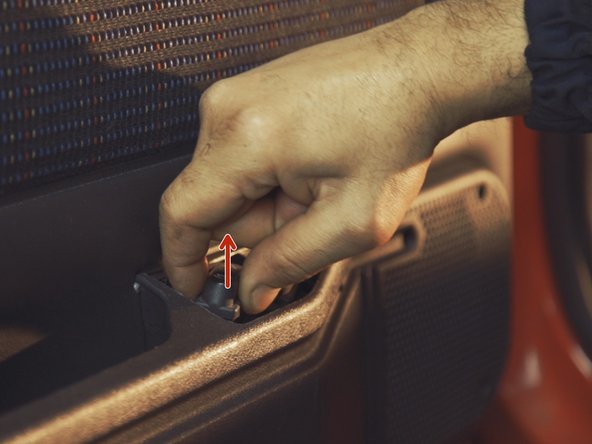
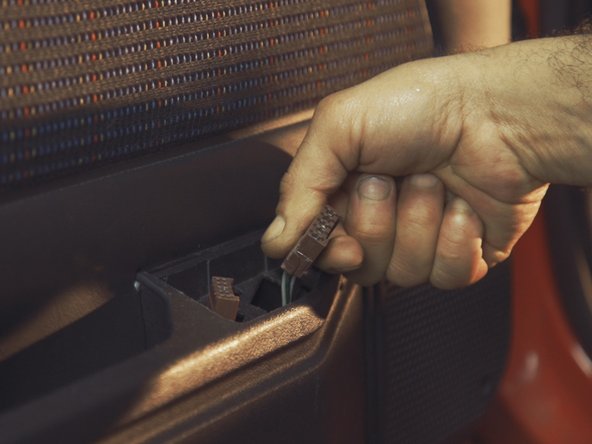
Tirer sur la commande de lève vitre
-
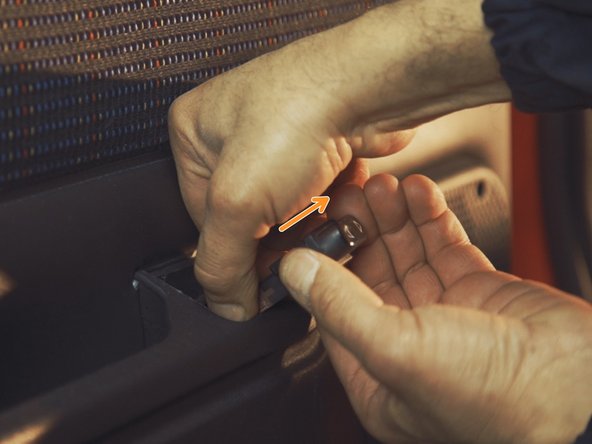
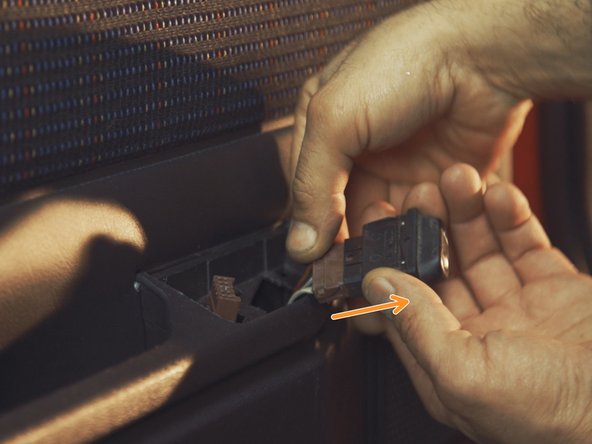
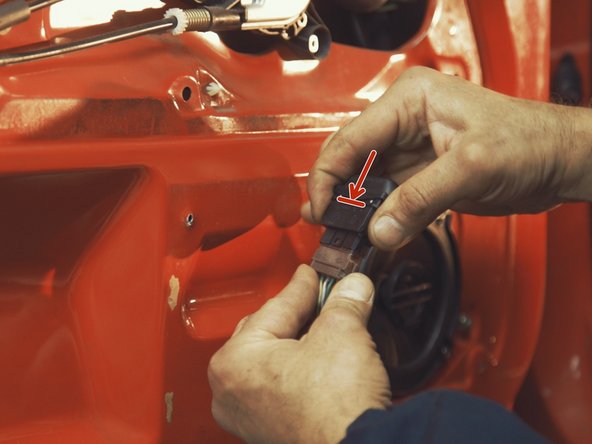
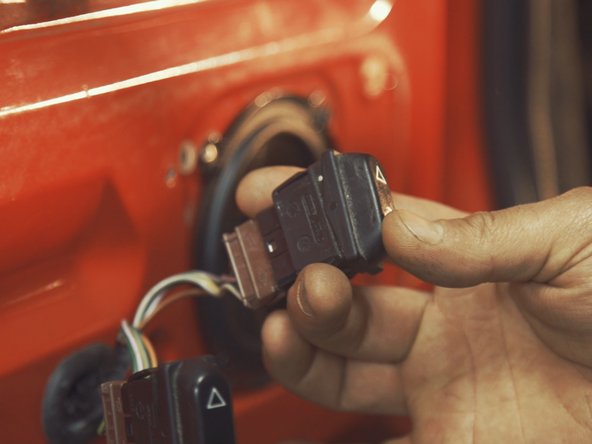
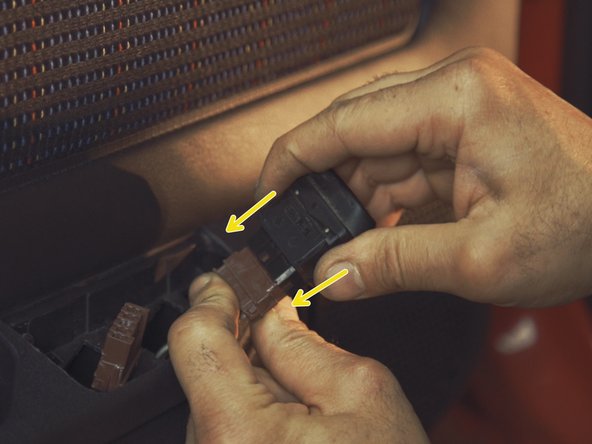
Déclipser la commande au connecteur en tirant simplement dessus
-
-
-
Répéter l'opération sur la seconde commande
-
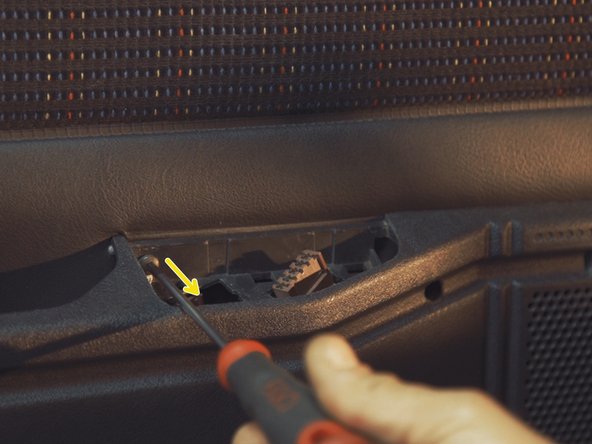
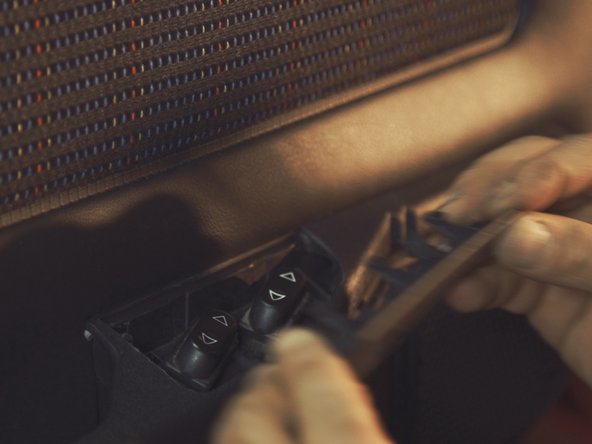
Dévisser la vis se trouvant derrière les commandes avec un Torx T20
-
-
-
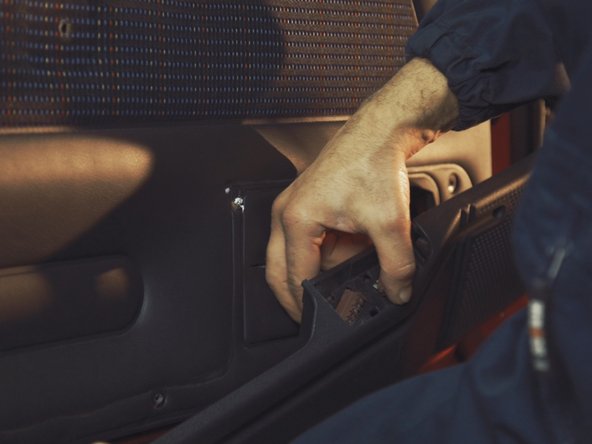
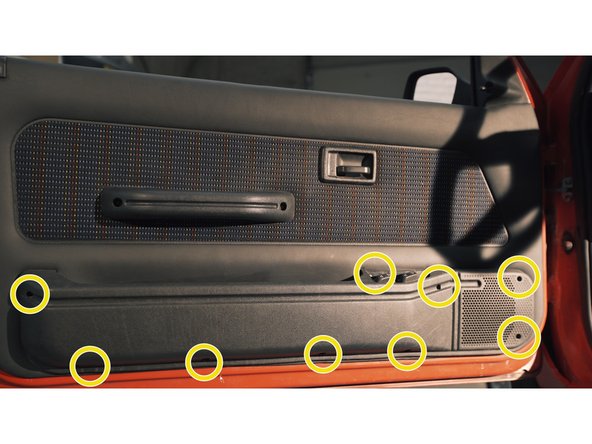
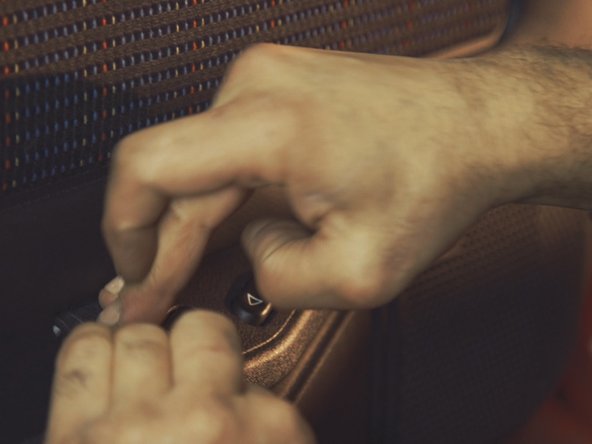
Retirer les 8 autres vis du vide poche pour le déposer, toujours avec un Torx T20
-
-
-
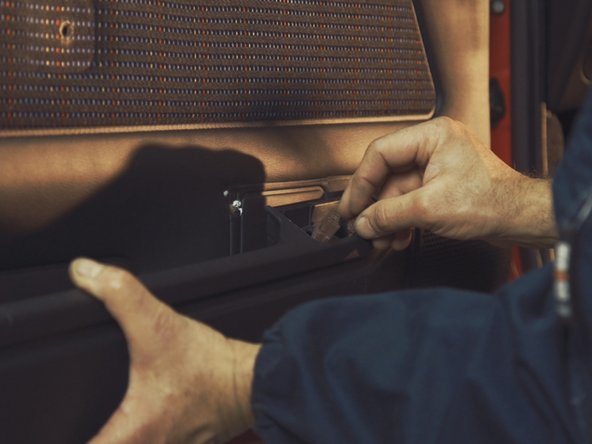
Une fois toutes les vis retirées, déposer le vide poche
-
Attention à bien faire passer les connecteurs de commande de lève vitre dans les trous du vide poche avant la dépose
-
-
-
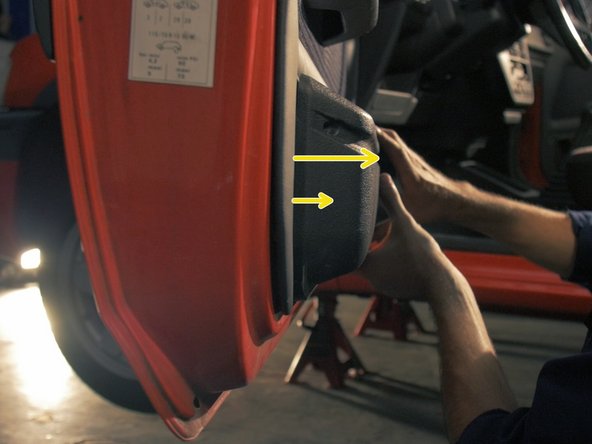
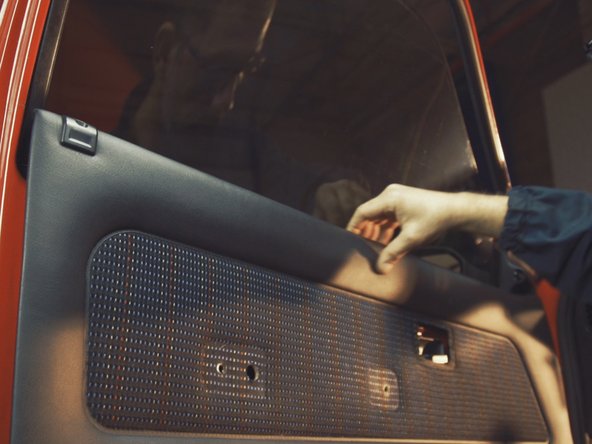
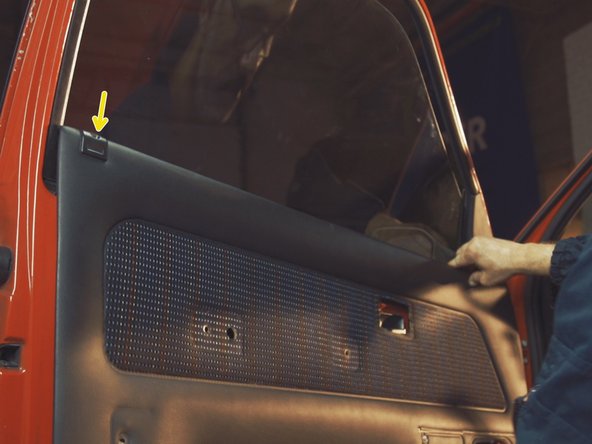
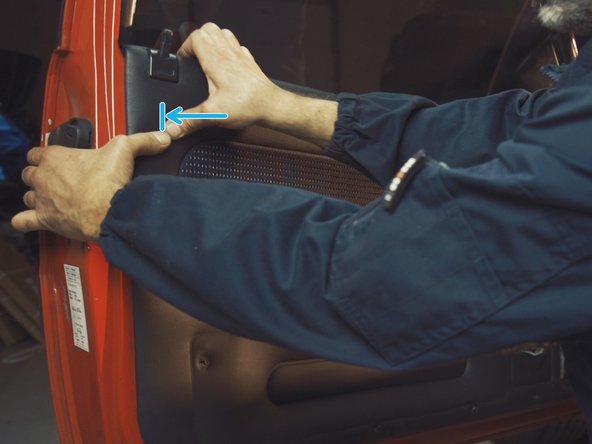
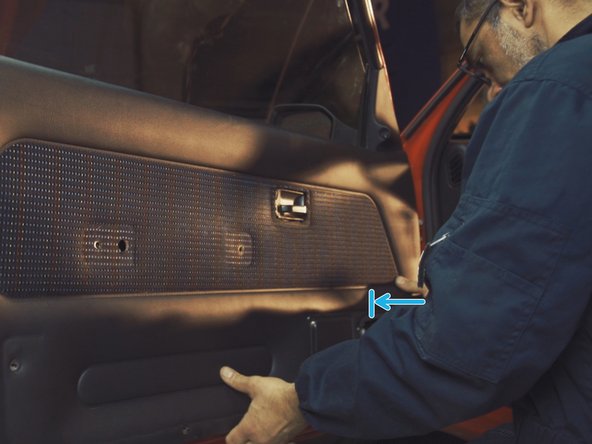
Tirer sur le bas du panneau de porte pour le déclipser de la portière
-
-
-
Tirer le panneau de porte vers le haut en guidant le loquet de verrouillage dans son trou
-
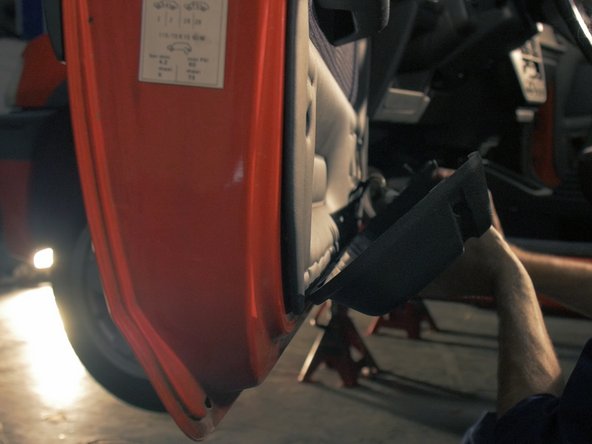
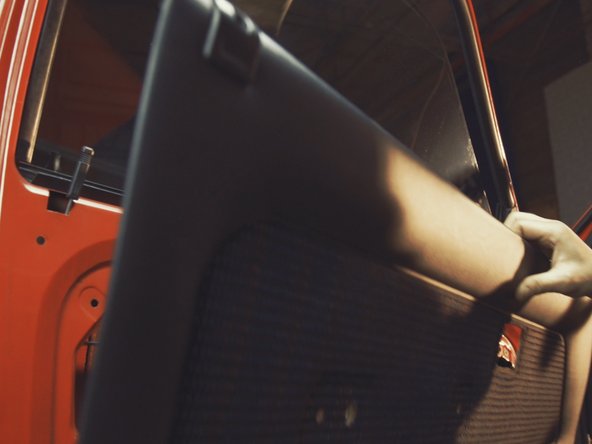
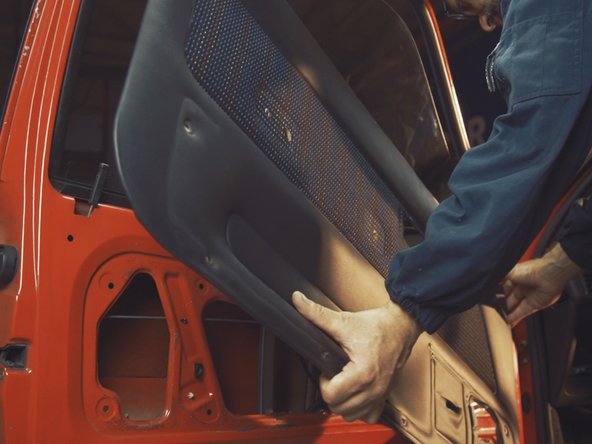
Déposer le panneau de porte
-
-
-
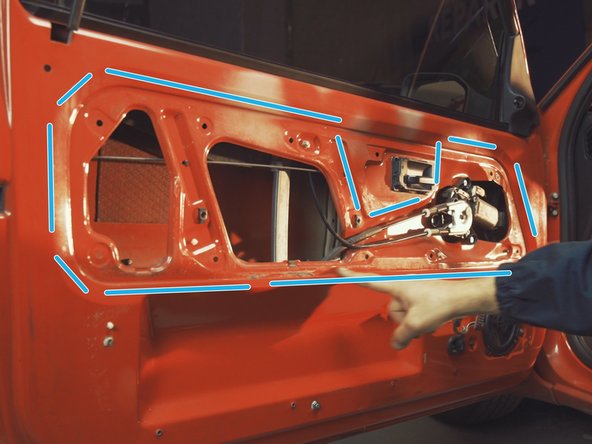
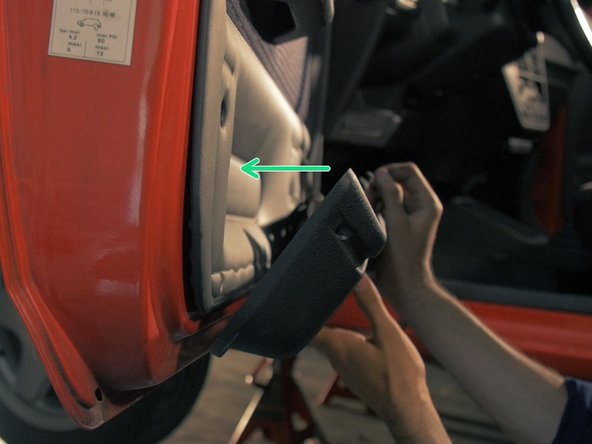
Retirer la protection en mousse présente sur la portière si elle n'a pas encore été retirée
-
-
-
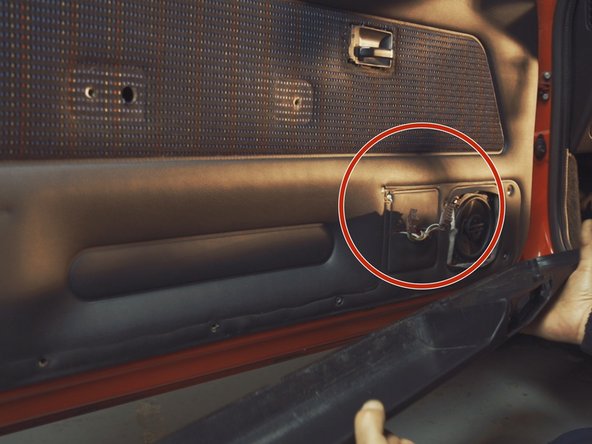
Rebrancher la commande de lève vitre pour pouvoir monter et descendre la vitre au besoin
-
-
-
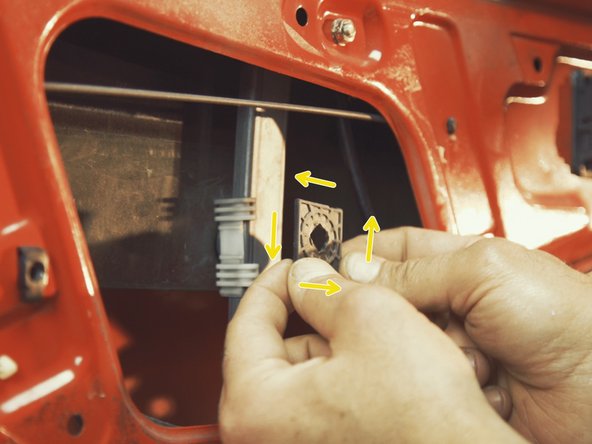
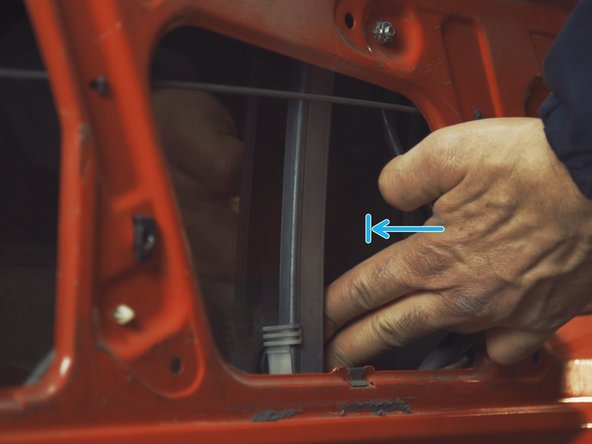
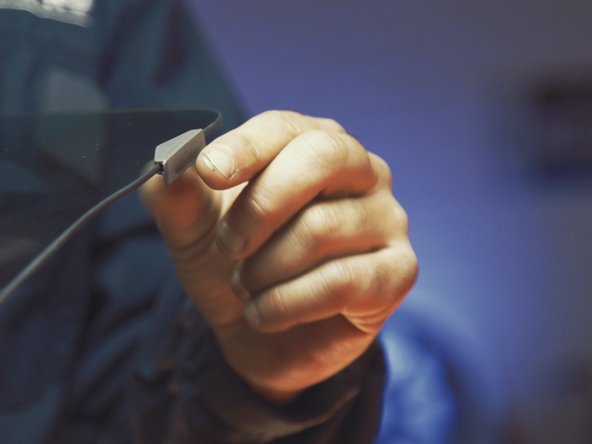
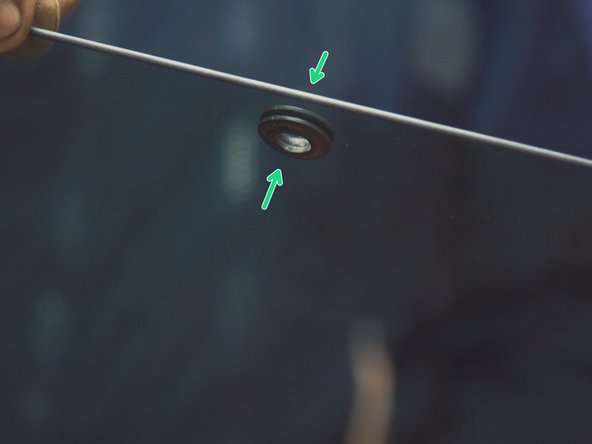
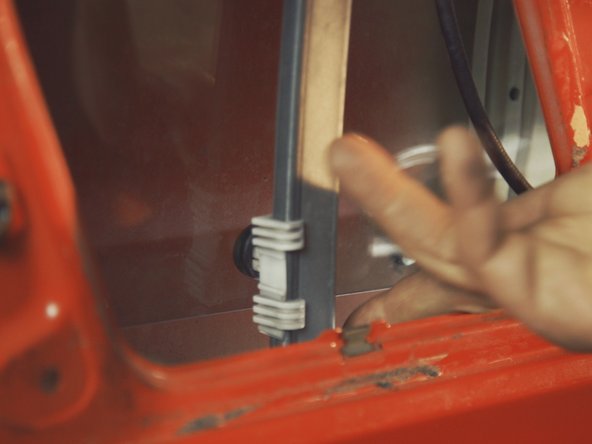
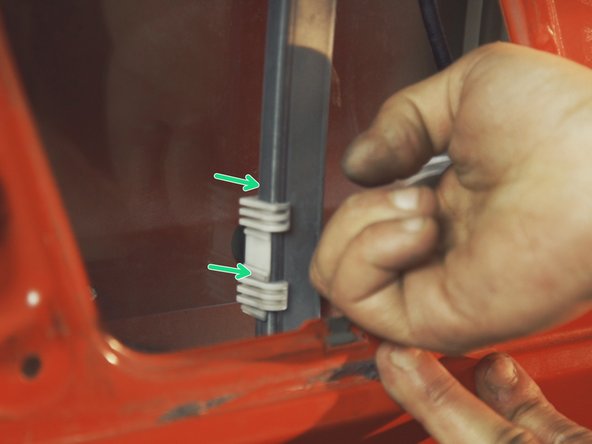
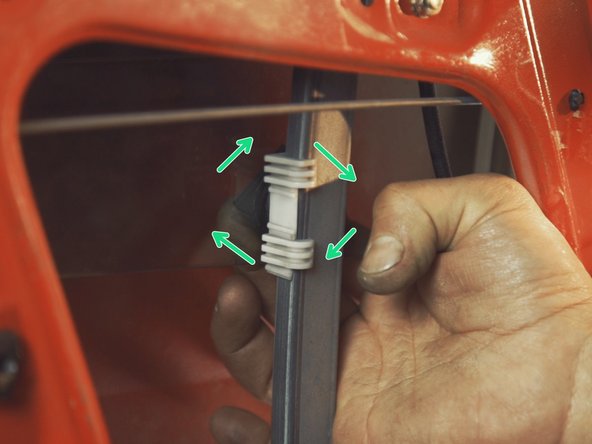
Passer les mains de l'autre côté de la vitre pour déclipser son support en pivotant la pièce à 90°
-
+ de détails à l'étape suivante
-
-
-
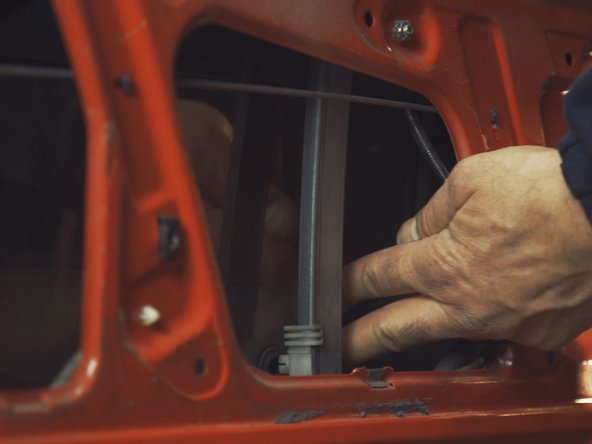
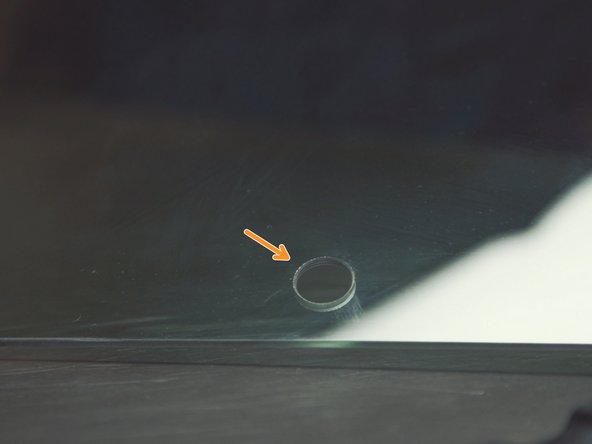
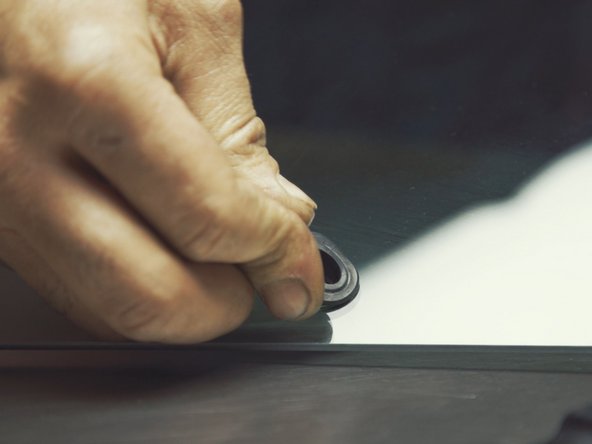
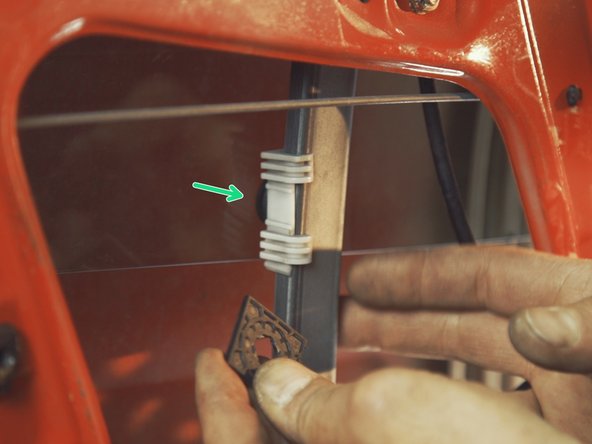
L'opération vue de l'intérieur
-
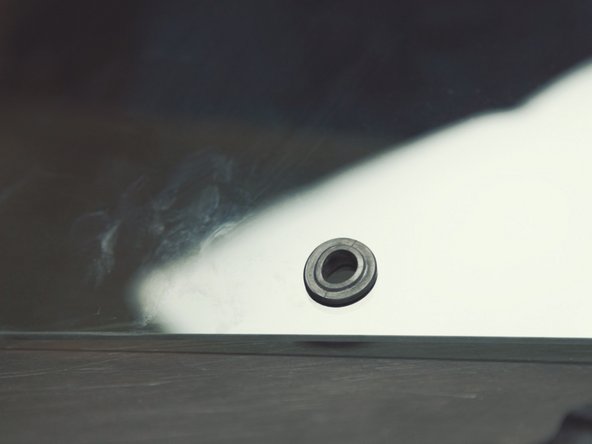
Déposez la pièce et gardez la précieusement
-
-
-
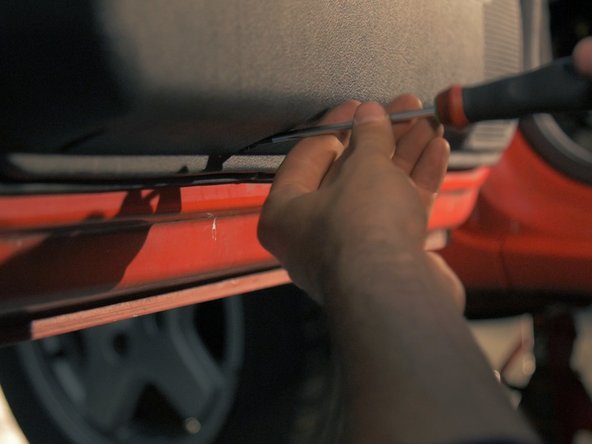
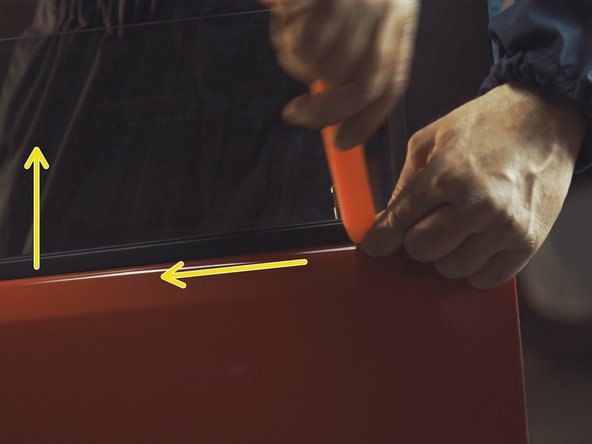
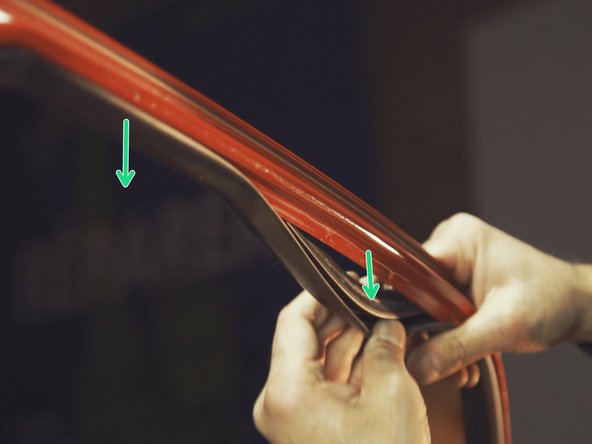
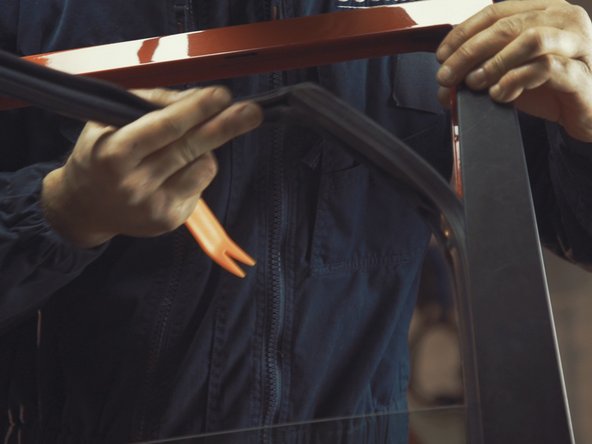
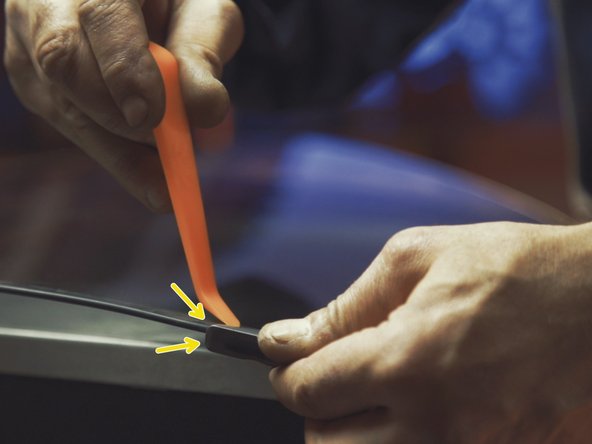
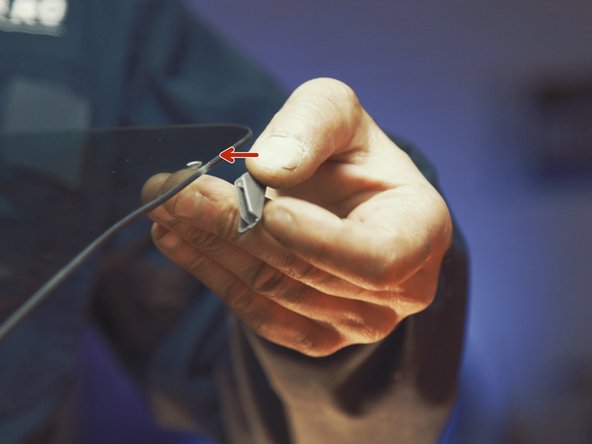
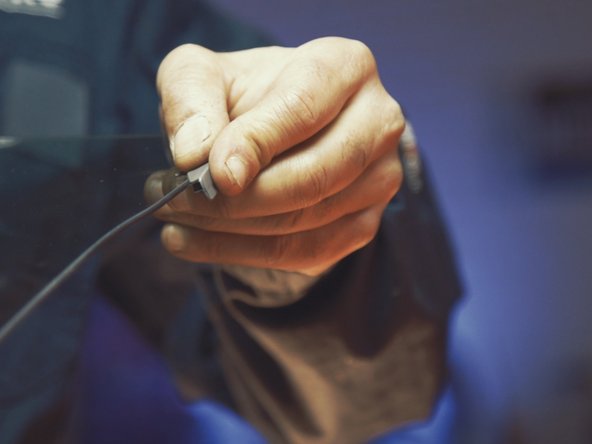
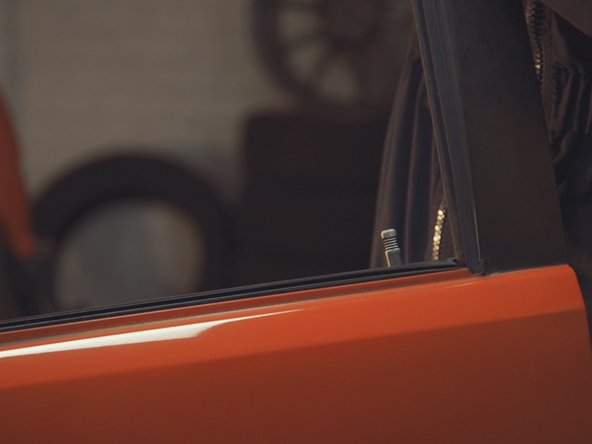
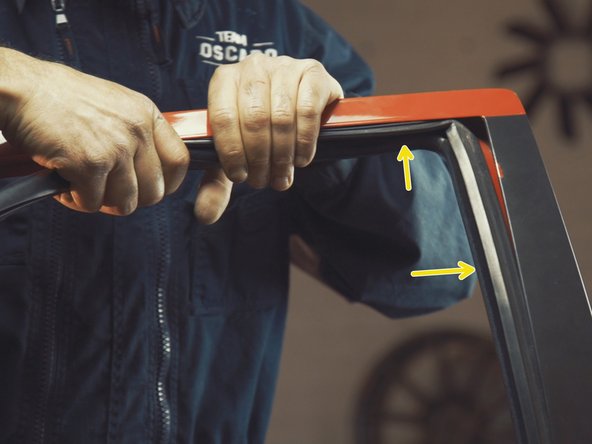
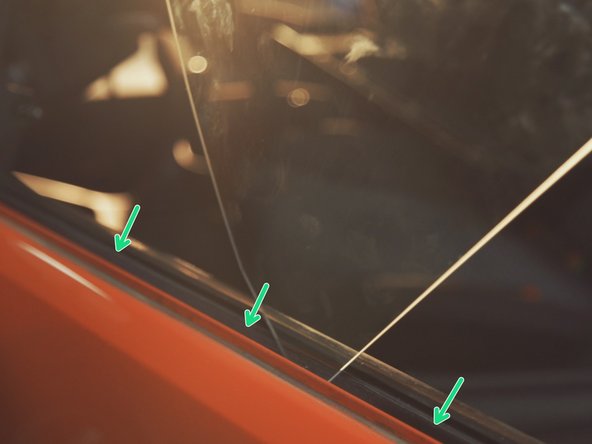
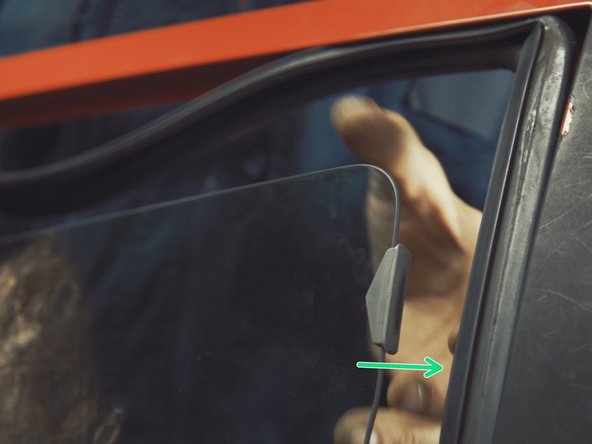
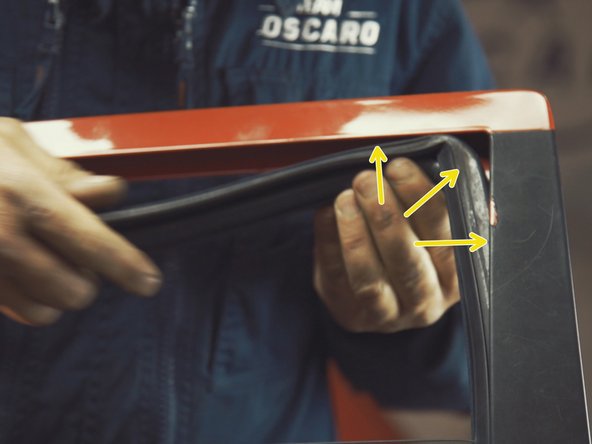
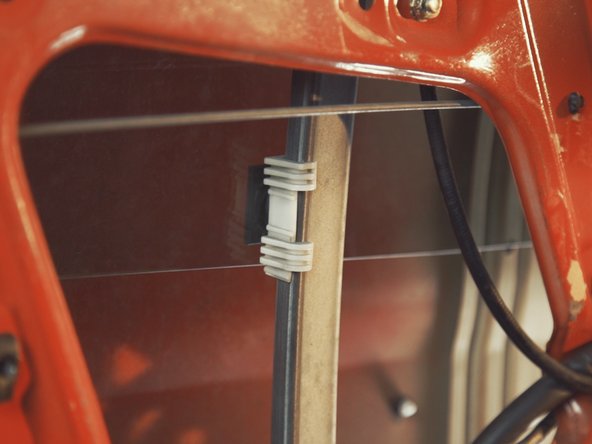
A l'aide d'une spatule, dégrafer la baguette extérieur de la vitre par le haut
-
Déposer la baguette en terminant par le côté rétroviseur
-
-
-
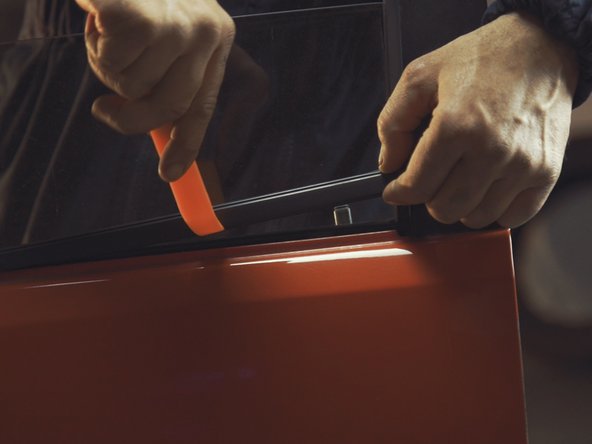
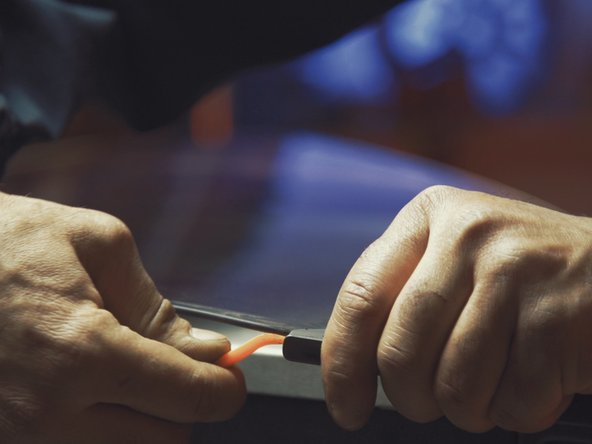
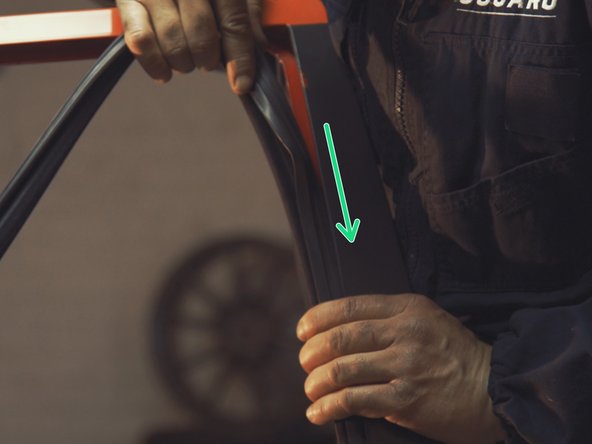
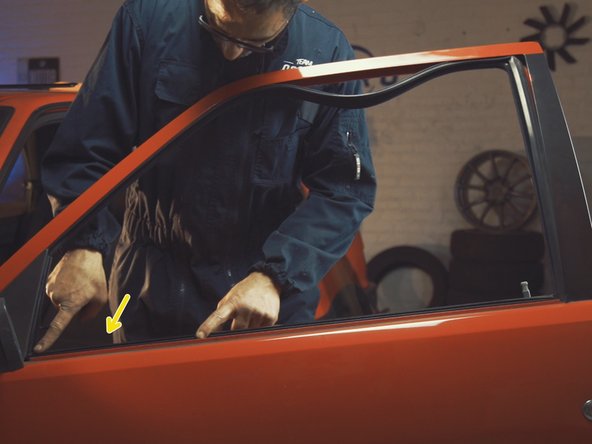
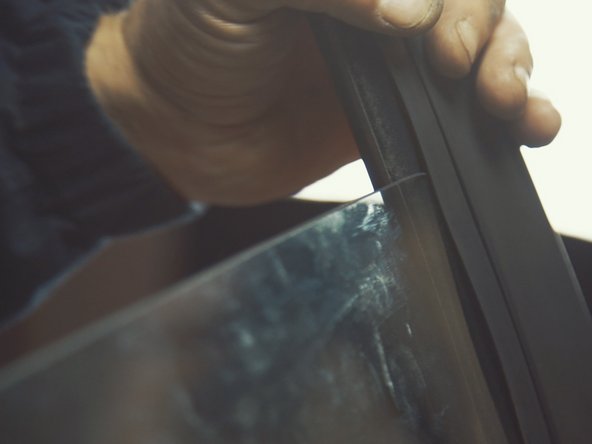
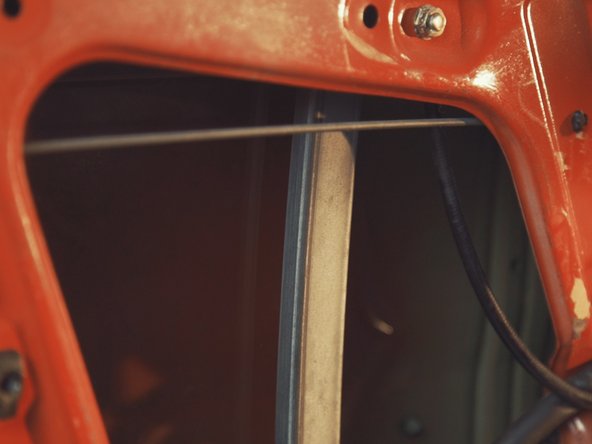
Libérer le joint de la vitre sur le haut de la portière en tirant dessus vers le bas
-
Appliquez vous pour ne pas abîmer le joint
-
Il n'est pas nécessaire de retirer le joint jusqu'au rétroviseur, laisser une partie sur la portière pour gagner du temps à la repose
-
-
-
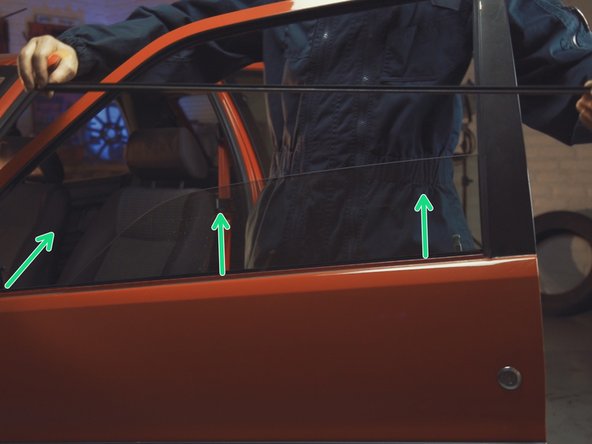
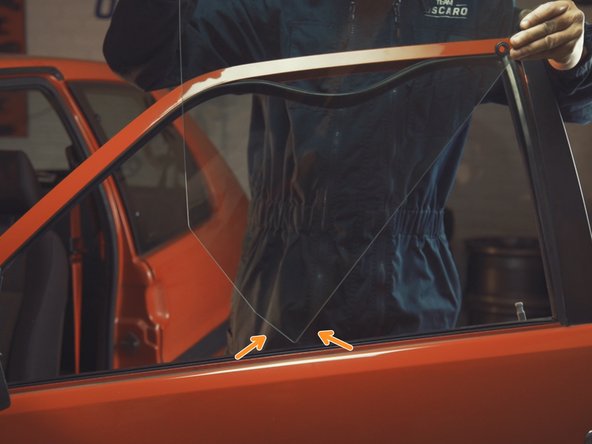
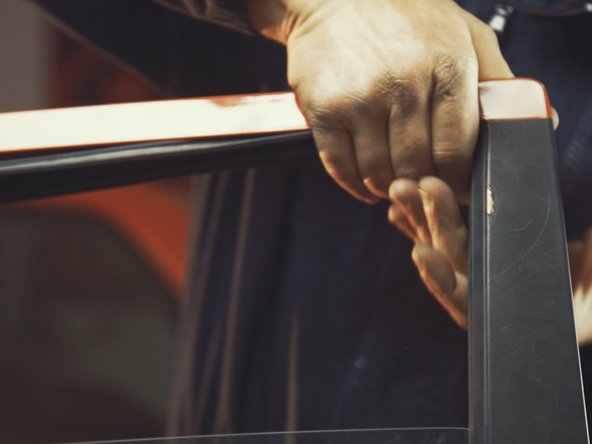
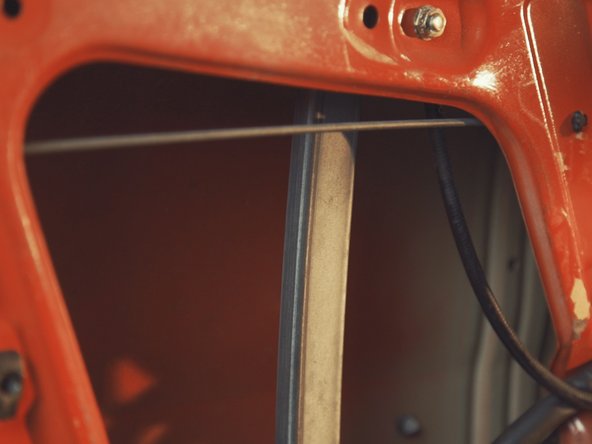
Tirer le joint vertical vers le haut pour le sortir de la portière
-
Tenir la vitre avec une main ou une autre personne, tout en sortant le joint la vitre se libérera
-
-
-
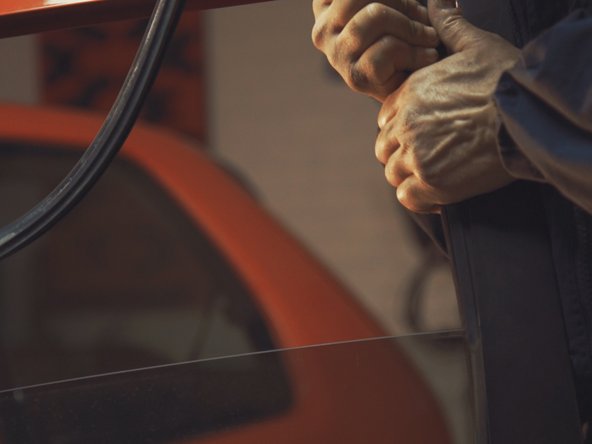
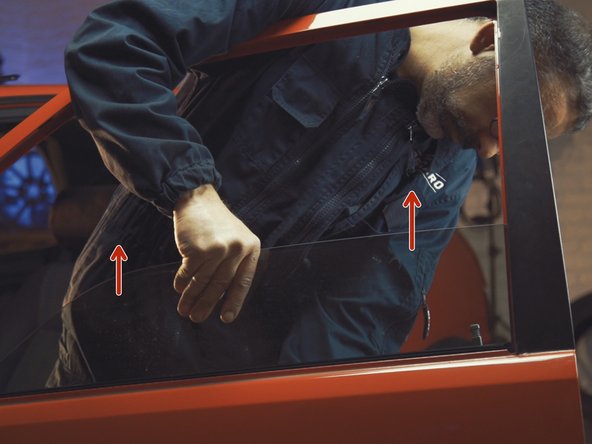
Tenir le haut de la vitre à une main
-
Au même moment, pousser le bas de la vitre vers l'extérieur pour la libérer de son support
-
-
-
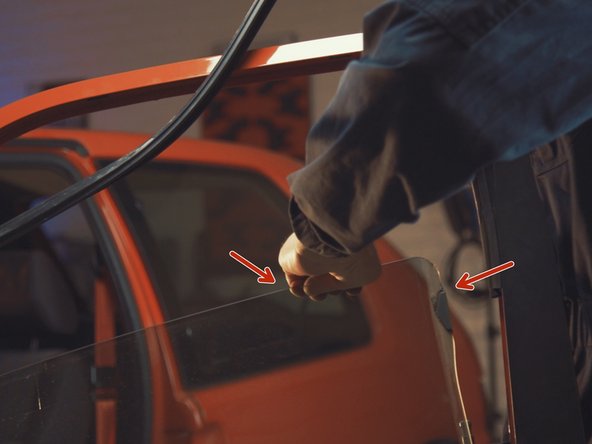
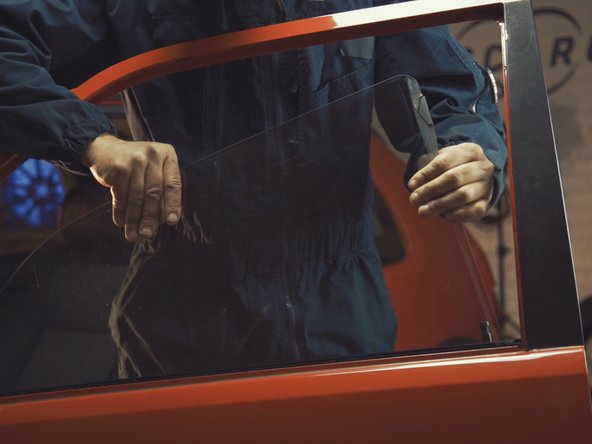
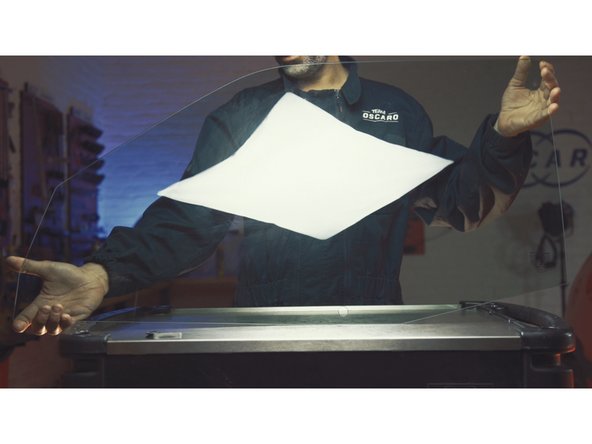
La vitre est maintenant libre
-
Sortir la vitre par le haut en la passant par l'extérieur de la portière
-
-
-
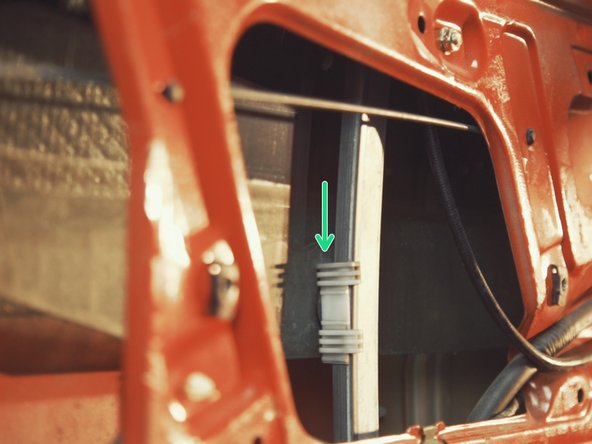
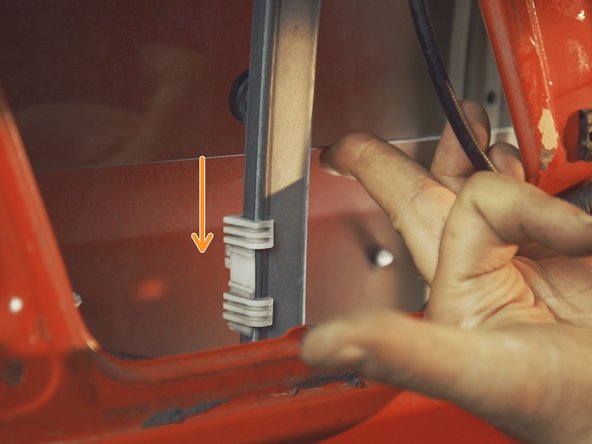
Récupérer le joint du support de la vitre
-
Dans le cas d'une vitre cassée, celui-ci est surement resté sur le support de lève vitre
-
-
-
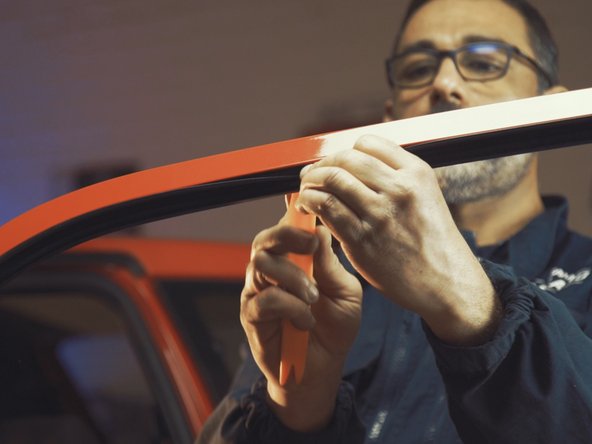
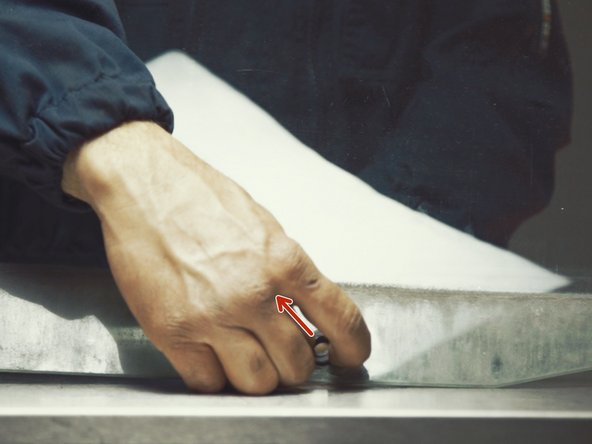
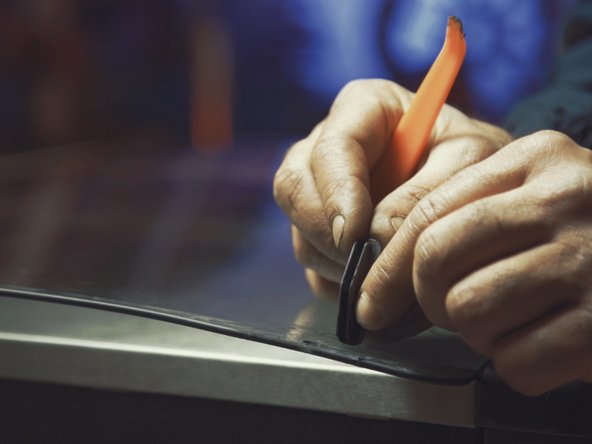
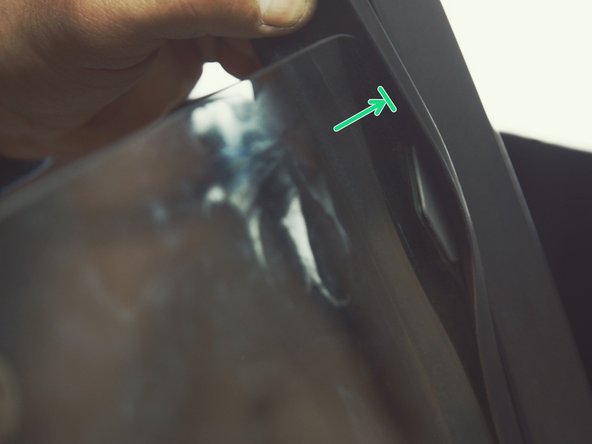
A l'aide d'une spatule, faire levier sur les deux côtés du guide présent sur le haut de la vitre
-
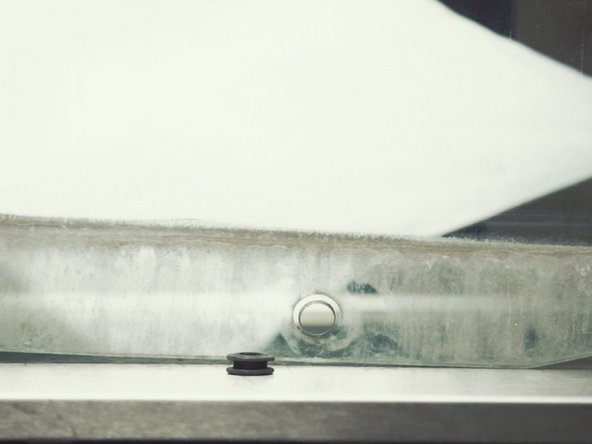
Retirer le guide
-
Dans le cas d'une vitre cassée, celui-ci est surement restée dans le joint de la vitre
-
-
-
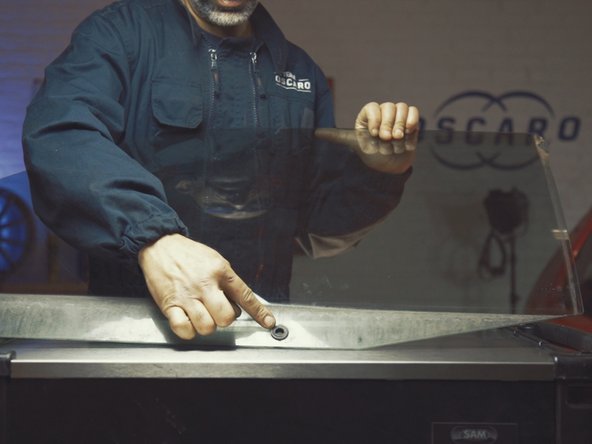
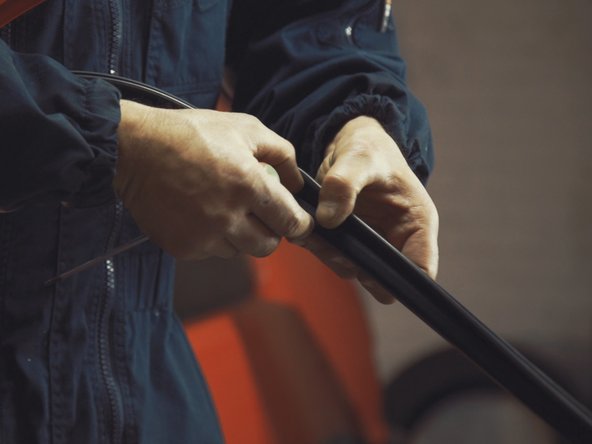
Replacer l'ancien guide sur le haut de la nouvelle vitre
-
Le guide a un sens de montage, la bordure du guide se positionne du côté intérieur de la vitre
-
-
-
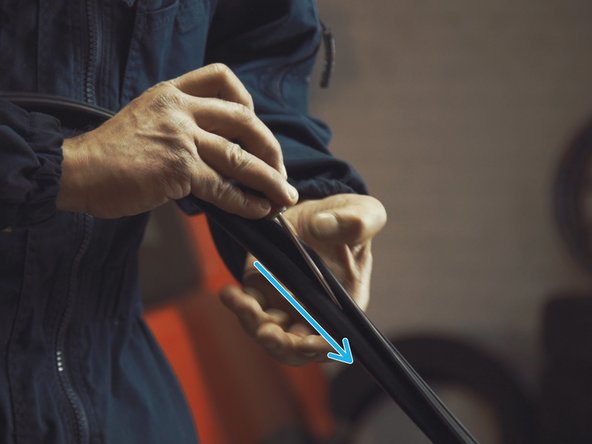
Replacer l'ancien joint sur le bas de la vitre, dans le trou dédié
-
Pincez-le pour le placer facilement
-
Le joint ne possède pas de sens de montage
-
-
-
Vérifier que le joint ressorte bien des deux côtés de la vitre
-
Si la vitre précédent a été cassée, nettoyer les débris de glace présent dans le joint de vitre en écartant les lèvres et en glissant un tournevis à l’intérieur
-
Passer l'aspirateur ou retirer manuellement les débris présent dans la portière, vides poches et dans le véhicule
-
Le port d'une paire de gant et de lunette de protection est conseillé
-
-
-
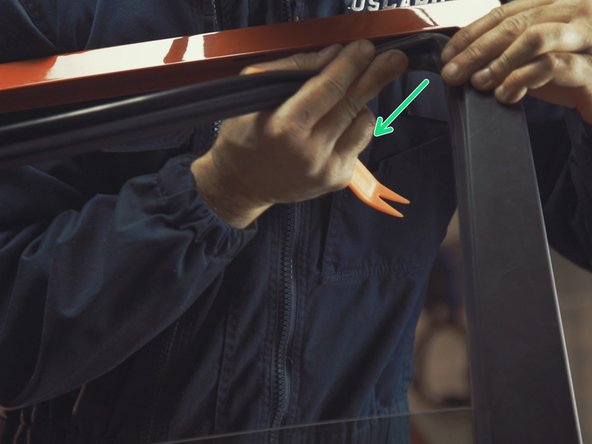
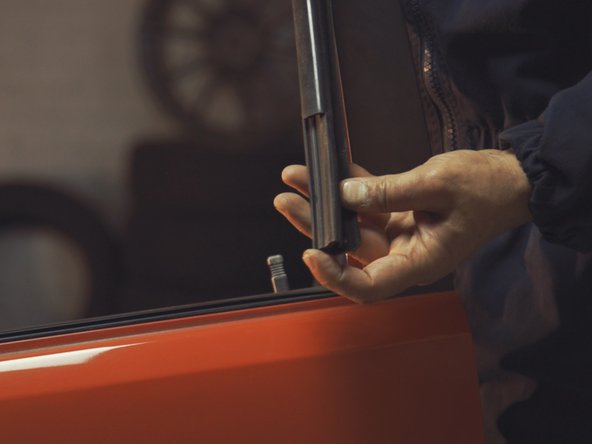
Replacer le joint de vitre dans la portière en commençant par le côté du montant
-
Emboîter le joint et le rentrer dans la portière
-
-
-
Replacer le joint en partie dans le coin
-
Continuer de le replacer excepté au milieu de la portière pour laisser du mou
-
-
-
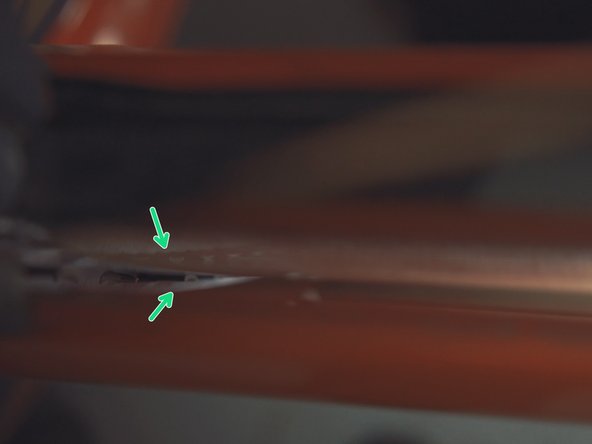
Avant de replacer la vitre, vous devez apercevoir le rail guidant la vitre dans la portière
-
C'est ici que la vitre doit se glisser, il s'agit de la pièce empêchant les mouvement parasites de la vitre et qui la guide.
-
Nous vous conseillons de changer cette pièce si elle est endommagée
-
-
-
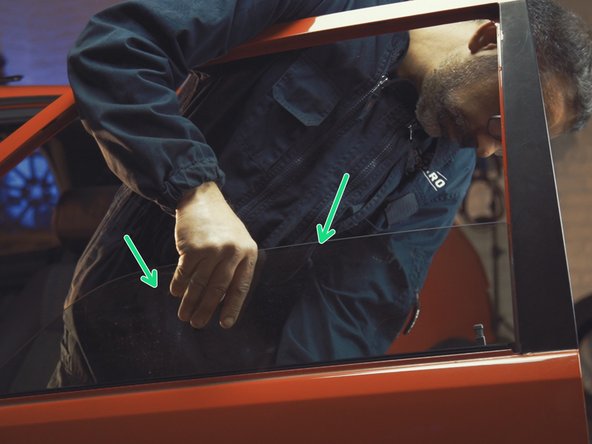
Présenter la vitre en commençant par le côté pointu, en bas de la vitre
-
Faire passer la vitre entre la portière et le joint intérieur
-
-
-
Placer la pointe de la vitre dans les rails présents dans la portière
-
Faire descendre la vitre en la redressant
-
-
-
Une fois la vitre quasiment à l'horizontal, présenter le guide en haut de la vitre dans le joint
-
Placer la vitre à l'horizontale jusqu'à entrer assez profondément le guide au fond du joint, permettant à la vitre de se fixer
-
-
-
Une fois la vitre placée et le guide dans le joint, replacer correctement l'intégralité du joint sur la portière en commençant par le coin
-
-
-
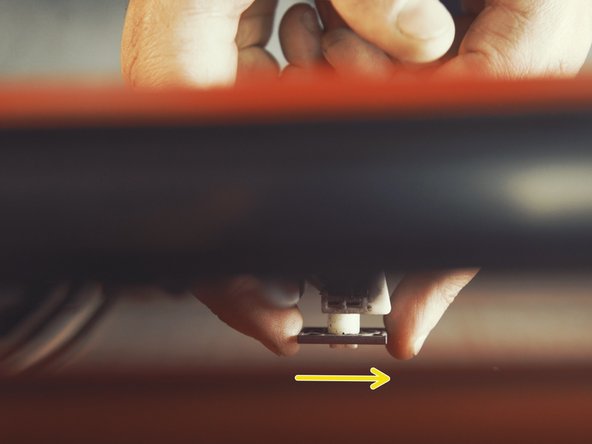
A l'aide de la commande de lève vitre, monter le support de vitre jusqu'au trou de la vitre
-
Une fois à la bonne hauteur, tirer la vitre sur le support pour les fixer ensemble
-
-
-
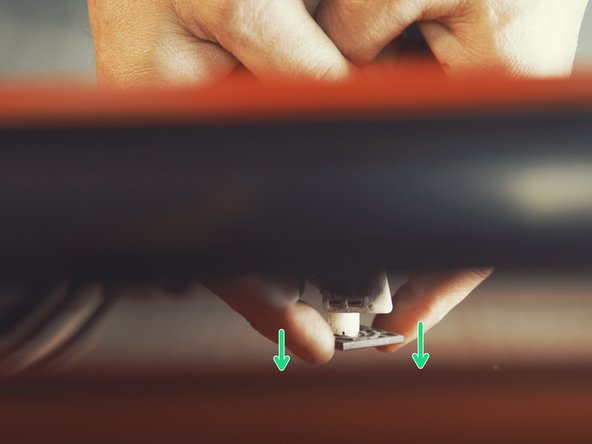
Comme à la dépose mais dans le sens inverse, remonter la plaque de support contre la vitre en effectuant un quart de tour
-
-
-
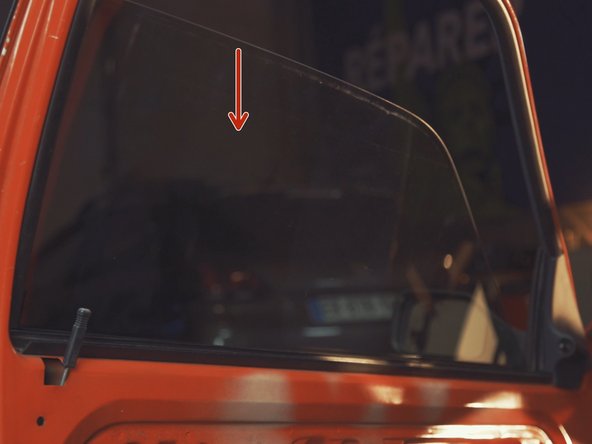
Monter et descendre la vitre pour vérifier le fonctionnement et sa bonne fixation
-
-
-
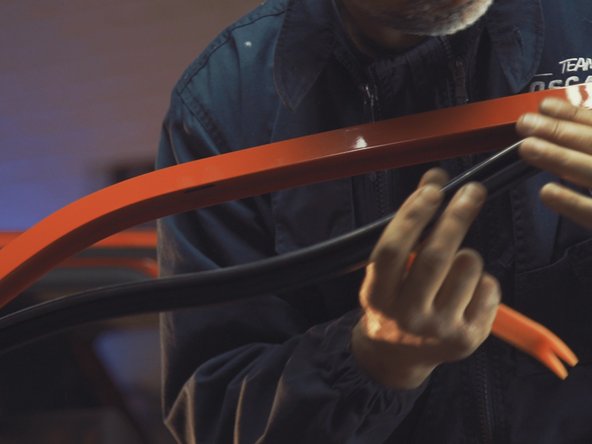
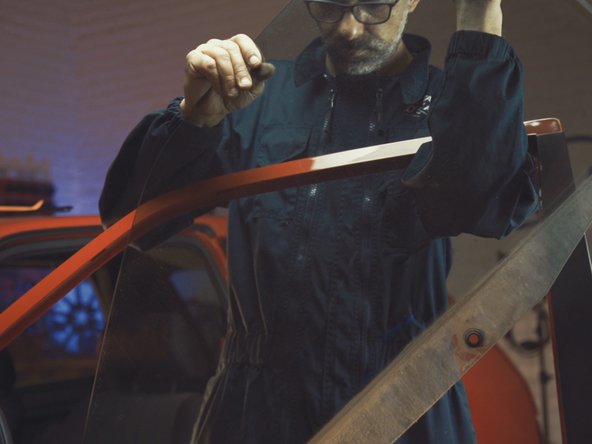
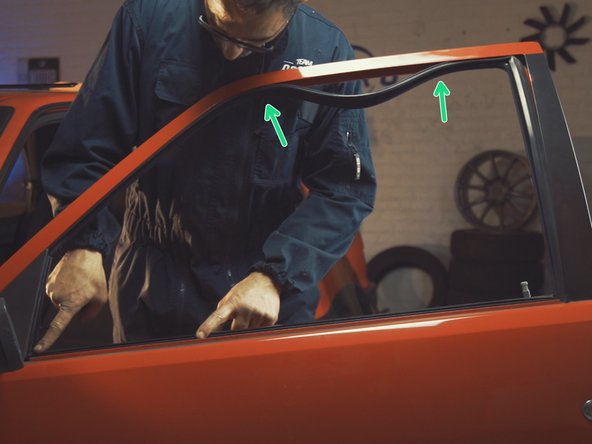
Replacer la baguette extérieur en commençant par le côté du rétroviseur
-
-
-
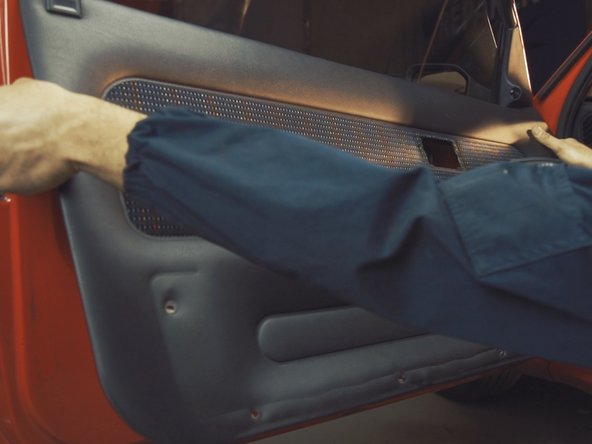
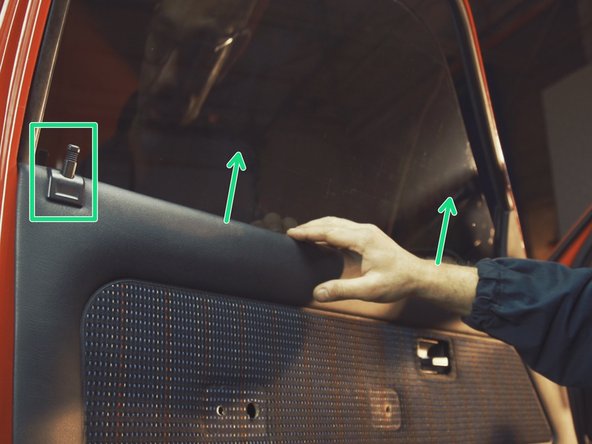
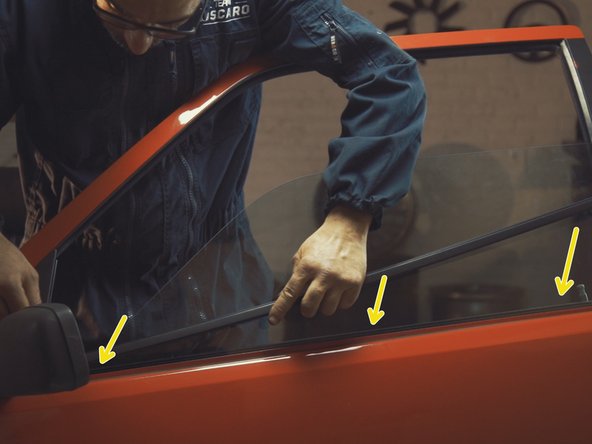
Présenter le panneau de porte sur la portière en commençant par le dessus, côté rétroviseur
-
Faire passer le loquet dans le trou dédié en descendant le panneau
-
Emboiter le haut du panneau de porte dans les lèvres du haut de la portière
-
-
-
Faire passer les connecteur de commandes de lève vitre dans le panneau de porte
-
-
-
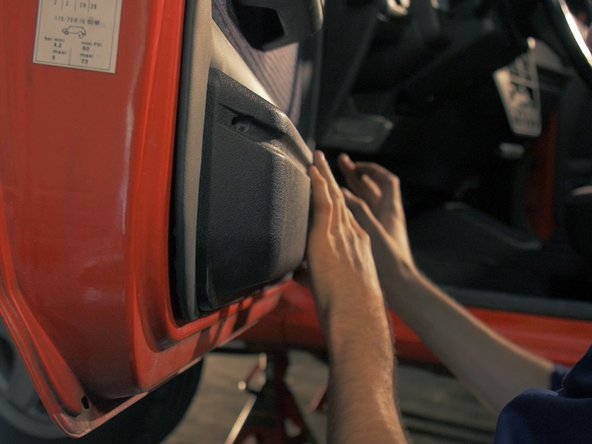
Appuyez sur les différentes parties du panneau de porte pour enclencher les agrafes
-
-
-
Présenter le vide poche et passer les connecteurs dans les trous dédiés
-
-
-
Placer le vide poche
-
Replacer et visser les 9 vis de ce dernier avec un Torx T20
-
-
-
Replacer l'accoudoir et serrer les deux vis avec un Torx T30
-
-
-
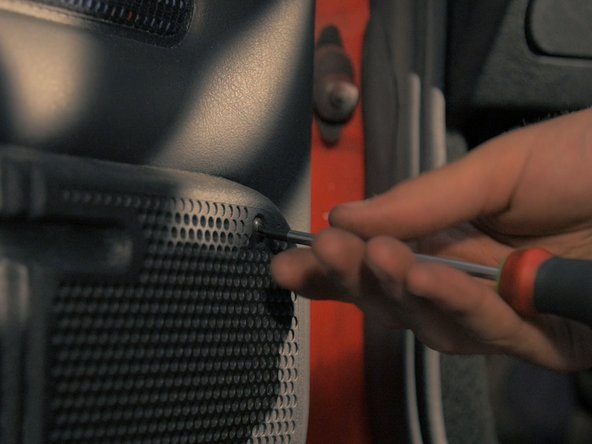
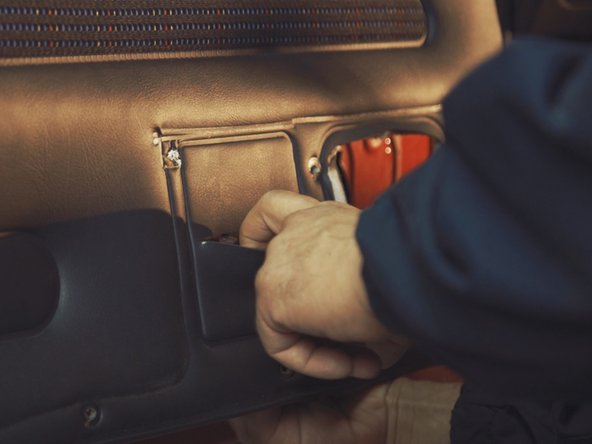
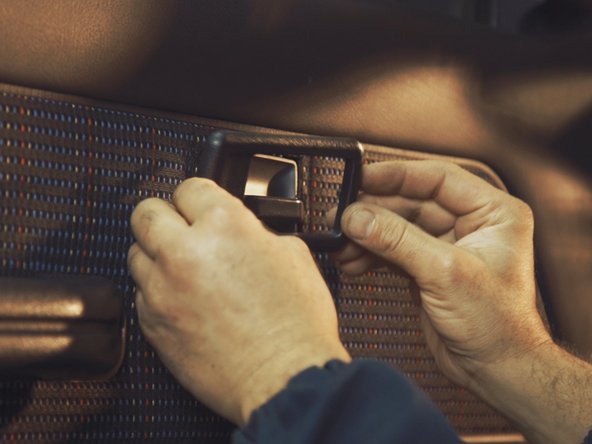
Replacer l'entourage de la poignée de porte en la clipsant
-
Le côté le plus épais vers l'accoudoir
-
-
-
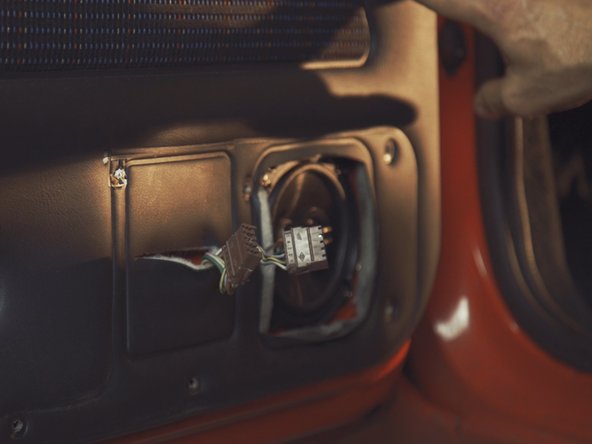
Rebrancher les commandes de lève vitre sur les connecteurs
-
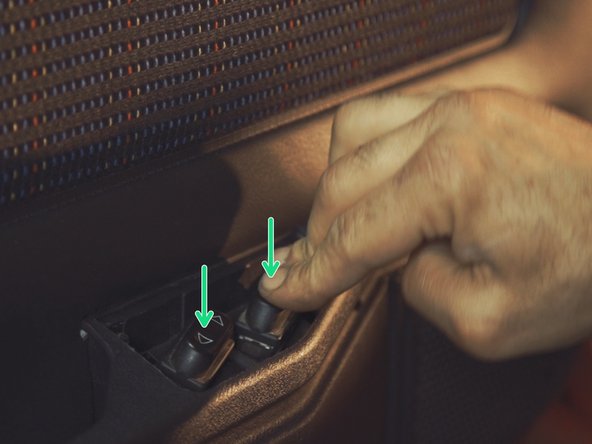
Placer les commandes dans leurs emplacements
-


Équipe
