


Introduction
Motorisation du véhicule 1.4 HDi 70 cv
-
-
Lever et caler l'avant du véhicule puis déposer les roues.
-
Mise en sécurité du véhicule : démontage et remontage de la roue
-
Appliquez du dégrippant au niveau du support et des fixations pour faciliter la dépose..
-
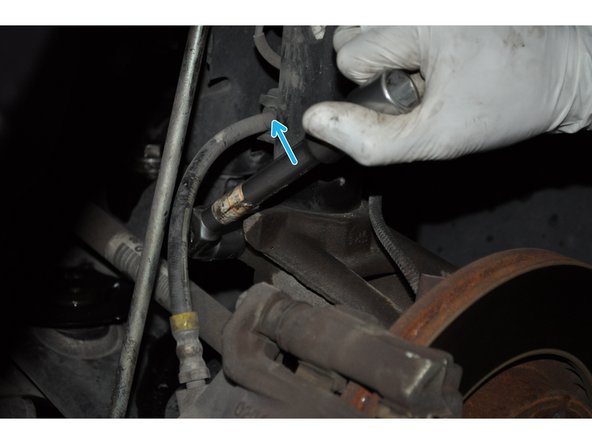
Dégrafer le faisceau électrique du capteur ABS et le flexible de frein de l’élément de suspension.
-
-
-
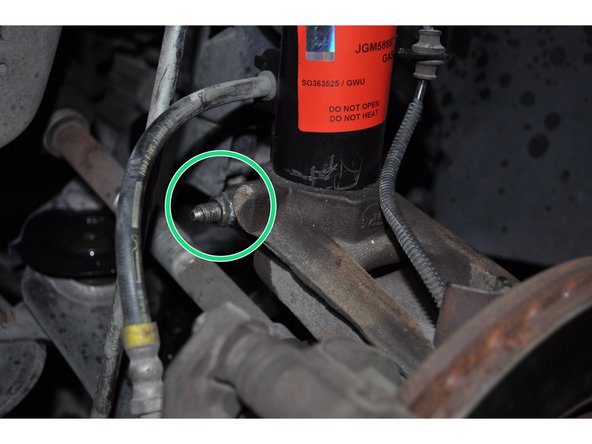
Déposer l'écrou de la biellette à l'aide d'une clé de 16 mm et d'un embout Torx T40.
-
-
-
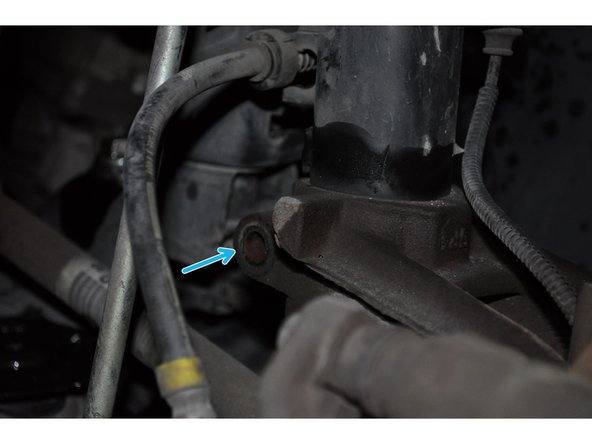
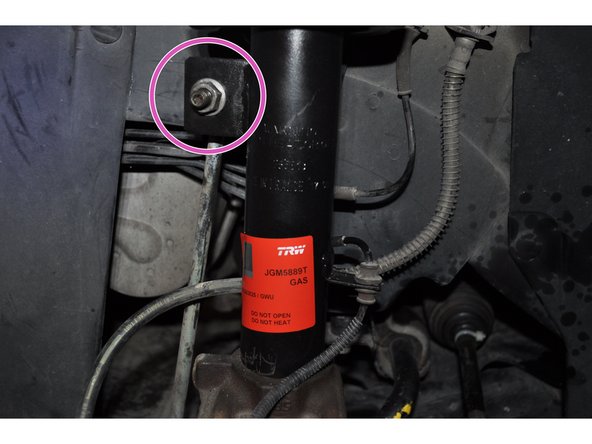
Dévissez le boulon de serrage du support de la jambe de suspension et retirez-le. Utiliser une clé de 16 mm.
-
-
-
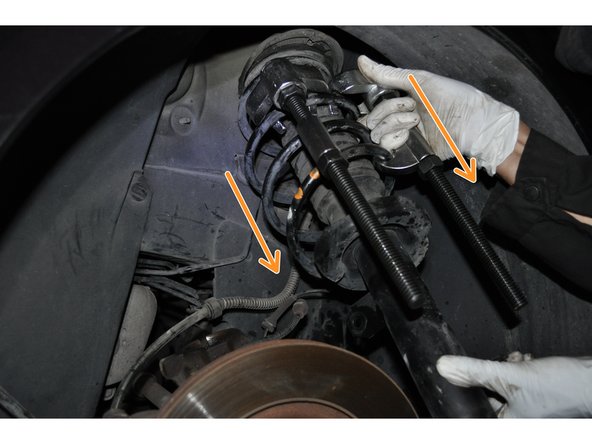
Mettre en place un compresseur de ressort approprié sur l'élément de suspension.
-
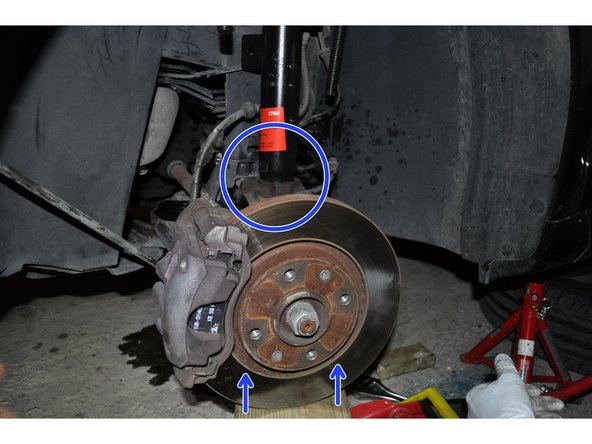
Utilisez un marteau ou un maillet de manière à taper sur le support métallique de la jambe de suspension. La jambe finit par sortir
-
Lors du dégagement de l'élément de suspension, veiller à ne pas déboîter la transmission du différentiel. Au besoin attacher l'ensemble pivot-transmission au berceau.
-
-
-
Déposer l'écrou de fixation supérieure de l'élément de suspension avec une clé de 21 mm tout en maintenant la tige d’amortisseur à l'aide d'une clé torx T40
-
Soutenir l'élément de suspension dans le passage de roue.
-
Dégager l'élément de suspension. Ne pas tenir par la partie supérieure.
-
-
-
Compresser de ressort de manière à séparer l’amortisseur et le ressort. Plus vous vissez les crochets et plus le ressort sera comprimé ; il possède désormais du jeu.
-
L'opération peut s'avérer complexe. L'outil mal placé ou mal fixé sur les spires du ressort pourrait lâcher et risquer de vous blesser.
-
Dévissez l'écrou central avec une clé torx et d'une clé à œil.
-
Vérifiez l'état des coupelles (ou butées). Le roulement se trouvant à l'intérieur ne doit pas être grippé et les caoutchoucs ne doivent pas comporter de fissures. Si c'est le cas, changez-les.
-
Assembler le nouvel élément de suspension sur le modèle de l'ancien.
-
-
-
Engager l'élément de suspension dans le passage de roue, en centrant son palier supérieur à l'aide du pion de centrage.
-
Reposer la cuvette et l’écrou puis serrer ce dernier.
-
Engager l'élément de suspension dans le pivot jusqu'en butée. Poussez doucement vers le haut à l'aide d'un cric si nécessaire.
-
-
-
Mettre en place le boulon de bridage.
-
Déposer le compresseur de ressort.
-
Réaccoupler la biellette et serrer son écrou.
-
Remettre en place le flexible de frein et le faisceau du capteur ABS.
-
Reposer la roue.
-
Contrôler le serrage des fixations véhicule au sol.
-


Annulation : je n'ai pas terminé ce tutoriel.
9 autres ont terminé cette réparation.

5 commentaires
La taille de clé pour l'écrou de tête d'amortisseur est 22mm sur ma c2 1.4hdi, clé coudée ouverte obligatoire.
gouna15071987 - Résolu à la publication Réponse
Bjr,I air changer amortisseur avant, triangle et rotule,depuis tout tremble a 80,90kmh, help HELP, merci ps ,Peugeot 1007
Didier Bouchat - Résolu à la publication Réponse
Bonjour , Vincent Duwel , entre comment s y prendre et le faire !!! Très attention au compresseur de ressort , pour moi le tuto et surtout la photo du positionnement de l’appareil beaucoup trop rapproché l un de l autre , essayer de partager les points d’accrochage sur la moitié du ressort ( 1 a droite et l autre sur la gauche bien partager le serrage ) car de la façon de la photo le ressort se retrouve comprimé que sur un coté ! et se met en en forme de banane
raymond elgart - Résolu à la publication Réponse
super aperçu ,je sais dés à present comment mi prendre pour samedi;merci
vincent duwel - Résolu à la publication Réponse
grosse faute de taille de clef, pour la fixation de la partie haute ce ne sont pas un torx T40 mais une clef btr de 7 , et pour les biellette se sont du torx T30 Cdt Manu
emmanuel dumont - Résolu à la publication Réponse