


Introduction
Changement des plaquettes de frein avant sur CITROËN DS5 2.0 HDi FAP 16V 136 cv
-
-
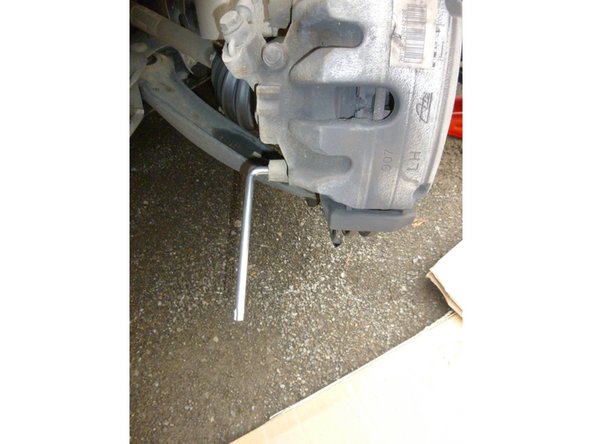
Mise en sécurité du véhicule : démontage et remontage de la roue
-
'LEVER ET CALER correctement le véhicule à l'aide d'un cric et deux chandelles, il y va de votre sécurité
-
-
-
-
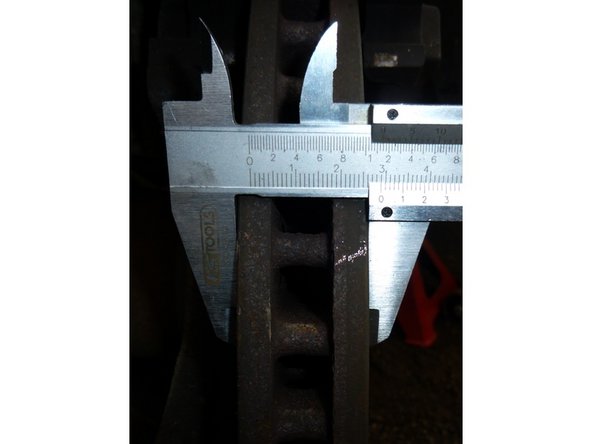
Comme l'étrier est démonté, profiter pour contrôler l'épaisseur du disque. Ici 29 mm pour une épaisseur mini de 24mm.
-
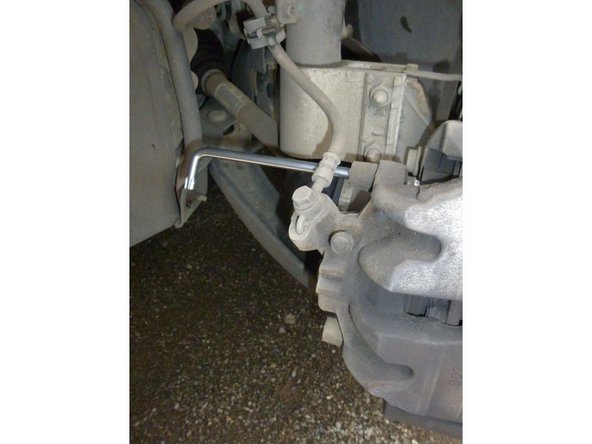
Effectuer le démontage coté droit, en image le remontage coté gauche.
-
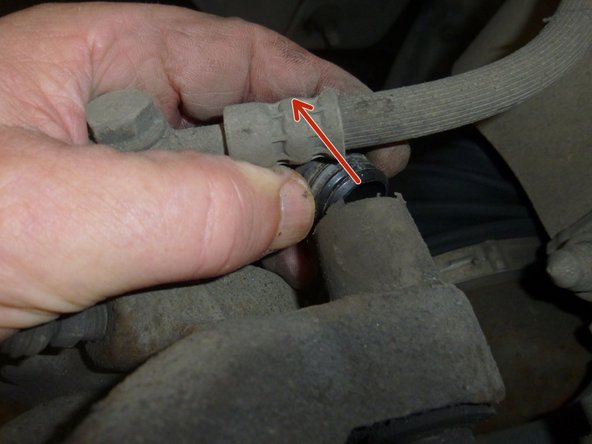
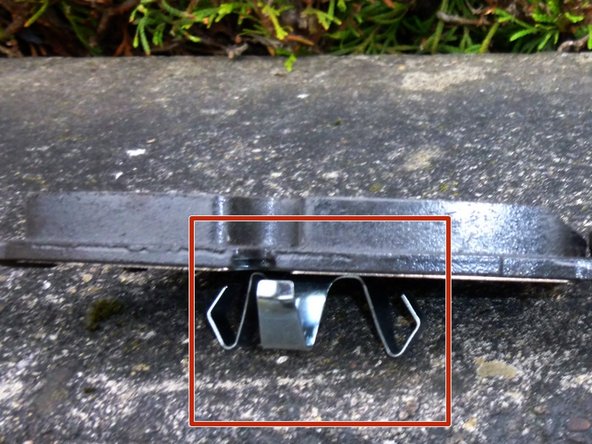
2 plaquettes sur les 4 présentent des agrafes pour êtres insérée dans le piston de l'étrier, photo 3 .
-
-
-
Une fois les 2 plaquettes positionnées, remettre l'étrier à sa place et serrer les vis.
-
Remettre les capuchons de protection des 4 vis.
-


Annulation : je n'ai pas terminé ce tutoriel.
3 autres ont terminé cette réparation.

4 commentaires
Les ressorts ne se remettent pas correctement ! Ils s'écartent en travers, et en roulant ça frotte contre la jante ! Attention super dangereux ! Pourquoi Oscaro ose vendre des mauvaises dimensions ! Direction sav et remboursement ! Mes disques sont à l'agonie, Oscaro vous me décrivez...
Attention!!!! Je me suis fait avoir , ma DS5 a des disques de 340 mm, le site me propose que des 302 mm.
dugast.jean-charles - Résolu à la publication Réponse
Bonjour
Vous auriez la reference des plaquettes ?
J en ai commandé sur oscaro (meme modele ds5 hdi 16v 163cv) et elles ne correspondent pas a celles d origine !
Slts
antoine delaitre1 - Résolu à la publication Réponse