


-
-
Pour pouvoir démonter votre roue :
-
- Utilisez une croix ou regarder dans votre coffre en enlevant la moquette, vous y trouverez une clé prévue pour desserrer vos 5 écrous, sans les retirer entièrement.
-
- Utilisez un cric pour lever l'avant de votre véhicule.
-
Pensez à sécuriser votre véhicule en utilisant des chandelles ou autres.
-
Maintenant vous pouvez totalement enlever vos écrous qui tiennent la roue puis déposer la retirer la roue.
-
Ensuite, ouvrez votre capot moteur et dévisser le bouchon du remplissage de liquide de frein.
-
-
-
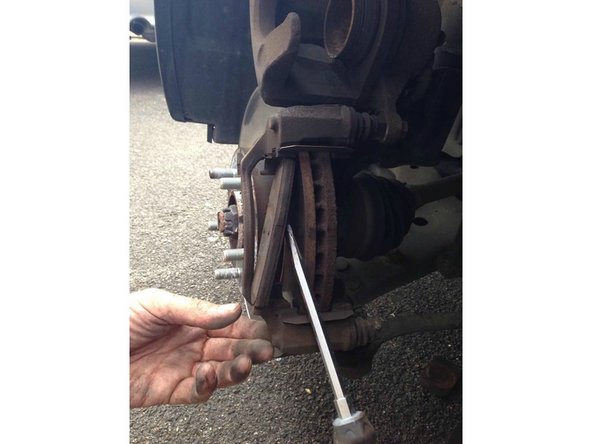
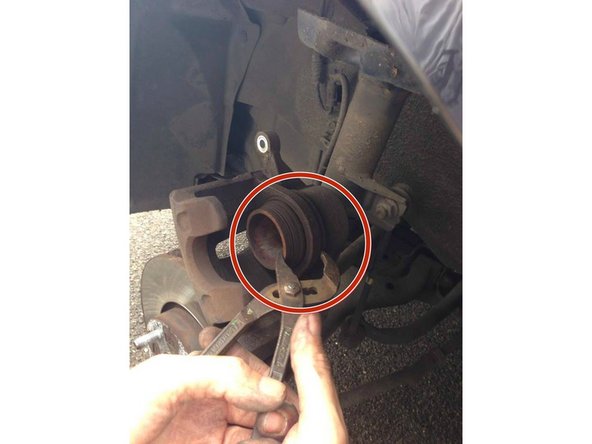
Pour pouvoir repousser le piston, utilisez un gros tournevis plat, insérez votre tournevis au niveau du cercle rouge juste entre la plaquette et le piston puis poussez fortement en faisant levier dessus car celui ci est très dur donc n'hésitez pas.
-
Avant de repousser le piston il est conseiller d’ouvrir son bocal réservoir de liquide de frein pour éviter que celui-ci ne se mettent sous pression.
-
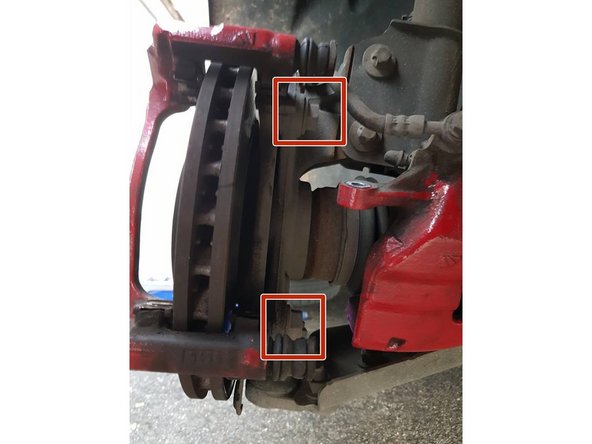
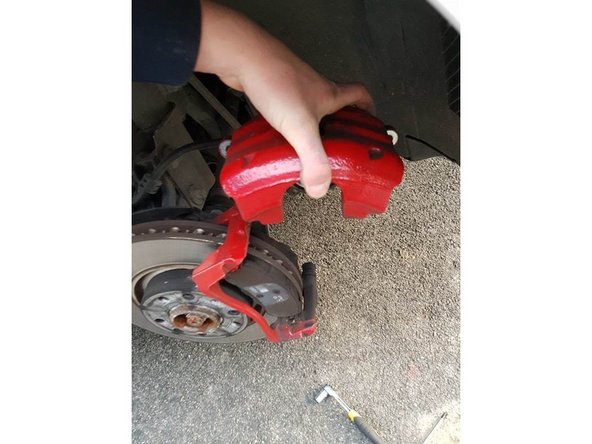
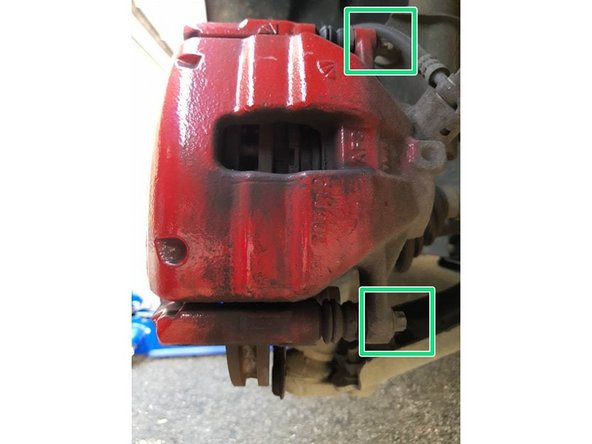
Pour changer vos plaquettes vous devrez dévisser entièrement les 2 vis qui maintiennent votre étrier et le sortir de son logement.
-
Pour dévisser l'étrier, utilisez une clé plate de 10, enlever entièrement les 2 vis qui le maintienne ainsi, vous aurez accès à vos plaquettes de freins.
-
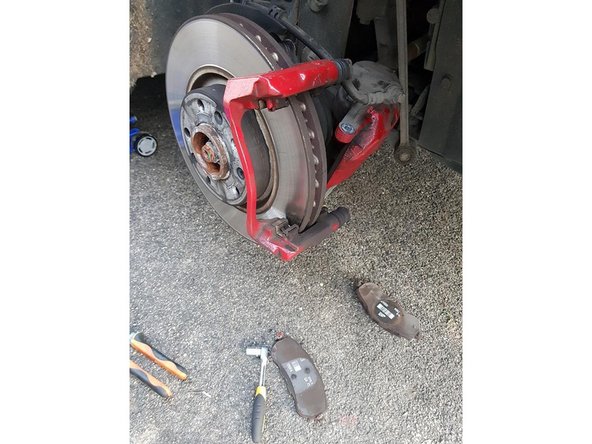
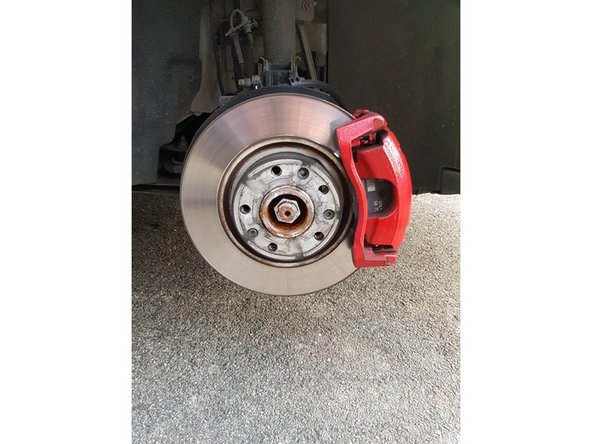
Les plaquettes sont maintenant accessible facilement.
-
-
-
Pour enlever vos plaquettes de freins, utilisez un tournevis plat puis mettez le derrière chaque plaquettes pour ensuite faire levier et la retirer simplement à la main.
-
Les deux premières photos de cette étapes sont non contractuelles car celle que j'ai réalisé pour cette étapes sont totalement flou mais l'étape reste la même.
-
-
-
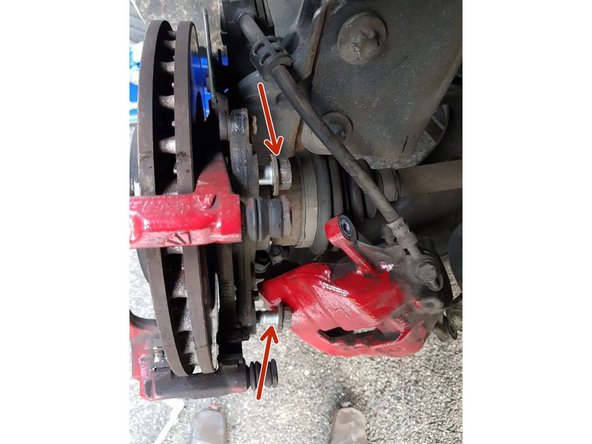
Nous allons maintenant démonter la deuxième partie de l'étrier pour pouvoir accéder au disque de frein avant, pour cela :
-
Dévissez entièrement les 2 vis qui maintienne la partie de l'étrier de frein à l'aide d'un cliquet et une douille de 18, une fois les 2 vis retirer vous pouvez enlevé simplement l'étrier en tirant dessus.
-
Les vis peuvent être difficile à retirer, pensez à mettre du dégrippant dessus pour vous faciliter la tache et éviter tout incident.
-
Le disque de frein est maintenant accessible.
-
-
-
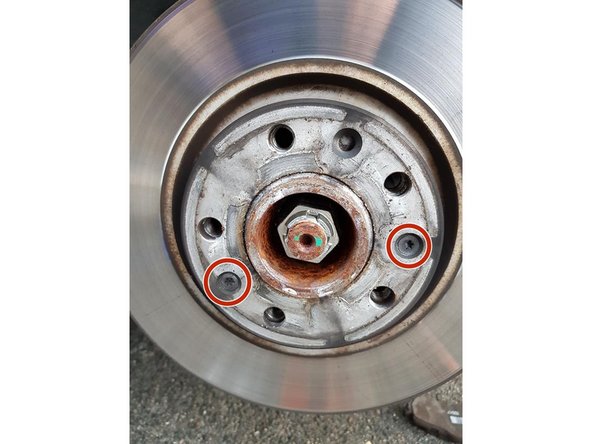
Pour déposer le disque de frein, vous devrez dévissé entièrement les 2 vis qui le maintienne grâce à une clé Torx 45.
-
Tirez sur le disque pour le retirer de son logement, utilisez du dégrippant si celui ci est "collé".
-
Pensez à nettoyé chaque pièces avant le remontage pour faciliter le prochain démontage à l'aide d'un lubrifiant.
-
-
-
Vous pouvez maintenant remettre le disque de frein neuf dans son logement, en le plaçant devant les pas de vis pour pouvoir remettre les 2 vis qui le maintienne.
-
Vous devrez vissé entièrement les 2 vis qui le maintienne grâce à une clé Torx 45.
-
-
-
Nous allons maintenant remonter la deuxième partie de l'étrier pour pouvoir remettre nos plaquettes de freins neuves.
-
Vissez entièrement les 2 vis qui maintienne la partie de l'étrier de frein à l'aide d'un cliquet et une douille de 18.
-
-
-
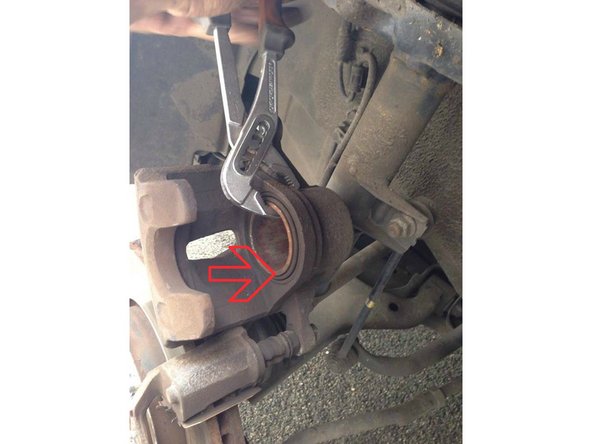
Pour pouvoir remettre l'étier vous devrez repoussé le piston au maximum, pour cela utilisez une pince multiprise puis appuyez très fortement dessus jusqu'à ce qu'il soit entrer totalement.
-
-
-
Vous pouvez maintenant mettre vos nouvelles plaquettes de freins dans leurs logement en respectant leurs sens et les glissant simplement dans l'étrier.
-
Les cales anti bruit sont généralement livrés avec les plaquettes neuves et sont à remplacer ou au minimum à nettoyer à chaque remplacement de plaquettes.
-
-
-
Une fois vos plaquettes de freins bien mises en places.
-
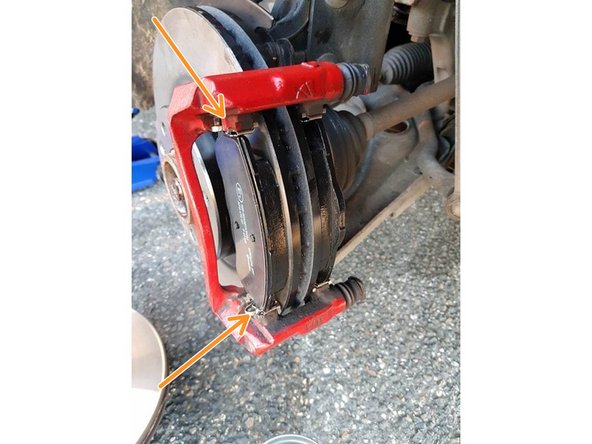
Placez l'étrier de frein en face des pas de vis puis visser l'étrier, utilisez une clé plate de 10, visser fortement les 2 vis qui le maintienne.
-
-
-
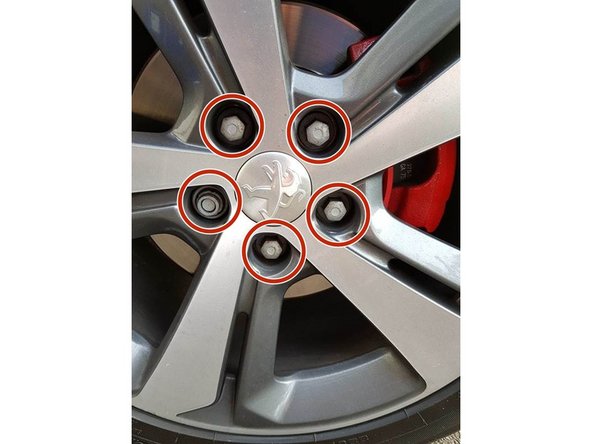
Replacez votre roue dans son logement puis visser les 5 goujons fortement.
-
Le travail est maintenant terminé, vous devrez vous rendre dans votre véhicule puis appuyer une dizaine de fois sur votre pédale de frein avant de prendre le volant pour que le piston se remette en place.
-


Annulation : je n'ai pas terminé ce tutoriel.
5 autres ont terminé cette réparation.
