


Difficulté
Modérée
Étapes
9
Temps nécessaire
03:00:00 - 05:00:00

Ce tutoriel a été créé par la communauté
User contributed
Introduction
Avec le poids des années, la ligne d'échappement se corrode, et risque de vous poser problème (désolidarisation de la ligne en roulant, ou bien refus au contrôle technique). Il est donc utile d'en contrôler l'état, et de faire les remplacement nécessaire si besoin.
Pas si compliqué que ça, mais il faut prévoir d'avoir un peu de temps devant soit !
-
-
Tout d'abord, il faut commencer à surélever la voiture pour pouvoir accès à la ligne d'échappement.
-
Vous allez passer un bon temps dessous, donc assurez vous bien que tout tient bien : rampes, chandelles, calles en bois. C'est trop dommage de mourir pour une ligne d'échappement !
-
-
-
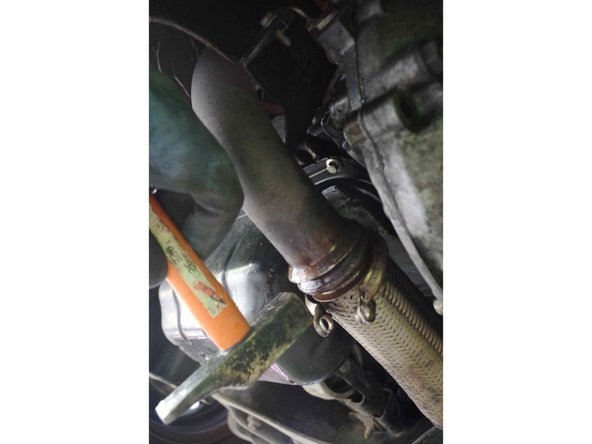
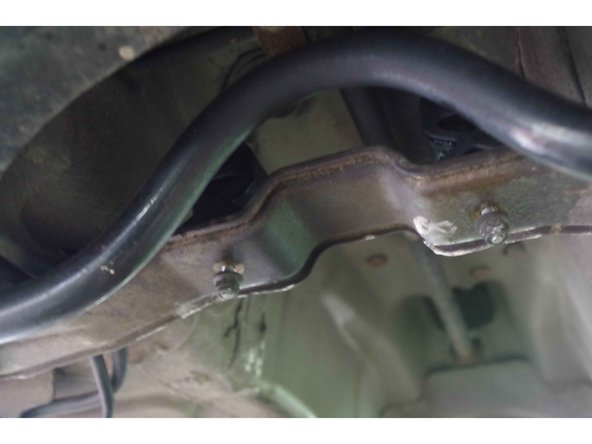
Ici on voit la partie de la ligne d'échappement qui nous intéresse. Elle se compose du flexible (tresse visible sur la deuxième photo) et va jusqu'au milieu de la voiture (3ème photo).
-
Le tout est simplement serré par des colliers. Pour vous aidez, la veille de votre chantier, passez un coup de lubrifiant (sans citer de nom : une petite bombe bleu et jaune :D). Ca va travailler un peu déjà, et quand vous voudrez démonter, ça va vous aider.
-
-
-
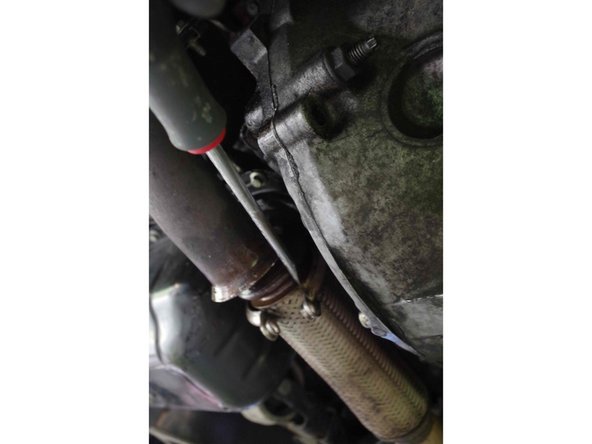
On va donc commencer par desserer les colliers à chaque extrémités.
-
La méthode : lubrifiant et coup de marteau ! Tout ça est bien collé, avec la calamine en plus, il ne faut pas hésiter à y aller ! (attention toutefois à ne pas déformer le tube !)
-
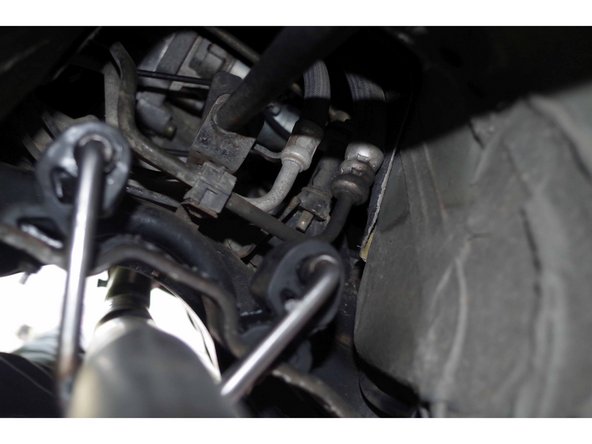
Une clé de 17 pour le côté avec le flexible. Pour enlever le collier (qui enveloppe les deux parties) : utilisez un tournevis plat (opération pas évidente, il faut forcer un peu).
-
-
-
Pour l'autre côté (celui au milieu de la voiture), une clé de 14 est nécessaire. Vous pouvez voir sur la photo qu'une partie est complètement corrodée alors que l'autre non : ma femme avait fait changer le pot d'échappement la première partie de la ligne d'échappement. Sauf que maintenant, c'est la deuxième partie de la ligne qu'il faut changer !
-
-
-
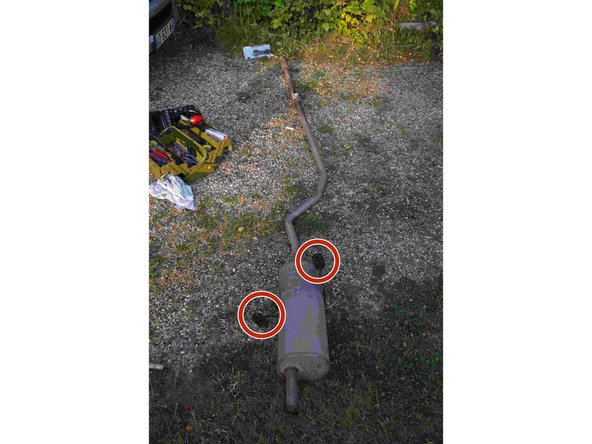
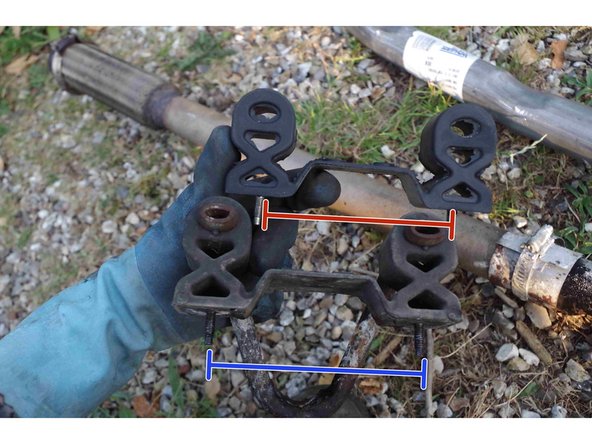
Maintenant que tout est desserré, la partie à changer ne tient plus que par les silent block (photo 1 en rouge). Les silent block sont liés à une pièce en métal, fixée par 2 vis (en bleu). Une douille de 10 pour sera nécessaire pour les extraire. Gardez bien les écrous ! (car les écrous ne sont pas fournis avec les silents block de rechange !)
-
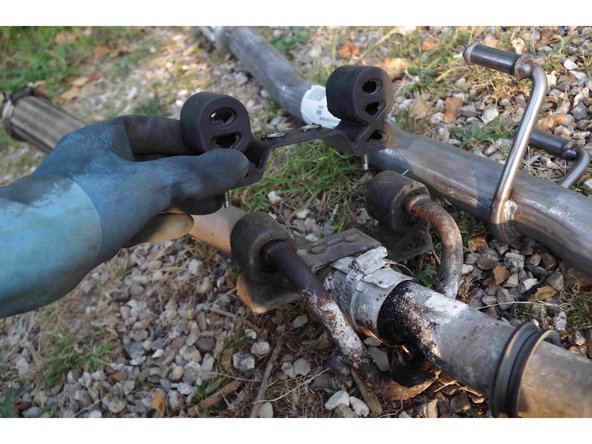
Il faut maintenant déposer le pot d'échappement ainsi que le tube qui le lie à la partie que nous voulons changer. Le pot d'échappement est tenu uniquement par 2 silent block (photo 2).
-
Une fois le pot d'échappement désolidarisé des silent block, vous devez le maintenir en hauteur (avec par 2 bidons d'huile vide) pour pas que la ligne tombe par terre.
-
Vous avez ainsi le temps de retourner au milieu de la voiture pour enlever les autres silent block de la partie à changer.
-
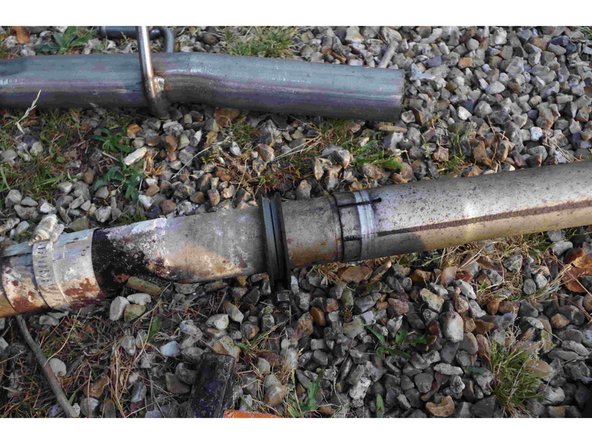
Ainsi, votre ligne est totalement désolidarisé de la voiture.
-
-
-
Etape cruciale : ai-je acheter la bonne pièce ?!!!
-
Le moment de la comparaison des pièces est arrivée : sueurs froides ...
-
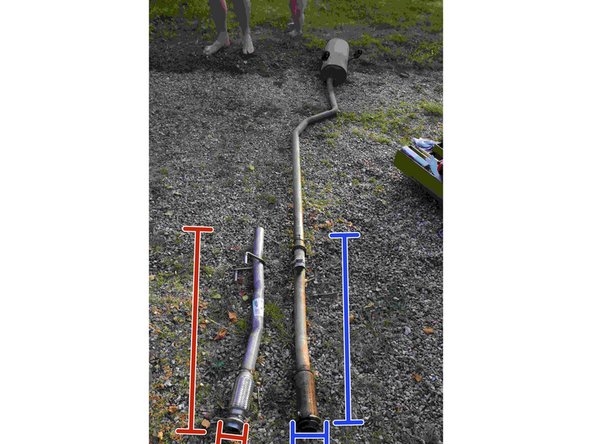
Sur la première photo on identifie bien la partie à changer. On vérifie la longueur et le diamètre, la partie flexible...
-
Pour les silent block, même exercices sur les dimmensions, et surtout l'espacement entre les deux vis !
-
Les colliers à changer nécessite aussi un contrôle de leur diamètre.
-
-
-
Une réparation de fortune avait été faite pour colmater le trou béant... (sorte de pansement). Mais à ce niveau, il vaut quand même mieux remplacer la pièce !
-
-
-
On commence par fixer les silents block. On reprend les 2 petits écrous (que nous avions précieusement gardé ! ) pour fixer la nouvelle pièce sur le chassis.
-
Puis, nous allons devoir fixer la nouvelle pièce dans ces nouveaux caoutchouc. Pour faciliter l'opération, mettez un peu de lubrifiant, ça rentre tout seul ! (en forçant un peu quand même !)
-
Sur la troisième photo, on voit la nouvelle pièce enfichée dans les silent blocks flambant neufs.
-
-
-
Puis mets en place les nouveaux colliers (j'ai remplacé celui du côté de la partie flexible, et gardé le même pour l'autre côté).
-
Je vous conseille de procéder comme suit :
-
1. fixation de la nouvelle ligne aux silent block
-
2. Première serrage du collier côté flexible (mais ne pas serrer à fond)
-
3. Positionnement du pot d'échappement (en hauteur sur les bidons), puis premier serrage du tube avec la nouvelle pièce.
-
4. Resserrer le collier côté flexible, puis resserrer de l'autre côté.
-


En prenant son temps et en étant méthodique, cette opération n'est pas compliquée. Il faut cependant être bien outillé et se dégager un espace suffisant sous la voiture, tout en étant en sécurité.
En prenant son temps et en étant méthodique, cette opération n'est pas compliquée. Il faut cependant être bien outillé et se dégager un espace suffisant sous la voiture, tout en étant en sécurité.
Annulation : je n'ai pas terminé ce tutoriel.
Une autre personne a terminé cette réparation.
Un commentaire
bonnes explication et reportage photos complet
bernard.le-gendre0941 - Résolu à la publication Réponse