


Introduction
Changer les plaquettes de frein arrière sur Audi A3 (8P1) Série 2 1.9 TDi 105cv
-
-
Avant de démonter la roue, ne pas mettre le frein à main pour permettre le démontage des plaquettes ! Mettre une cale sous une ou plusieurs roues.
-
Mise en sécurité du véhicule : démontage et remontage de la roue
-
-
-
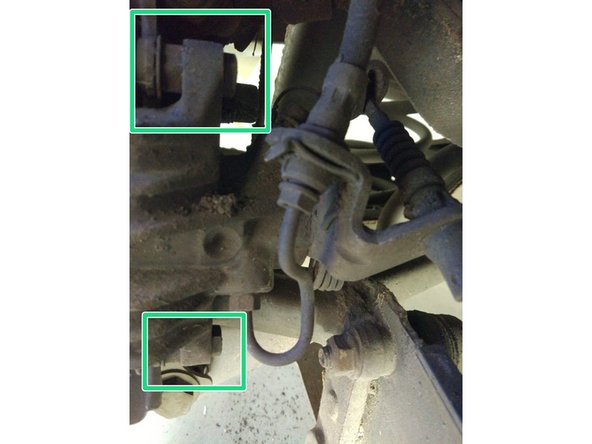
Etrier
-
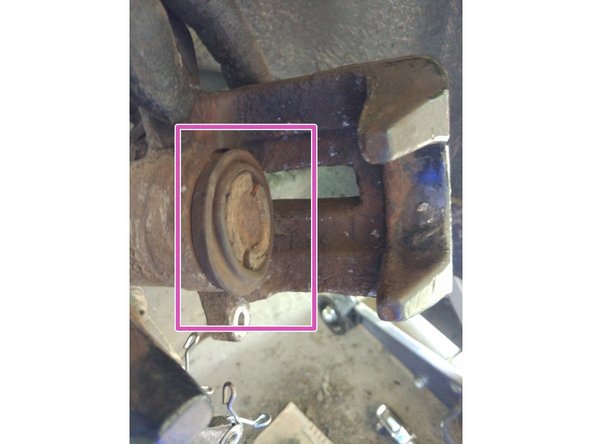
Ecrou tenant l'étrier
-
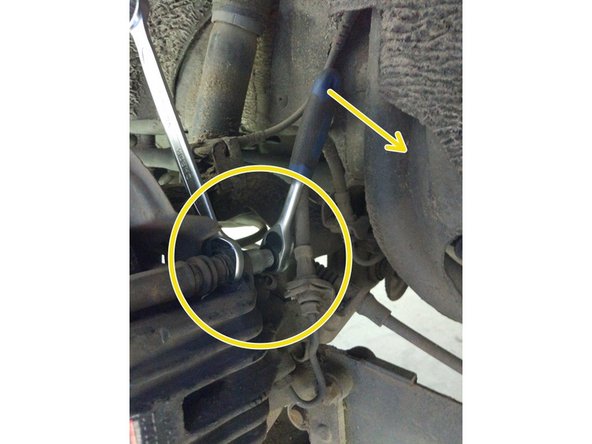
Dévisser l'étrier pour celà, il faut une clef de 16 et un cliquet avec une douille de 14. Maintenir la clef et dévisser avec le cliquet. Répeter l'opération pour le bas de l'étrier.
-
-
-
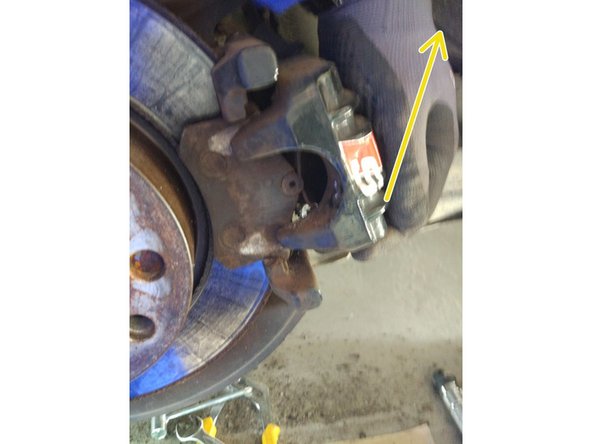
Tirer l'étrier vers l'extérieur et le faire pivoter vers le haut. Celui-ci viens en forçant un peu.
-
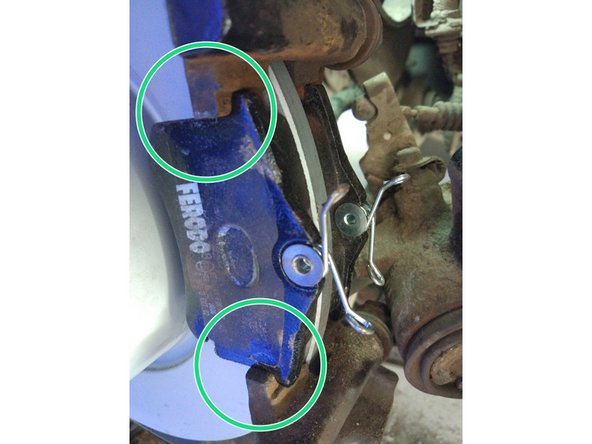
Retirer les plaquettes devant et derrière le disque.
-
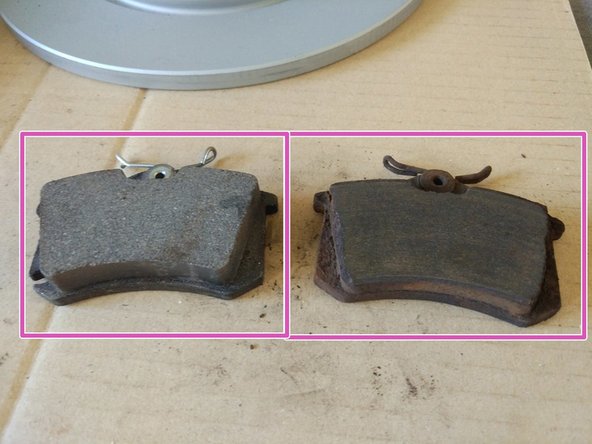
Différence entre une plaquette neuve et une vieille plaquette.
-
-
-
Utiliser un repousse piston à tête rotative (deux ergots sur le dessus).
-
Placer le dans l'étrier et serrer jusqu’à ce que le piston soit entièrement dans son logement.
-
Piston entièrement repoussé.
-
-
-
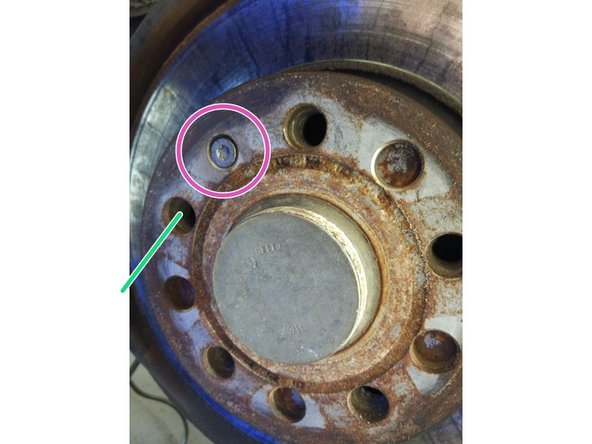
Dévisser la vis de maintient du disque.
-
Insérer un tournevis assez long dans un des trou du disque pour l'empêcher de tourner lors du dévissage (trait vert).
-
Retirer le disque en pivotant légèrement.
-
Si le disque est grippé et que le démontage est difficile prendre une cale et la placer au niveau des plaquettes de freins et taper d'un coup sec avec un marteau.
-
Nettoyer la surface en contact du disque.
-
-
-
Appliquer la même procédure pour l'autre côté de la voiture.
-
Lorsque tout est terminé, appuyer plusieurs fois sur la pédale de frein jusqu'à ce qu'elle soit dure (repousse les pistons).
-
Il est conseillé de roder ces disques pendants les 500 premiers kilomètres (freinage doux).
-


Annulation : je n'ai pas terminé ce tutoriel.
9 autres ont terminé cette réparation.

6 commentaires
Il manque une petite étape non? Le porte étrier doit être démonté pour déposer le disque..
Le repousse piston on tourne à gauche ou à droite ?
jean paul Pierre - Résolu à la publication Réponse