


Difficulté
Modérée
Étapes
15
Temps nécessaire
02:00:00 - 03:00:00
- Changer un lève vitre électrique 15 étapes

Ce tutoriel a été créé par la communauté
User contributed
Introduction
changement du lève vitre électrique AVG
Vous appuyez sur le bouton mais rien ne se passe, la vitre ne bouge pas. Il s'agit d'une panne (ou casse) du lève vitre électrique. Voici les étapes à suivre.
-
-
Pour commencer, vous allez devoir démonter la garniture de la portière. Pour cela il faut démonter en premier : le cache du rétroviseur, le contour de la poignée et le cache du haut parleur, en faisant levier avec un tournevis plat, tout en douceur pour ne pas casser les attaches.
-
Comme pour toutes intervention sur votre véhicule, pensez à couper le contact, il est plus prudent de connecter aussi la batterie (pas nécessaire ici)
-
-
-
Démontez le haut parleur ( 4 vis torx T20), débranchez la cosse.
-
-
-
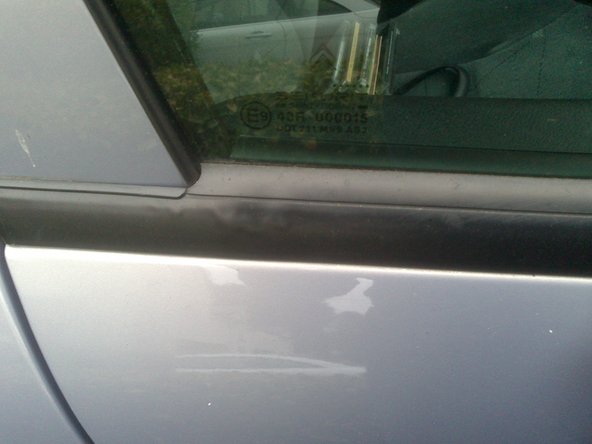
Vous devez ensuite enlever les baguettes autour de la vitre. En premier celle extérieure, puis si vous avez la place celle intérieure (sinon vous pourrez retirer celle intérieure en même temps que la garniture dans les prochaines étapes).
-
Vous devez faire glisser un tournevis plat en dessous et faire levier, en prenant soin de ne pas rayer la peinture et surtout de ne pas tordre la baguette car ce sont des éléments très fragile.
-
-
-
Vous devez dévisser les 4 vis (2 torx T20 et 2 torx T30) qui maintiennent la garniture en place. 1 à côté de poignée, 1 au niveau de l'accoudoir (caché en dessous), et 2 au niveau du haut parleur.
-
Vous devez maintenant tirer délicatement sur la garniture pour la déclipser et essayer de casser le moins possible d'attache (clipse blanc), il y en a 7 en tout répartis en périphérie de la pièce. Détachez ces clipses blancs de l'ossature métallique à l'aide d'un tournevis et d'une pince.
-
A savoir que les clipses blancs sont prévus pour être remplacer systématiquement en garage lorsque cette opération a lieu (s'ils sont cassés).
-
-
-
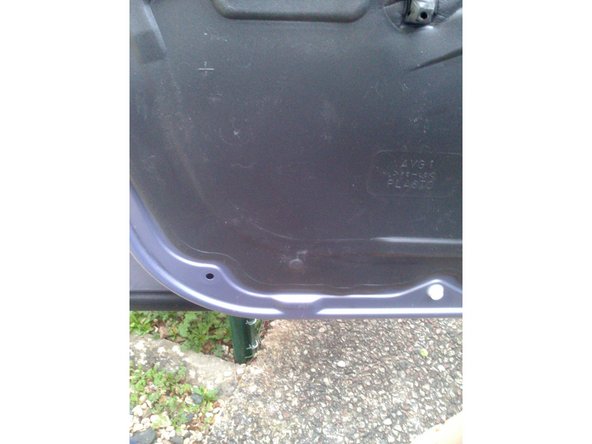
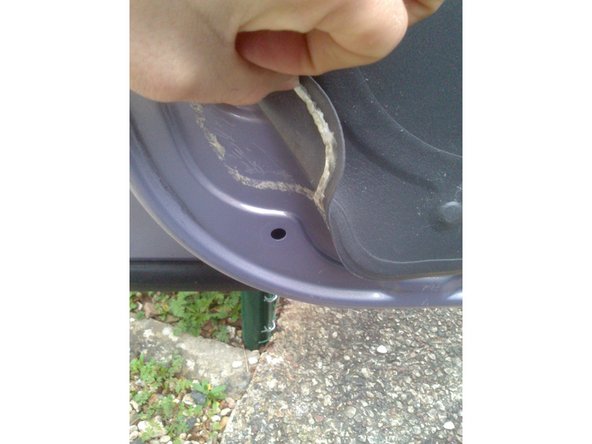
Vous devez maintenant retirer le voile isolant qui collé sur tout le tour de la portière. tirer légèrement sur le voile et utiliser un cutter pour couper la mousse polyuréthane qui sert de colle
-
Vous n'allez normalement pas pouvoir retirer le voile tant que la poignée est toujours fixé (sauf s'il s'est déchiré). Voir l'étape suivante...
-
-
-
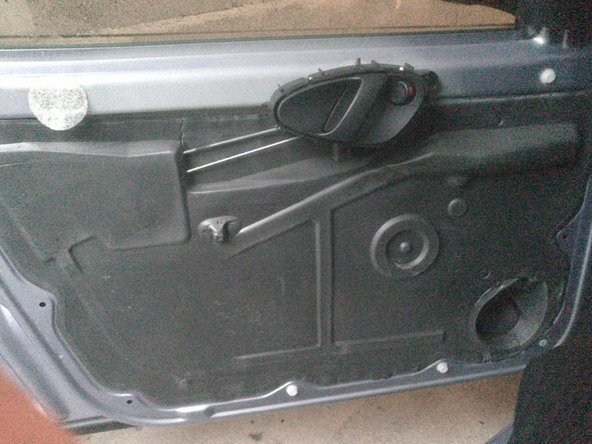
A ce stade, vous apercevez la vitre et la mécanisme de lève vitre, mais vous ne pouvez toujours pas y accéder, il vous faut retire la poignée.
-
Vous allez devoir utiliser une perceuse avec un foret à métaux diamètre 5 mm. Percez le rivet qui maintien la poignée à la portière (utilisez un foret de 4 mm si le 5 mm est trop gros pour percer correctement le rivet entièrement)
-
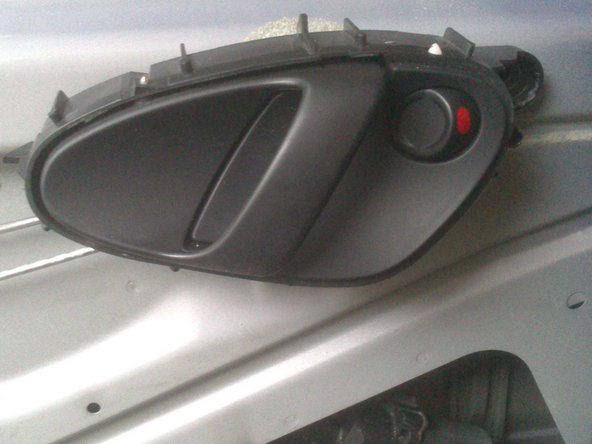
Vous devez maintenant déclipser les 2 petites attaches bleues qui retiennent les 2 tiges du système d'ouverture de portière. Utiliser un tournevis plat pour faire levier.
-
Vous pouvez finir de retirer le voile isolant une fois la poignée retirée.
-
-
-
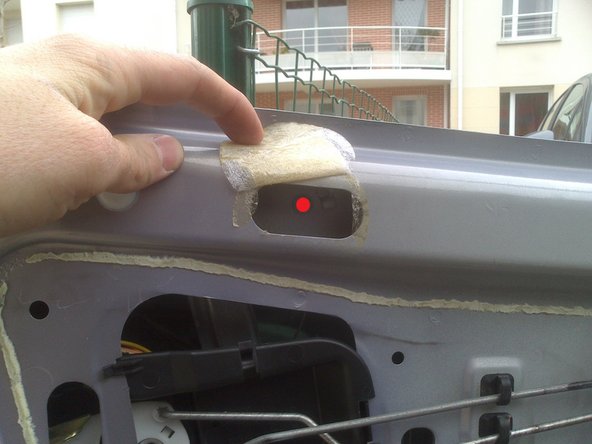
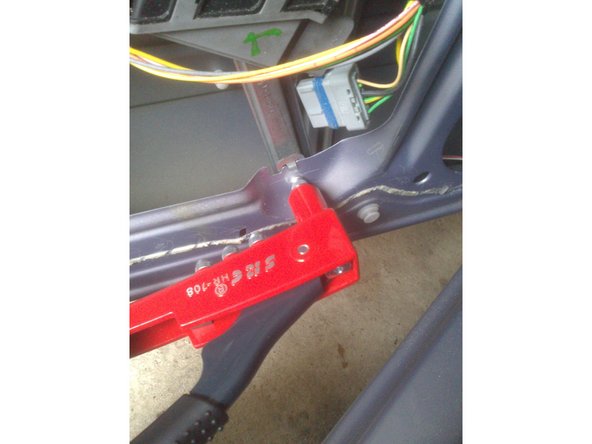
Vous venez de retirer tout les éléments qui vous bloquaient l'accès au système de lève vitre. Vous devez maintenant percer les 5 rivets (signalé en rouge, au bout des flèches) qui retiennent les rails du lève vitre à la portière. Utilisez pour cela la même méthode que dans l'étape précédente.
-
Deux de ces rivets sont cachés derrière les pastilles en mousse, décollez les pour y accéder.
-
Vous devez enlever le dernier clipse blanc qui maintient un des câbles du lève vitre, en le pinçant et en appuyant dessus avec un tournevis
-
-
-
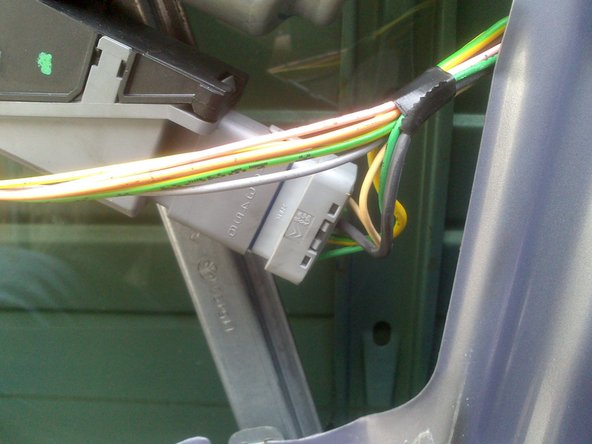
Dernières étapes avant de retirer le lève vitre de la portière. Vous devez détacher les fils qui se trouvent sous le moteur, maintenu par une attache noire.
-
Ensuite débranchez la cosse d'alimentation du moteur du lève vitre, aidez-vous d'un petit tournevis plat, l'opération peut être difficile car la partie sur laquelle vous devez appuyer ce trouve vers l'intérieur.
-
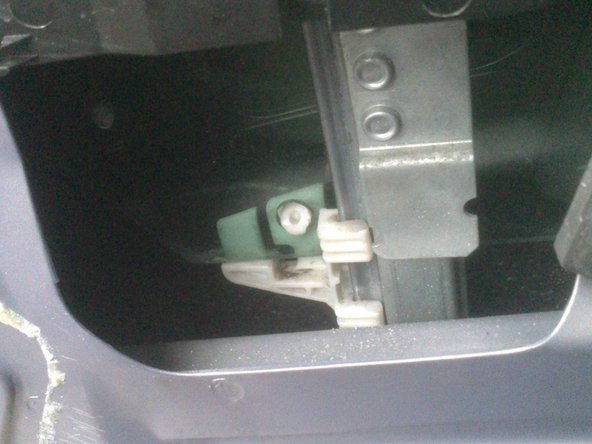
L'opération la plus délicate consiste à détacher la vitre des 2 supports blancs qui la relie aux rails du lève vitre (un sur chaque rail). Aidez-vous d'un petit tournevis pour appuyer sur la partie en plastique blanc située dans le trou. Faites levier pour l'extraire complètement.
-
Une fois la vitre retirée de ses supports, plus rien ne la retient. vous devez la retirer complètement de la portière. Si vous ne faites pas attention, elle peut se casser, ATTENTION TRÈS FRAGILE !
-
-
-
Une fois la vitre extraite de la portière, déposez le lève vitre en faisant bien attention de ne pas endommager les câbles électriques (VIDÉO)
-
Dans la vidéo, la vitre a été laissé dans la portière lors de cette étape, mais elle a quand même dû être extraite de la portière pour l'étape suivante. Nous vous conseillons donc de la retirer pour éviter tout risque de casse, le lève-vitre sera d'autant plus facile à retirer.
-
-
-
Vous pouvez maintenant identifier la panne.
-
Dans la plupart des cas il faudra remplacer le système du lève vitre
-
Démontez le moteur pour le mettre sur le nouveau système s'il n'est pas fournis (3 vis Torx)
-
-
-
Montez le moteur sur votre nouveau lève vitre (si besoin), graissez-le avec de la graisse universelle (graisse épaisse) et placez votre nouveau lève vitre dans la portière à l'emplacement prévu. Vérifiez son bon fonctionnement avant l'étape suivante : branchez la cosse électrique, mettre le contact et actionnez le bouton.
-
Pensez à couper le contact avant de continuer
-
Positionnez correctement les câbles électriques avant toute fixation. Munissez-vous d'une pince à rivet pour fixer les rails et le moteur (5 rivets au total). Choisissez un rivet de taille et longueur adaptées.
-
-
-
Rattachez les câbles électriques sur les emplacements prévus et fixer le clipse blanc du câble transversale du lève vitre (par l'intérieur de la portière).
-
Remettre la vite en place, toujours en faisant bien attention. Elle doit être alignée à l'avant dans le rail fixe (flèche bleue) et reclipsée sur ses 2 supports en plastique blanc.
-
Lorsque que vous manipulez la vitre dans la portière, vous devez toujours avoir une main qui la retient par le dessous afin d'éviter tout basculement qui pourrait provoquer la casse de la vitre.
-
-
-
Commencez par enfiler le voile isolant sur les 2 tiges de système d'ouverture.
-
Positionnez la poignée dans son emplacement, maintenez-la bien et enclenchez les tiges une à une dans les attaches bleues de la poignée en forçant légèrement.
-
Avant de fixer la poignée, vous devez tester le bon fonctionnement du système d'ouverture de la portière, ainsi que le système de fermeture centralisée (si le véhicule en est équipée). Si vous constatez un problème vous devez retirer les tiges des attaches bleues et recommencer cette étape jusqu'au bon fonctionnement du système.
-
Munissez-vous de votre pince à rivet et fixez la poignée (1 rivet).
-
-
-
Vous devez remettre en place le voile isolant, pour cela il suffit d'appuyer au niveau de la zone de collage pour que la mousse fasse à nouveau contacte.
-
Avant de repositionner la partie basse du voile, pensez à faire ressortir le câble du haut parleur par le trou prévu à cet effet.
-
-
-
Vous devez commencer par remettre la baguette intérieure.
-
Positionnez ensuite les clipses blancs que vous aviez récupéré lors du démontage dans les emplacement en "U" prévus à cet effet sur la garniture.
-
Clipsez la garniture à la portière en commençant par le bas. Avant de clipser la partie haute, emboitez la garniture dans la baguette (il sera difficile de le faire une fois les clipses déjà enfoncés).
-
Vissez les 4 vis Torx de la garniture.
-
Branchez et revissez le haut parleur.
-
Remontez le contour de la poignée, le cache rétroviseur et le cache du haut parleur.
-
Pour finir, remonter la baguette extérieure. Vous devez remonter la vitre, et commencer par enfoncer la partie avant, en appuyant dessus d'un bout à l'autre par légère pression pour ne pas la déformer. Il y a un détrompeur qui vous indique si vous êtes bien aligné ou non.
-
Vous avez terminé votre changement de lève-vitre.
-


Annulation : je n'ai pas terminé ce tutoriel.
12 autres ont terminé cette réparation.
9 commentaires
Bonjour j'ai un souci avec ma mercedes w203 c200 cdi coupé je souhaite remplacer ma vitre qui a étais casser mes lorsque j'appuie sur le bouton pour baisser la vitre les câble se détende… et lorsque je monte la vitre les câble sont bien tendu du coup j'ai peur de mettre la vitre est que lorsque je voudrais descendre et remonter la vitre que le câble se prenne dans la vitre et que ma vitre casse à nouveau… auriez vous une solution à mon problème ? Merci de votre compréhension cordialement.
hassanoubaali - Résolu à la publication Réponse
Bonjour,
Merci beaucoup pour ce tuto très bien fait qui m’a permis de changer seul le lève-vitre AVG de ma XSARA…malgré mes deux mains gauches!
Bravo et encore merci.
Gérard Derler - Résolu à la publication Réponse
Merci pour votre turo
Samir de la chaine Notaclassique
Samir ERRAHMOUNI - Résolu à la publication Réponse
impeccable après avoir coupé les câbles la vitre descend sans pb
maintenant que j’ai remonté le nouveau système. J’ai actionné la vitre.
C’est descendu et remonté MAIS c’est de nouveau bloqué !!! en position haute.
Le système est tout neuf ! qu’est ce qui peut dysfonctionner ?
est ce qu’il y a une programmation ? il s’agit d’un système automatique avec option confort.
Stéphane GAGEY - Résolu à la publication Réponse
Un câble du faisceau coupé.
Résultat : une commande de pièce pour rien… j’avais qu’a vérifier les éléments de base.
Mais très bon tuto merci