


Difficulté
Très facile
Étapes
8
Temps nécessaire
00:10:00 - 00:15:00

Tutoriel complet
Ce tutoriel contribué par la communauté est complet et prêt pour l'examen de l'équipe Oscaro.

Ce tutoriel a été créé par la communauté
User contributed
Introduction
Dans ce tutoriel je vais vous aider a changer votre rupteur/vis platinée facilement! il y a ensuite un tutoriel pour réaliser le réglage de la vis platinée car il est important de le faire après le changement du rupteur car on dérègle le réglage initiale, risque de problème d'allumage si vous ne le faites pas !
Pièces
-
-
IMPORTANT ! Déposer la batterie pour réaliser cette manipulation pour éviter tout problème !! ( enlever le - en premier et ensuite enlever le + et pour le remontage mettre le + en premier ensuite le - )
-
-
-
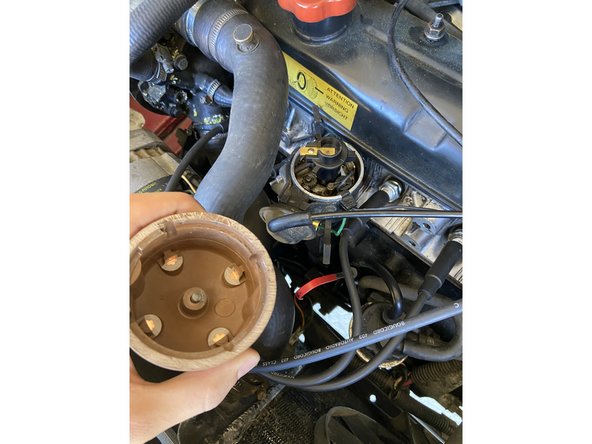
Il faut déposer la tête de delco, elle est maintenue par les petits clips que je montre en photos, y'a 2 clips, l'autre est a l'opposé, une fois les clips enlevé, tirer vers le haut la tête.
-
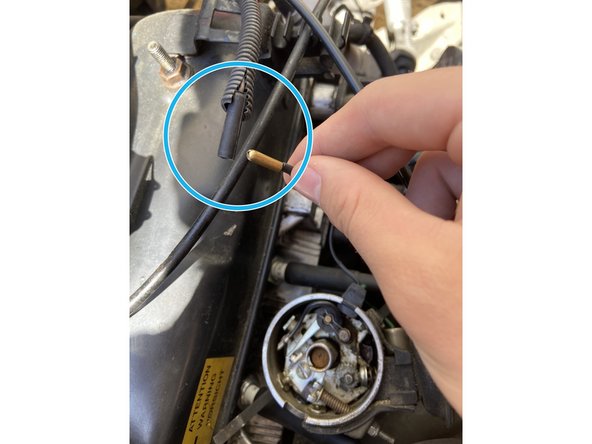
ensuite le rotor/doigt d'allumeur (petit embout noir avec la tige cuivrée au centre) il suffit tout simplement de la tirer vers le haut également, ça va nous permettre d'avoir accès à la vis platinée/rupteur (voir photos)
-
-
-
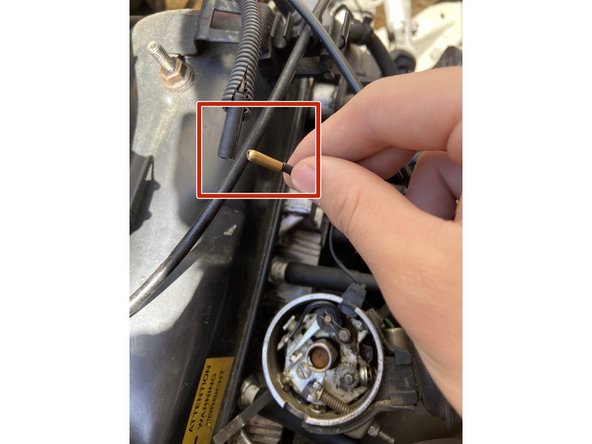
première étape retirer le contact de sont logement ( voir la première photo avec le rectangle rouge )
-
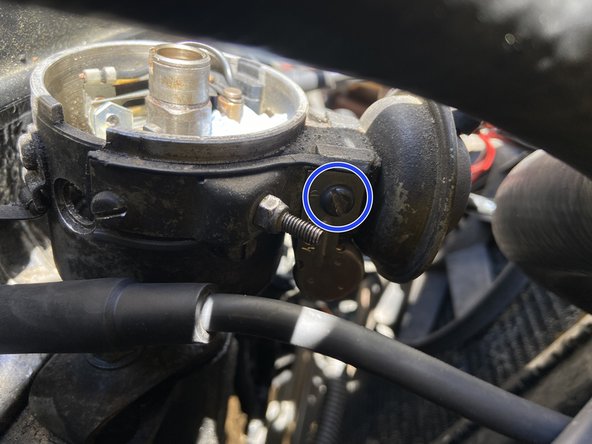
Ensuite déposé la vis qui maintient le condensateur avec un petit tournevis plat ( sur la deuxième photo cercle bleu )
-
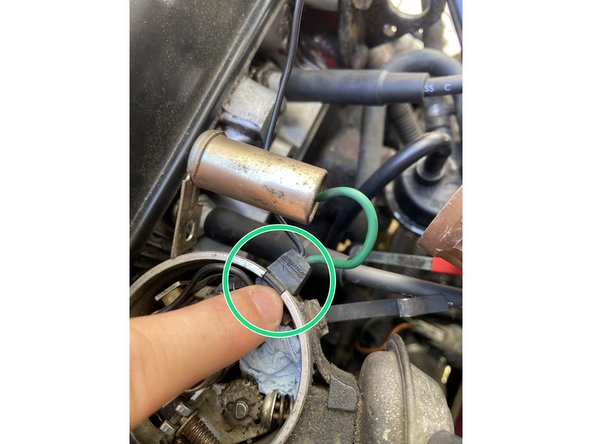
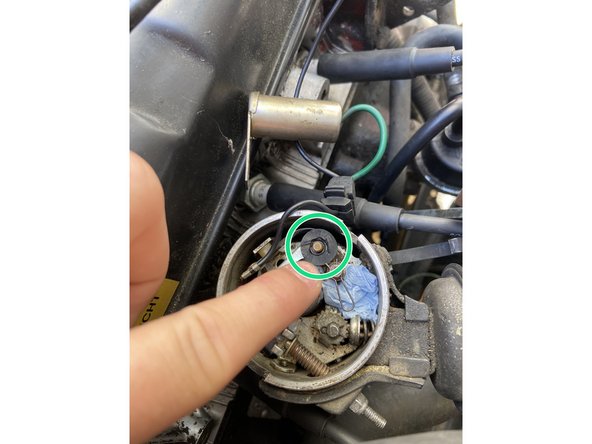
Tirez vers le haut l'embout plastique ( cercle vert sur la 3e photo )
-
-
-
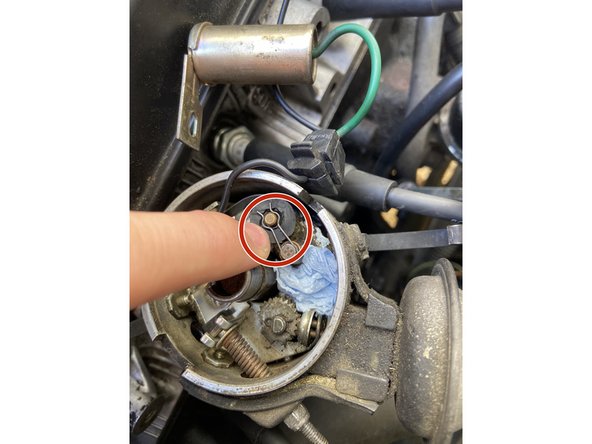
Reculez l'agrafe de maintient ( cercle rouge sur la photo )
-
Attention celle-ci à tendance a sauter, personnellement j'ai mis du papier pour pas qu'elle tombe dans mon allumeur
-
Déposez la rondelle isolante ( cercle vert 2ème photos)
-
Attention a ne surtout pas la perdre ! ( la votre ne ressemble pas a la mienne tout simplement car la mienne était cassé je l'ai remplacé )
-
Avec votre doigt exercer une pression sur la partie du rupteur afin de la déloger de sont emplacement ( cercle jaune 3ème photos ) et avec votre autre main tirer le rupteur vers le haut ( cercle vert 3ème photos )
-
-
-
Avec votre grand tournevis plat, desserrer la vis de maintient complétement ( cercle rouge )
-
Attention a ne pas perdre les deux rondelle de cette dernière
-
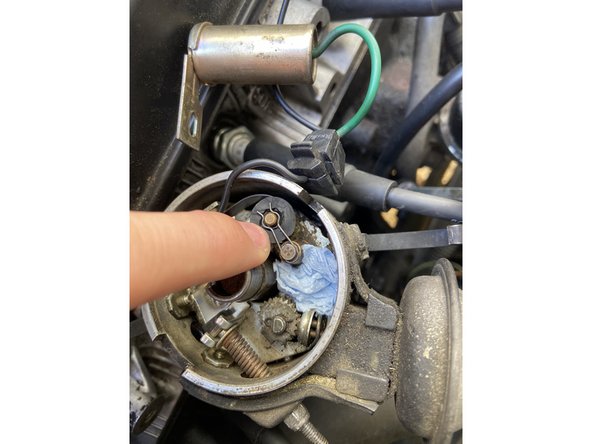
Déposez la petite agrafe noir de maintient ( cercle bleu toujours la première photos )
-
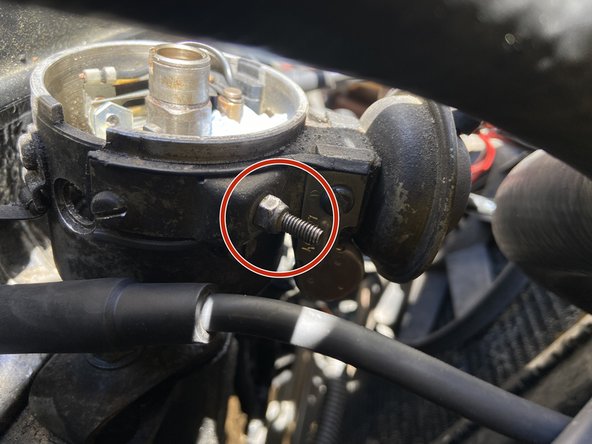
Avec une douille de 7mm dévisser totalement l'écrou ( cercle orange 2ème photos )
-
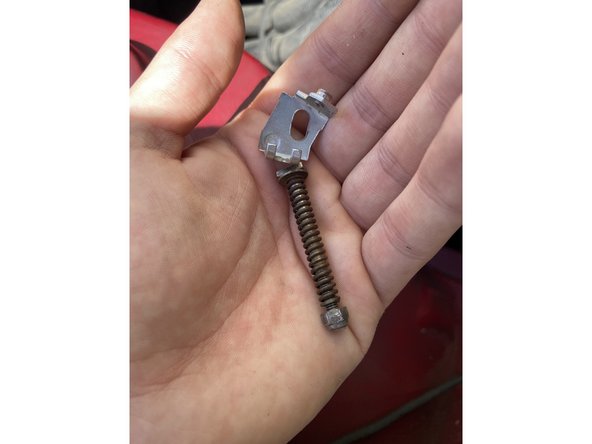
Vous devrez avoir votre tige de sortie avec le ressort comme sur la 3ème photos
-
-
-
Pour le remontage c'est exactement comme le démontage !
-
Tout d'abord remettre en place notre tige avec le ressort et la partie immobile du rupteur
-
une fois mis en place resserrer complètement l'écrou avec une douille de 7mm ( voir photo avec cercle rouge ) afin d'avoir de l'espace pour placer le rupteur ensuite et pour faire le réglage rupteur
-
Ensuite remettre en place la vis avec ses rondelles pour maintenir la partie immobile et la serrer
-
Ne pas oublier de remettre la petite agrafe noir en place ! ( voir photos 3, le cercle vert )
-
-
-
mettre le nouveau rupteur dans le trou adapté ( cercle rouge ) et bien mettre la tige dans sa gorge ( cercle vert ), bien enfoncé le rupteur au fond en appuyant dessus
-
Ensuite remettre la rondelle isolante et l'agrafe de maintient par dessus ( voir photos numéro 2 ça doit être comme cela )
-
Bien remettre la rondelle isolante c'est important sinon vous allez a voir un faux contact et abimer votre système
-
Fixer le nouveau condensateur à sa place et mettre la vis ( cercle orange 3ème photos )
-
-
-
Remettre en place la connectique plastique ( cercle rouge )
-
Remettre en place la connectique électrique dans sont emplacement prévu ( voir photo 2, cercle bleu )
-
Remettre en place le rotor/doigt d'allumeur, ainsi que la tête de delco avec ses clips
-
Et voilà vous avez terminé bravo ! je vous conseil d'allez voir mon autre tuto pour régler votre jeu du rupteur ! ( c'est important sinon vous allez avoir des problèmes d'allumage ! )
-


6 commentaires
Niveau position moteur il y a quelque chose à faire point mort haut ou autre
gardoncool - Résolu à la publication Réponse