


Difficulté
Modérée
Étapes
14
Temps nécessaire
02:00:00 - 03:00:00

Ce tutoriel a été créé par la communauté
User contributed
Introduction
Votre vitre ne descend plus lors de l'appuie sur le bouton, le moteur ne fait plus de bruit!
Il s'agit certainement d'une panne du lève vitre électrique.
Voici les 14 étapes à suivre afin de le remplacer facilement. C'est partie !
-
-
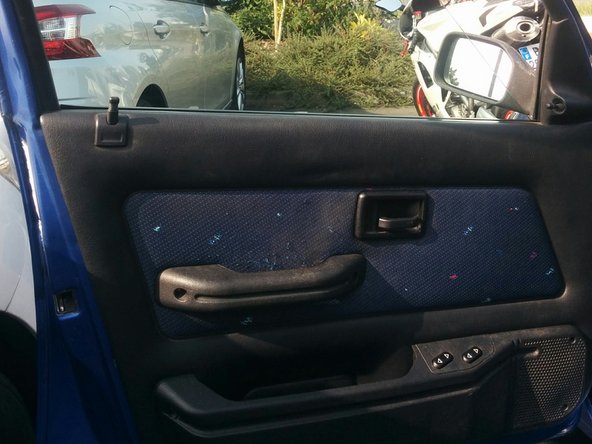
Repérer les vis de fixation du vide poche
-
Il y a une vis de cacher sous le cache des boutons de lève-vitre
-
Déposer le cache des boutons de lève-vitre à l'aide du tournevis plat
-
Deviser les 8 vis du vide poche à l'aide du tournevis torx T20
-
-
-
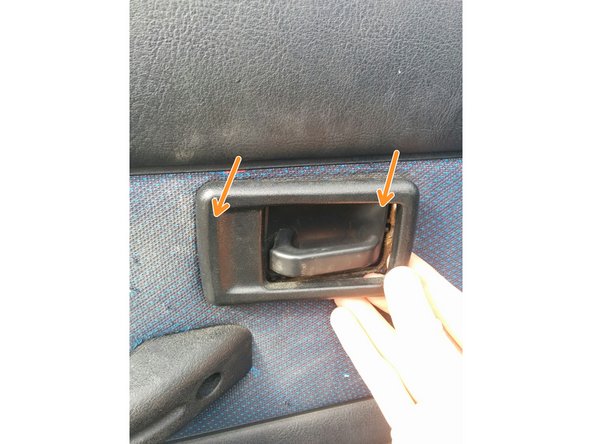
Repérer les 2 vis de fixation de la poignée
-
Deviser les 2 vis de la poignée à l'aide du tournevis torx T30
-
-
-
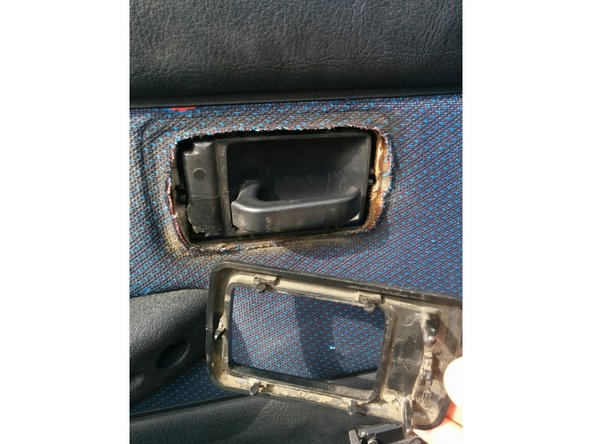
Déposer le contour du levier en tirant vers vous
-
Attention à ne pas casser les fixations du contour
-
-
-
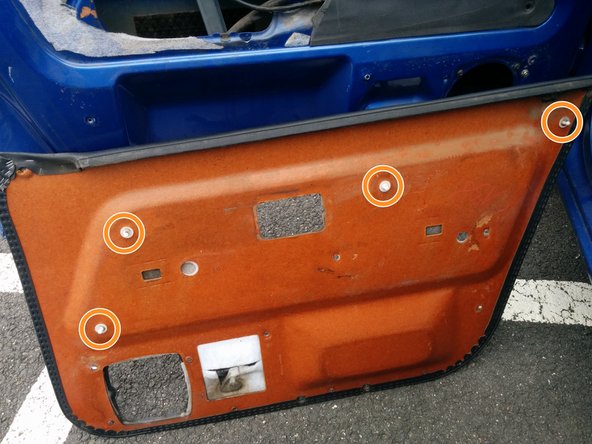
Tirer le panneau de porte vers vous en partant du bas pour le déboîter
-
Le panneau est retenu par 4 clips en plastique
-
Une fois le bas du panneau déboîter, tirer le panneau vers le haut afin de le désolidariser de la porte
-
Attention au bouton d'ouverture lors de la dépose du panneau
-
-
-
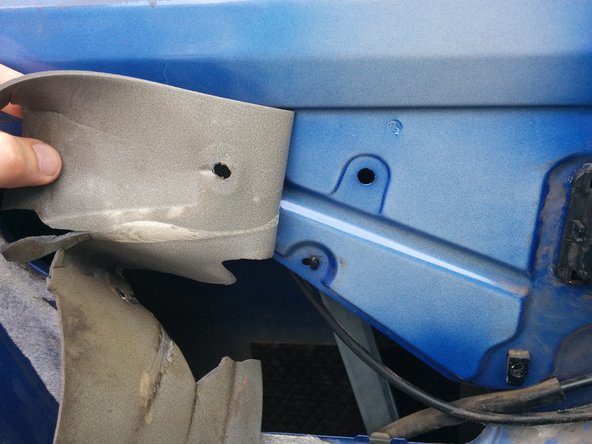
Déposer la protection acoustique en tirant doucement dessus
-
Le constructeur préconise de remplacer cette protection lors du démontage
-
-
-
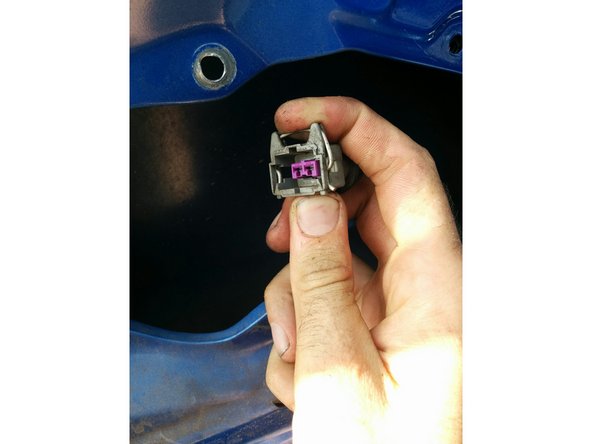
Localiser l'alimentation électrique du moteur de lève-vitre
-
Débrancher la cosse en appuyant sur la languette métallique du connecteur et en le tirant (voir photos)
-
-
-
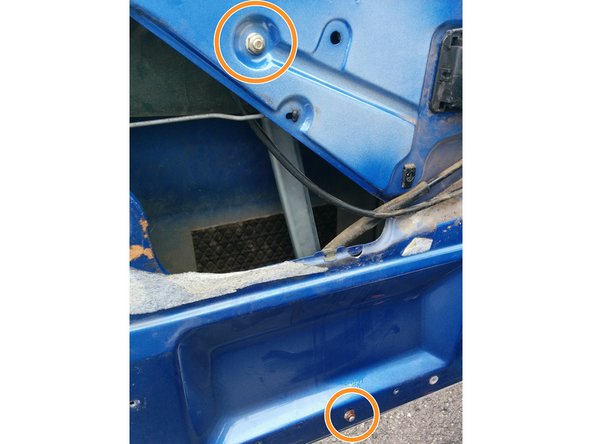
Repérer les 3 fixations à percer
-
Percer les fixations à l'aide du foret à métaux
-
-
-
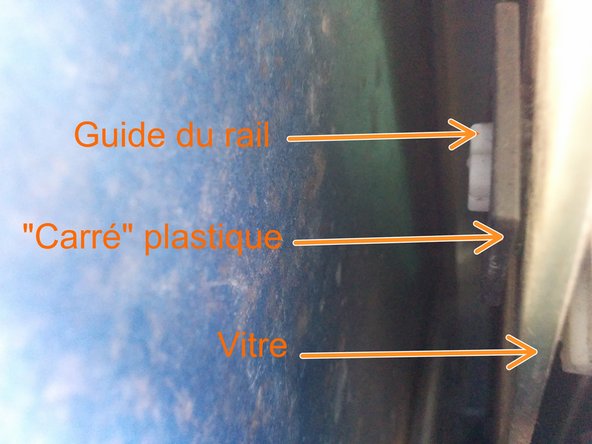
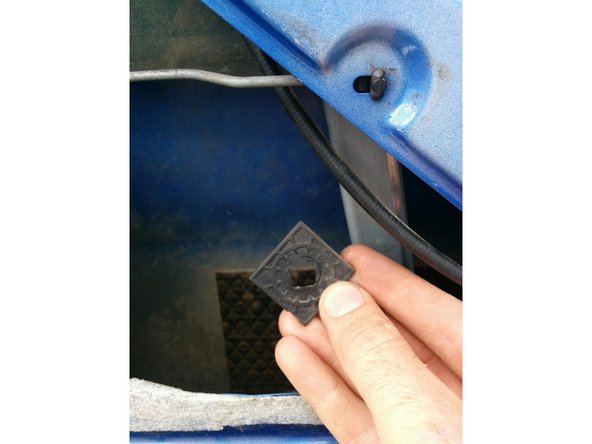
La vitre est maintenue sur le rail du lève-vitre par un "carré" en plastique côté extérieur de la porte
-
Il suffit de tourner le "carré" d'un demi-quart de tour puis de le pousser vers l'extérieur
-
Une certaine résistance se fait sentir lors de la manœuvre de déverrouillage
-
-
-
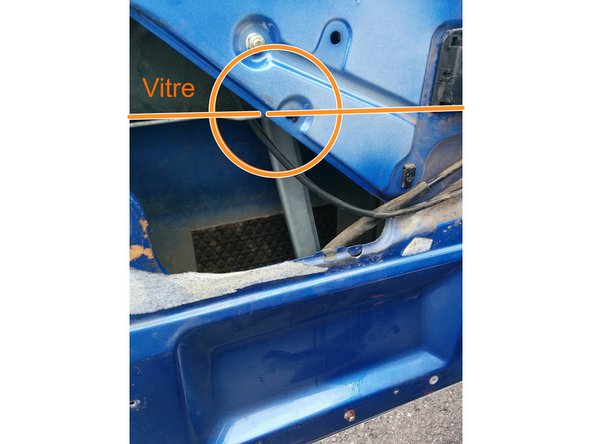
Déposer le joint extérieur de la vitre afin de pouvoir décaler la vitre du rail
-
Il suffit de le tirer vers le haut en partant du côté de la poignée de porte. Utiliser un tournevis plat afin de faire levier pour le début
-
-
-
Repérer les 2 vis de fixation
-
Dévisser les vis à l'aide de la clé mixte de 10
-
-
-
Enlever la vitre du guide de lève-vitre
-
La vitre va tomber, soutenir la vitre en position "monté" à l'aide d'un tasso
-
Extraire le système de lève-vitre de la porte en basculant le rail à l'horizontal
-
-
-
Comparer les systèmes de lève-vitre neufs et ancien avant le remontage afin de vérifier qu'ils sont identiques
-
-
-
Procéder dans l'ordre inverse pour le remontage du lève-vitre
-
Tester la monté/descente complète de la vitre avant de remonter le panneau de porte afin de vérifier qu'il n'y a pas de blocage de la vitre et que celle-ci est bien guidée
-
Changer la protection acoustique de la porte par une neuve si besoin
-
-
-
Admirer son travail et ranger les outils
-
Jeter l'ancien système de lève-vitre dans une déchetterie
-


Annulation : je n'ai pas terminé ce tutoriel.
2 autres ont terminé cette réparation.
6 commentaires
Bonjour,
Pour moi le câble est sertie. Il faudrait voir sur les photos ou démonter pour vérifier.
alanboucher.info - Résolu à la publication Réponse
Faut-il changer tout le mécanisme entier (rail, poulie, câble …) alors que le câble seul s’est enrouler autour de la poulie ? Pourquoi ne pas changer que le câble ?
Marcelo VIEIRA - Résolu à la publication Réponse
Merci beaucoup pour ce tutorial il et super bien expliquer
cyril benazech - Résolu à la publication Réponse