


Difficulté
Modérée
Étapes
18
Temps nécessaire
01:00:00
- Remplacer un Commodo sur Peugeot 206 18 étapes

Ce tutoriel a été créé par la communauté
User contributed
Introduction
Il y a plusieurs modèles de COM2000, on veillera à prendre exactement le même que celui d'origine (il faudra peut-être démonter le volant et les caches derrière pour obtenir le numéro OEM et commander la bonne pièce).
Il est possible de trouver des COM2000 d'occasion mais cette pièce étant un problème connu sur 206, il est préférable d'opter pour du neuf.
-
-
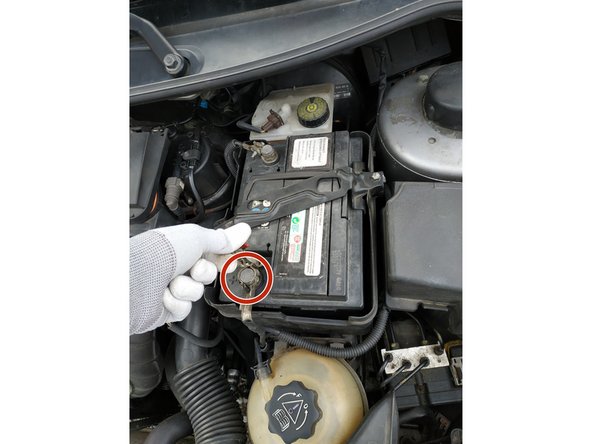
déconnecter la batterie et attendre 10mn avant d'attaquer le démontage, le temps de désactiver l'airbag
-
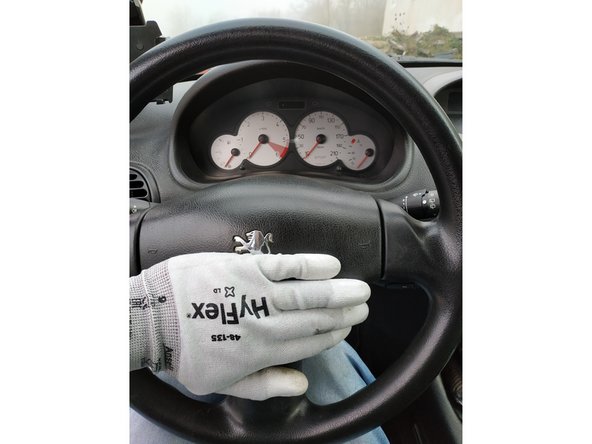
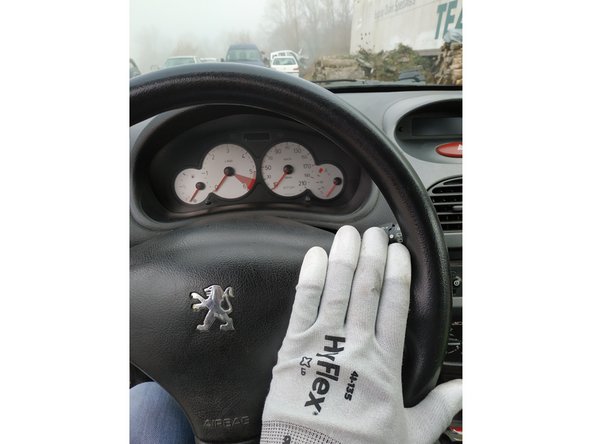
mettre les roues bien droites
-
et le volant bien droit
-
Tout au long de l'intervention, on veillera toujours à garder le volant bien droit et le Com2000 bien droit.
-
-
-
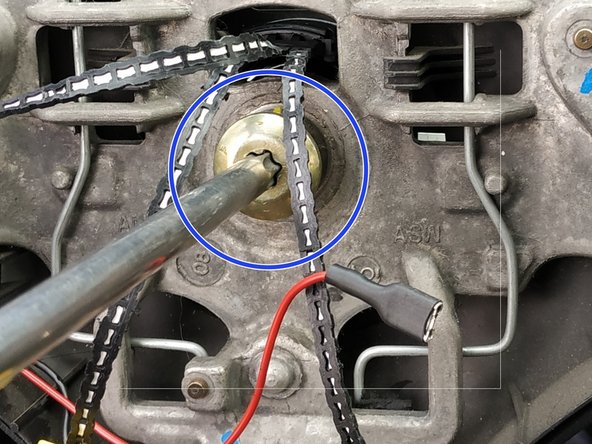
l'agrafe de maintien de l'airbag est accessible via un orifice derrière le volant
-
passer un tournevis plat dans cet orifice
-
et appuyer pour libérer l'airbag
-
Ne pas tirer, l'airbag est connecté.
-
-
-
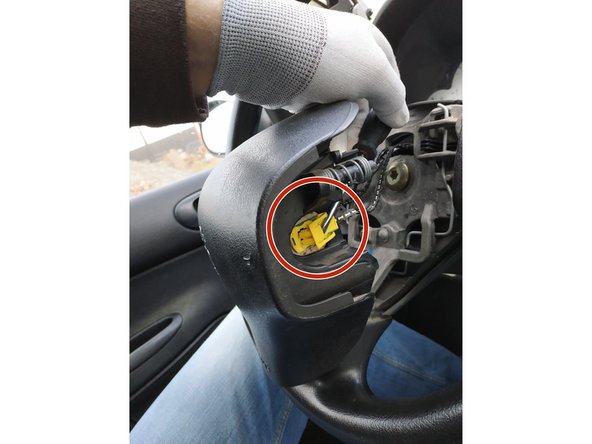
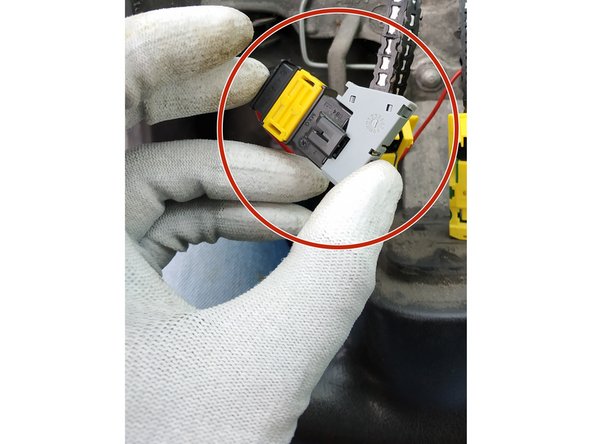
déconnecter la fiche jaune et verte à droite de l'airbag en retirant le rabat de verrouillage
-
et en faisant levier avec un petit tournevis plat.
-
la fiche sort assez facilement
-
-
-
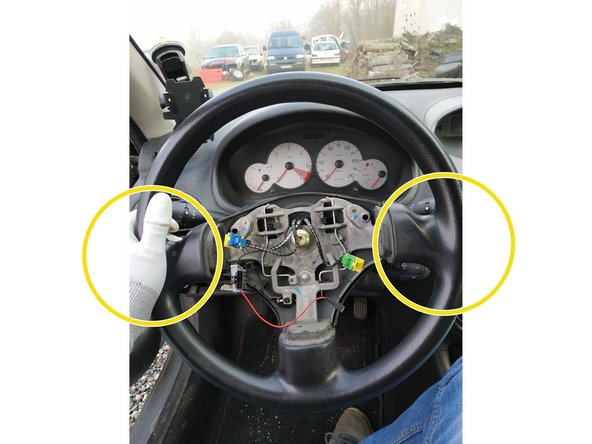
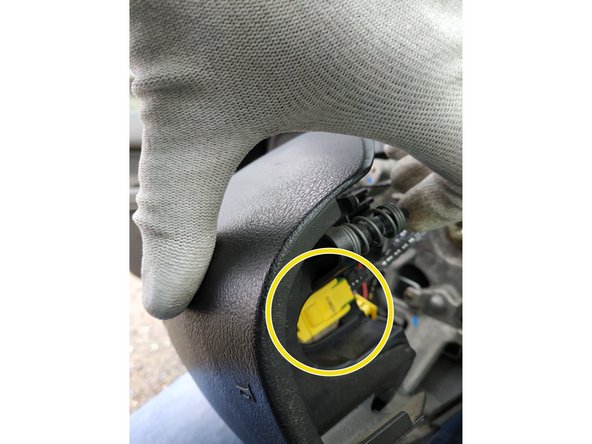
procéder de la même façon pour la fiche jaune et bleue coté gauche de l'airbag
-
-
-
déconnecter la fiche de l'airbag et retirer celui-ci
-
Il faudra peut-être utiliser un tournevis plat pour enlever la fiche.
-
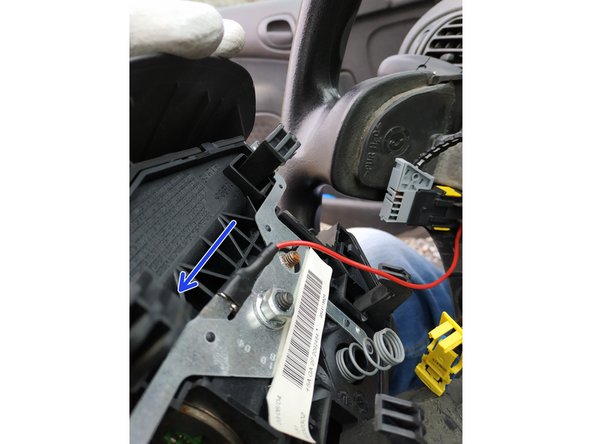
déloger la fiche grise
-
et la déconnecter
-
-
-
dévisser la vis de maintien du volant à l'aide d'une clé Torx T50
-
On peut immobiliser le volant avec ses 2 genoux.
-
avec un marqueur, repérer la position du volant
-
-
-
visser la vis de maintien du volant de quelques tours à la main
-
bouger le volant jusqu'à le déloger
-
Ne pas faire tourner le volant mais faire des mouvements d'avant en arrière.
-
puis retirer la vis
-
-
-
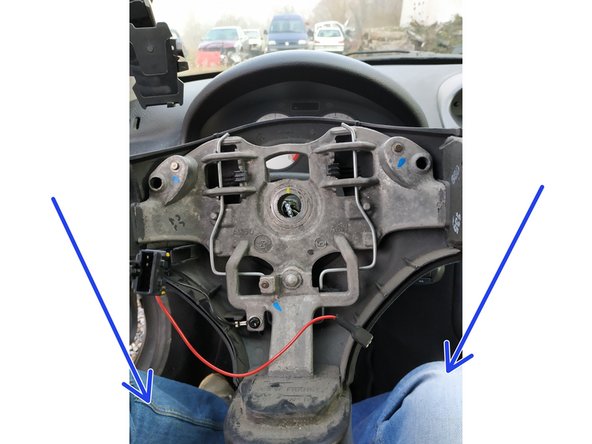
déloger le volant
-
faire passer la connectique à travers le volant
-
Il faudra faire passer les fiches une par une.
-
retirer le volant
-
-
-
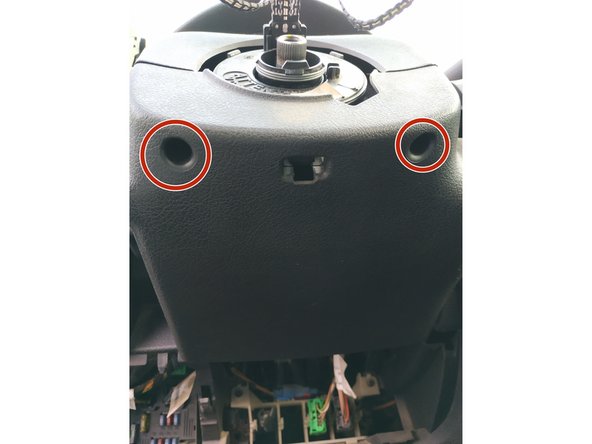
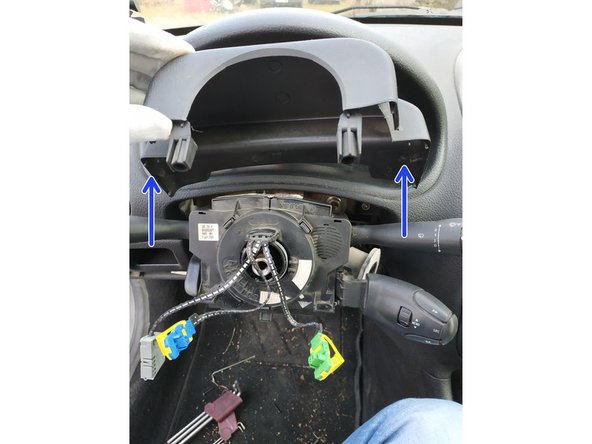
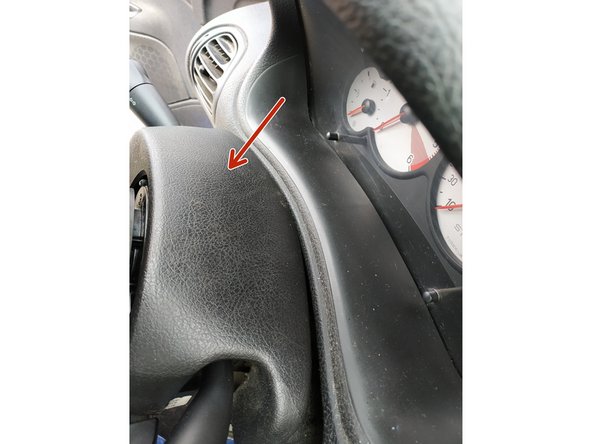
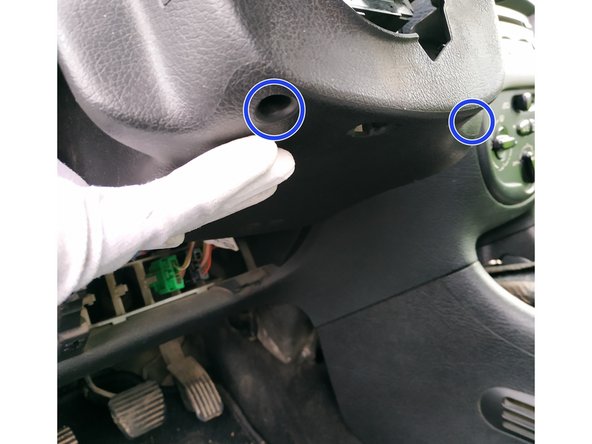
dévisser les 2 vis de fixation du cache inférieur avec le clé torx T20
-
le cache est en partie clipsé donc il faudra tirer vers la bas pour l'enlever
-
et retirer le cache supérieur
-
-
-
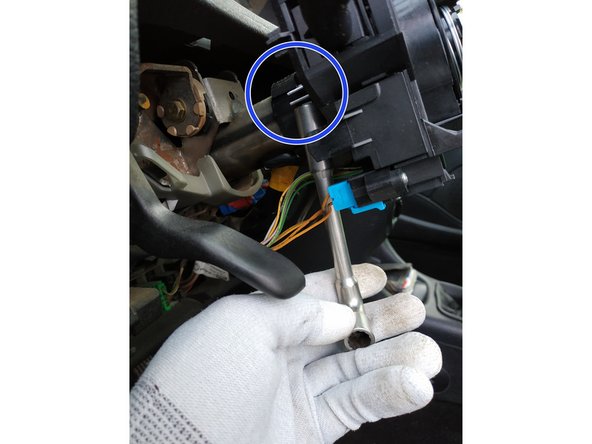
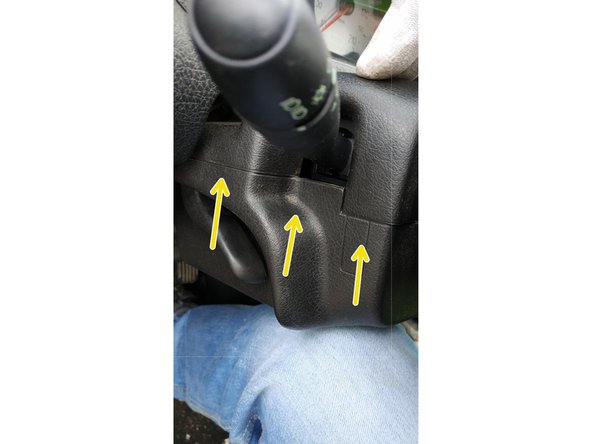
dévisser la vis de maintien du collier métallique du com2000 à l'aide de la clé de 10mm
-
défaire les 2 encoches en plastique en faisant levier avec un petit tournevis plat puis tirer l'ensemble vers soi progressivement sans forcer
-
Il faut faire très attention, c'est très fragile.
-
débrancher les 4 fiches du com2000
-
-
-
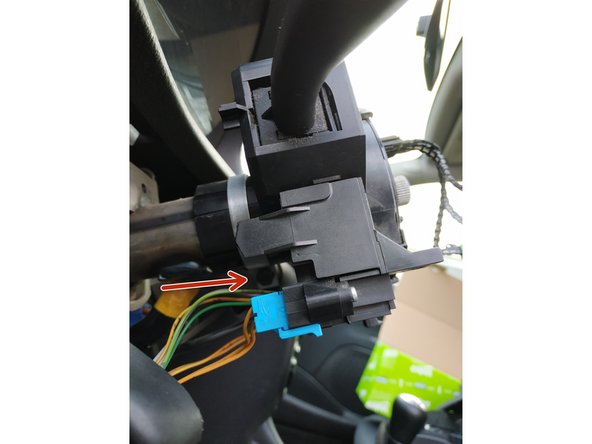
pour enlever la commande au volant de l'autoradio, appuyer sur la languette de verrouillage avec un tournevis plat
-
et tirer
-
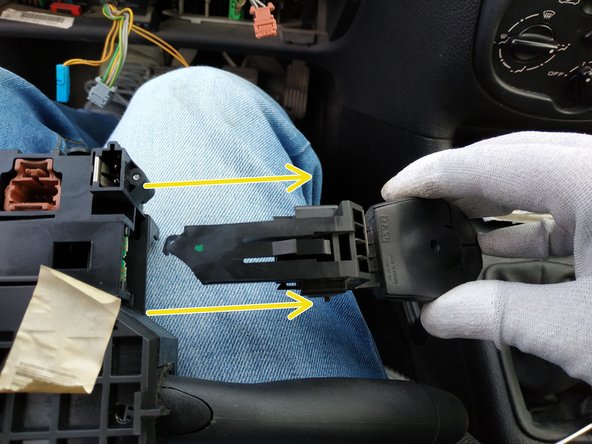
pour l'installer sur le nouveau Com2000, appuyer tout simplement jusqu'à verrouiller
-
Le Com2000 neuf est fourni avec un obturateur en plastique qu'on doit retirer pour monter la commande au volant.
-
On procèdera de la même façon si la voiture possède un limiteur/régulateur de vitesse.
-
-
-
brancher les 4 prises (on doit entendre un "clic")
-
positionner le com2000 et l'enfoncer pour verrouiller les 2 clips (on doit également entendre un "clic")
-
visser la vis du collier métallique avec la clé de 10mm
Bonjour, savais vous a quoi correspond la cose marron svp?
Et quel es là cose des essuies glace ? Merci
Polska86000 - Résolu à la publication Réponse
-
-
-
mettre en place le cache supérieur
-
clipser le cache inférieur
-
et visser les 2 vis de fixation à l'aide de la clé Torx T20
-
-
-
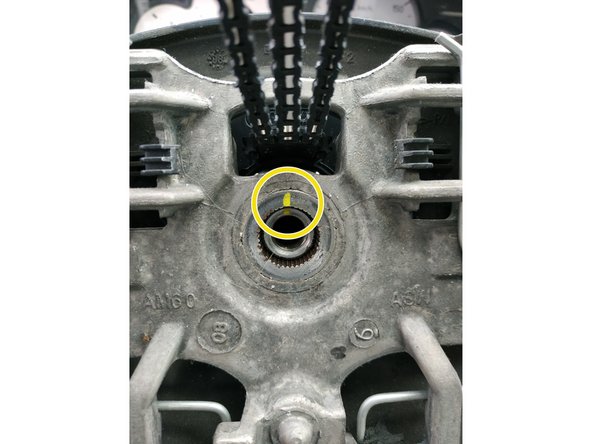
après avoir enlevé la languette blanche d'immobilisation du Com2000, faire passer les prises une par une à travers le trou du volant (en rouge)
-
mettre en place le volant en respectant les repères
-
appliquer du frein filet rouge sur la vis de maintien du volant et serrer (couple de serrage 35 N.m)
-
-
-
connecter la fiche grise
-
et la remettre dans son logement
-
puis rebrancher la fiche rouge sur l'airbag
-
-
-
brancher la fiche jaune et verte
-
et verrouiller le rabat en plastique
-
faire de même pour la fiche jaune et bleue de l'autre côté
-
Il y a des codes couleur sur l'airbag donc aucun risque de se tromper.
-
-
-
s'assurer que tout est en place et qu'aucun fil ne va se pincer, puis présenter l'airbag et appuyer pour verrouiller
-
-
-
rebrancher la batterie
-
tester que tout fonctionne et s'assurer que la voiture démarre
-
Si un voyant d'airbag s'est allumé, il faudra effacer le défaut à l'aide d'un outil diagnostic.
-


Annulation : je n'ai pas terminé ce tutoriel.
4 autres ont terminé cette réparation.
6 commentaires
Bonjour, le com2000 est le gros point faible chez PSA. A mon avis, c’est une erreur d’avoir pris de l’occasion. La nape au niveau du contacteur doit être coupée. Pour le changement, le volant doit rester droit, roues droites. La nape fait une certaine longueur et on risque de la déchirer en braquant à fond si elle n’est pas montée correctement.
a_bosc2000 - Résolu à la publication Réponse
Bonjour à tous, j’ai suivi ce tuto hier pour le changement de mon com2000, une fois tout remonté, j’ai un défaut permanent “Anomalie Airbag”. Selon un garagiste et sa valise, ça viendrait du “contact tournant” du nouveau com2000 (D’occasion). Bon pourquoi pas. En en reparlant au garage qui m’a vendu ce com2000, il me dit qu’il faut respecter un certain angle pour changer un com2000 alors que dans le tuto ci dessus il est préciser : “Tout au long de l'intervention, on veillera toujours à garder le volant bien droit et le Com2000 bien droit. “ Donc que penser ? Qui a raison ? Merci pour vos infos.
perrin shop - Résolu à la publication Réponse
Très bon tuto. Merci beaucoup, cela a été facile grâce à ces explications.
lapertaut christophe - Résolu à la publication Réponse
La bonne procédure recommandée par PEUGEOT est bien le débranchement du collier positif, c’est pour cette raison qu’il y a un collier rapide à débranchement manuel. Même si le résultat est le même avec le débranchement du collier négatif, pourquoi s’embêter à utiliser un outil pour démonter le négatif quand le positif se démonte plus rapidement et à la main …
Pascal BEAUSEIGNEUR - Résolu à la publication Réponse
Il me semble que l'on peut débrancher l'une ou l'autre cosse dans ce cas précis ! Il s'agit juste de couper l'alimentation pour désactiver l'électronique, pas de remplacer la batterie. Ici, on voit que la cosse + est en attente contre le support batterie. Celui-ci est en plastique donc aucun risque de court-circuit.
Après, on peut tout-à-fait déconnecter la cosse -. On peut même retirer la batterie si on le souhaite.
a_bosc2000 - Résolu à la publication Réponse