


Difficulté
Modérée
Étapes
6
Temps nécessaire
01:00:00 - 02:00:00
- Pose d'un attelage sur Peugeot 106 6 étapes

Ce tutoriel a été créé par la communauté
User contributed
Introduction
Après avoir acheté l'attelage correspondant au véhicule nous allons réaliser le montage sur celui-ci. Le montage se fait en retirant la roue de secours et en plaçant des écrous-cages dans les trous déjà présents sur le châssis.
-
-
Déposer la roue de secours en dévissant la vis située dans le coffre.
-
Vous pouvez utiliser un grand tournevis ou la clé de la roue de secours.
-
-
-
Sortir l'attelage de l'emballage et le présenter afin de vérifier sa compatibilité avec le véhicule.
-
Il faut assembler les deux parties qui composent l'attelage de manière provisoire. Ne pas serrer complètement afin de pouvoir régler la position exacte lors du serrage final.
-
-
-
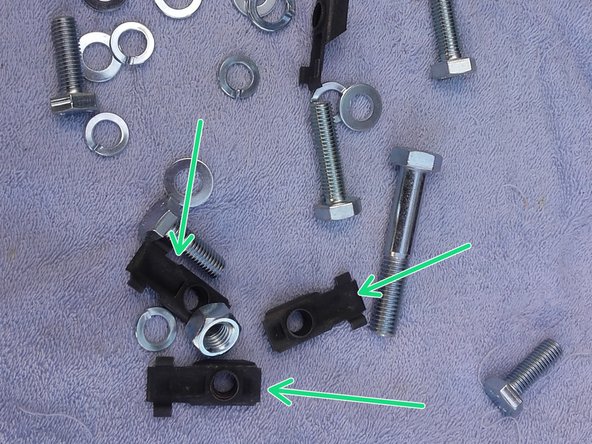
Le kit est livré avec des écrous cages qui se positionnent directement dans les trous du chassis.
-
-
-
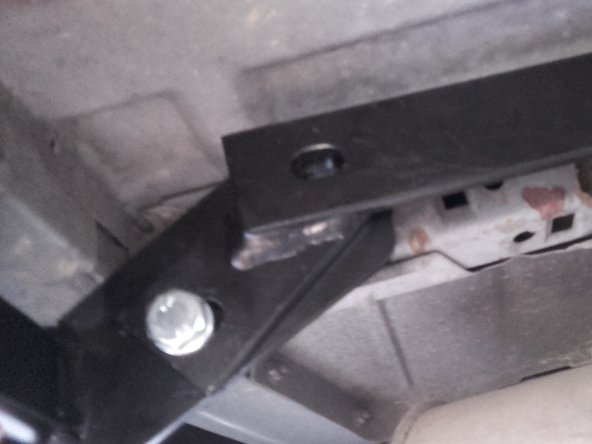
L'attelage est fixé en 5 points sous le chassis du véhicule :
-
2 points de fixation situé à l’arrière du véhicule sous le pare choc.
-
1 point sur la partie droite du châssis (toujours à l'arrière au niveau de l'emplacement de la roue de secours).
-
1 point sur la partie gauche.
-
Enfin 1 point situé vers l'avant coté gauche. (toujours dans l'emplacement de la roue de secours).
-
-
-
Présentez l'attelage et engagez toutes les vis sans serrer.
-
Une fois l'ensemble positionné vous pouvez réaliser le serrage final
-
La boule d'attelage est amovible et tient avec 2 boulons.
-
N'oubliez pas de graisser la boule d'attelage et de la protéger lorsque vous ne l'utilisez pas.
-
-
-
Repositionnez la roue de secours et serrez la patte de maintien (vis dans le coffre).
-


Annulation : je n'ai pas terminé ce tutoriel.
4 autres ont terminé cette réparation.
6 commentaires
Bonjour,
Pourrais-tu me donner les références des boulons et écrous cages/ rondelles?? Merci!
allaisarthur28 - Résolu à la publication Réponse
Il manque toute la partie sur le faisceau et son branchement. C’est dommage. Sinon, tuto très clair.
a_bosc2000 - Résolu à la publication Réponse
vidéo très explicite aucune difficulté a mettre en place merci
goblet frederic - Résolu à la publication Réponse
Merci de prendre le temps de faire ce tuto on gagne du temps grâce à vous!
Romain Catinaud - Résolu à la publication Réponse