


Difficulté
Modérée
Étapes
8
Temps nécessaire
01:00:00

Ce tutoriel a été créé par la communauté
User contributed
Introduction
Il est préférable de ne pas avoir le réservoir plein pour faire cette opération. Lunettes et gants en nitrile recommandés. On travaille avec de l'essence donc bien entendu pas de cigarette ou autre source d'étincelle. Laisser les 4 portes ouvertes pour un maximum de ventilation.
L'utilisation de l'outil spécifique pour extraire le couvercle de la pompe est vraiment indispensable. Il n'est pas possible de faire un travail correct sans lui.
On aura pris soin de relever la référence de la pompe d'origine car il y a 2 modèles sur Logan 1.4 mpi: une avec retour carburant, l'autre sans retour (c'est celle-là que nous avons ici). Il faut vérifier la compatibilité bien en avance pour éviter les mauvaises surprises.
-
-
retirer l'assise de la banquette arrière
-
puis retirer le cache en plastique à l'aide d'un petit tournevis plat
-
-
-
déconnecter la fiche de la pompe, on peut écarter la languette de verrouillage avec un petit tournevis plat (sans trop forcer)
-
puis mettre un chiffon sous la durite d'essence et la déconnecter
-
envelopper la durite dans le chiffon et la mettre de côté pour se faire de la place
-
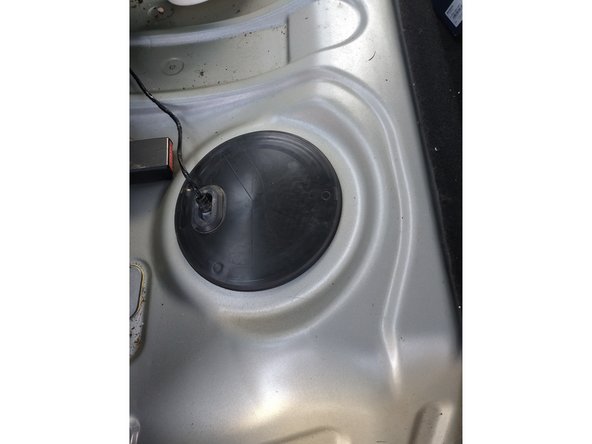
Avant de continuer, nettoyer tout le pourtour de la pompe avec un aspirateur et des chiffons. Il ne faut pas que toutes les impuretés tombent dans le réservoir.
-
-
-
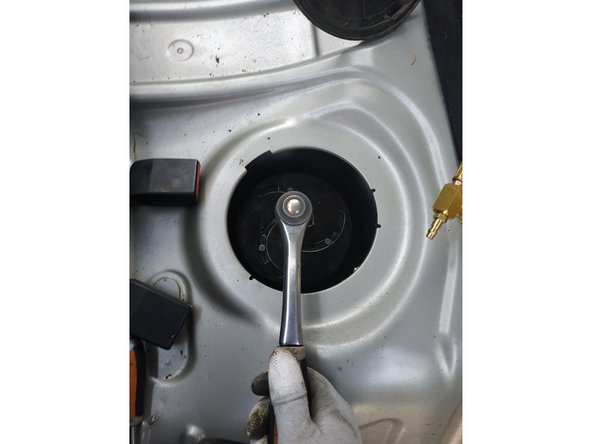
placer l'outil spécifique sur le couvercle de la pompe et commencer à dévisser à l'aide de la clé à cliquet et douille de 15mm
-
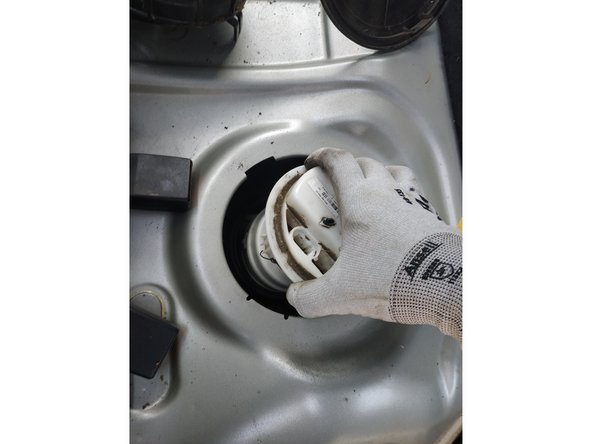
finir de dévisser à la main et retirer le couvercle
-
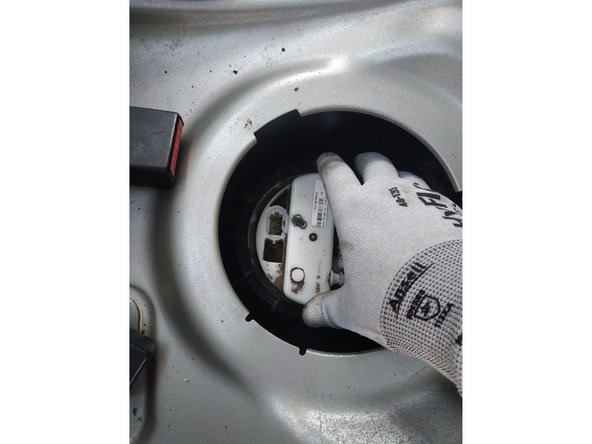
puis retirer la pompe en l'inclinant pour faire passer le flotteur de jauge
-
On aura placé un sceau à proximité dans lequel on mettra immédiatement la pompe pour éviter de mettre de l'essence partout. Ce sceau est à mettre ensuite en sécurité à l'extérieur du véhicule. Il vous incombe de vous débarrasser de la pompe défectueuse et de l'essence de manière responsable.
-
-
-
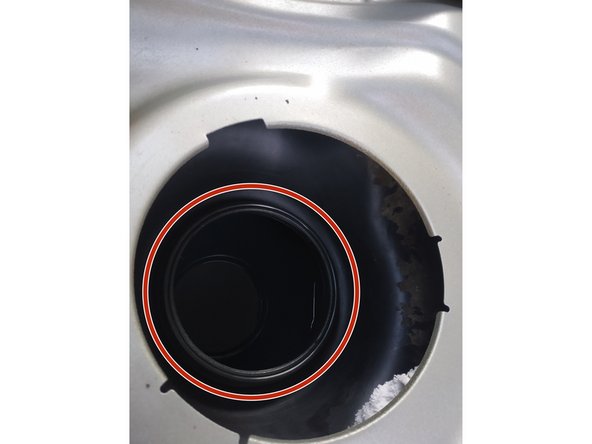
s'assurer que le joint en caoutchouc est bien en place
-
Il n'est pas nécessaire de le remplacer s'il est en bon état, de même que le couvercle de la pompe.
-
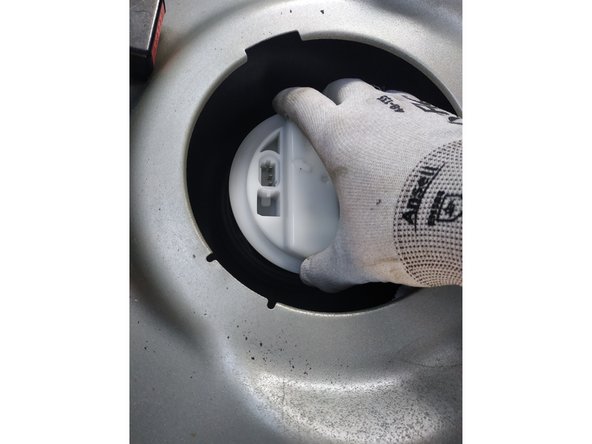
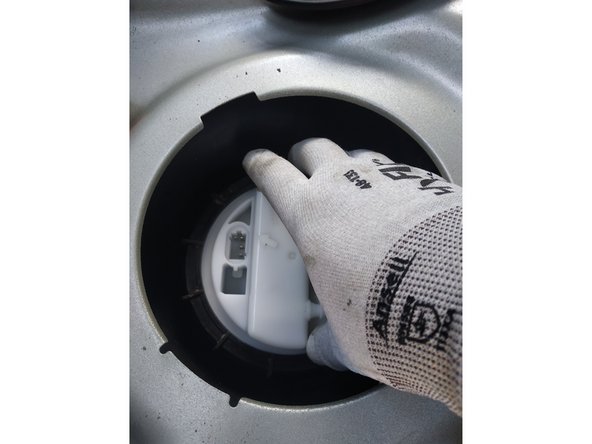
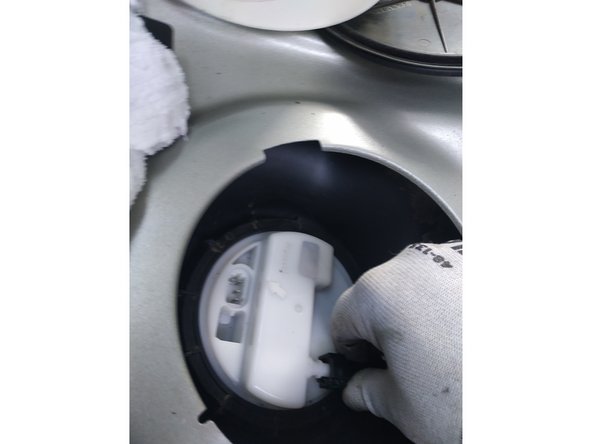
présenter la pompe avec la flèche en arrière (comme sur la photo) en faisant passer le flotteur de jauge en premier
-
poser la pompe contre le réservoir
-
-
-
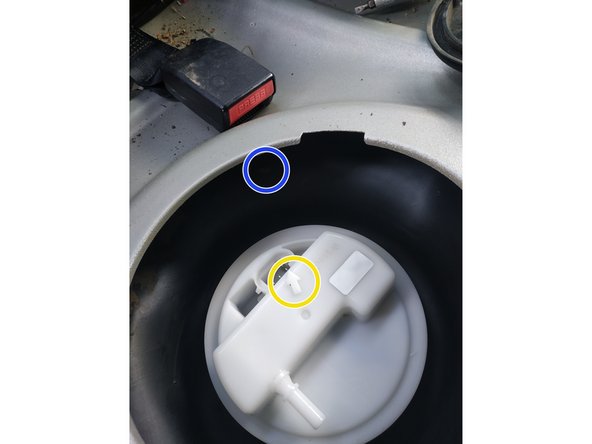
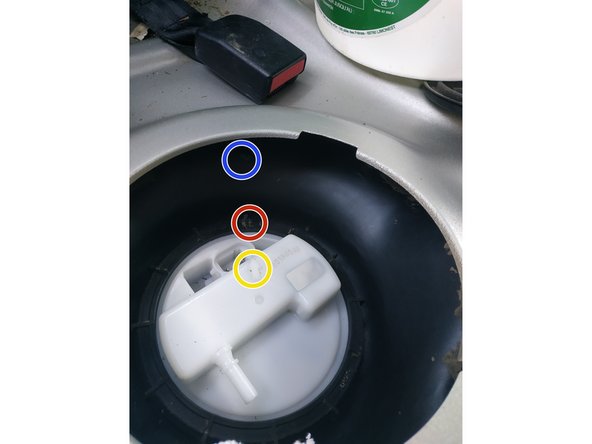
Etape absolument cruciale. Il va falloir aligner 2 repères (flèches).
-
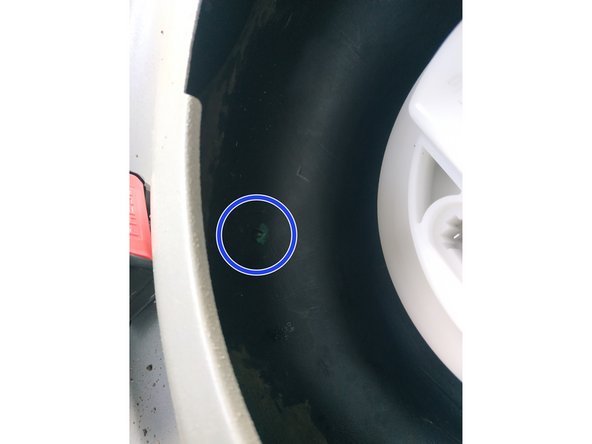
un sur le réservoir (pas très visible sur la photo mais il se voit très bien sur le réservoir)
-
un sur la pompe
-
Ces 2 repères devront TOUJOURS rester alignés.
-
-
-
placer le couvercle autour de la pompe et la maintenir (elle a tendance à remonter)
-
et serrer à la main (il faudra maintenir appuyé d'une main et serrer de l'autre) aussi loin que possible
-
puis placer l'outil spécifique
-
-
-
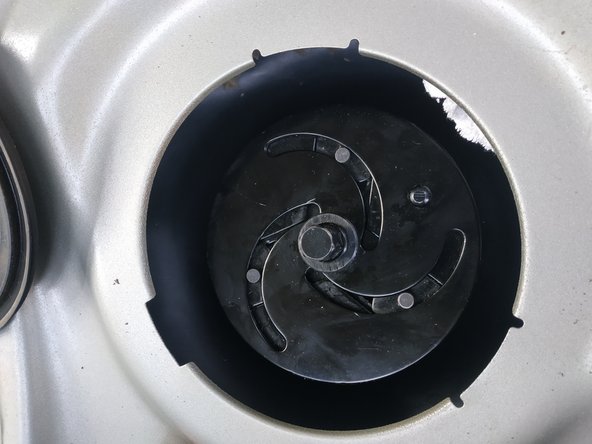
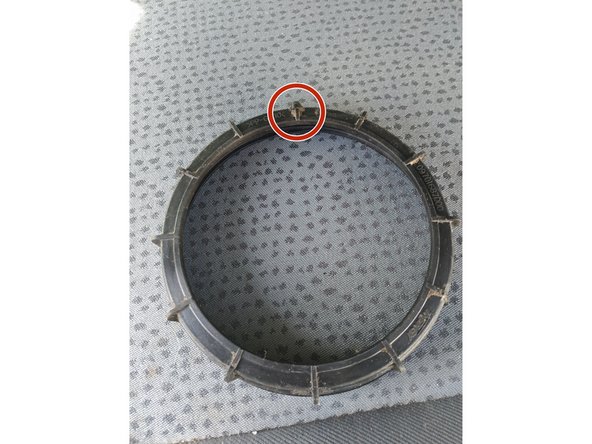
tout comme la pompe et le réservoir, le couvercle a lui aussi un repère
-
serrer avec l'outil
-
quand le repère du couvercle (en rouge) est aligné avec le repère du réservoir (en bleu) et le repère de la pompe (en jaune), le serrage est bon
-
Il faudra serrer progressivement, retirer l'outil pour voir où on en est et s'assurer que la pompe reste dans l'alignement, et continuer le serrage si besoin.
-
-
-
récupérer la durite d'essence qu'on avait mise de côté et la reconnecter
-
rebrancher la fiche d'alimentation
-
Mettre le contact et s'assurer qu'il n'y a pas de fuite puis démarrer la voiture en continuant de contrôler.
-
remettre le cache en place et poser la banquette
-


2 commentaires
Pour info, le couvercle est très serré et l’achat d’un outil spécialisé pour dévisser vous aidera à mener l’opération à bien.
hafed.benchellali - Résolu à la publication Réponse
Je remercie l'auteur de la vidéo, c'est très professionnel. Bravo pour les explications.
Mention : très bien .
hannafzker - Résolu à la publication Réponse