


Difficulté
Facile
Étapes
20
Temps nécessaire
00:30:00

Ce tutoriel a été créé par la communauté
User contributed
Tools
Parts
-
-
Observer la zone de l'emplacement des ampoules de plaque d'immatriculation
-
-
-
lever le coffre et observer la zone en plastique noir au niveau du coffre et du parebrise arrière (il est facilement identifiable
-
-
-
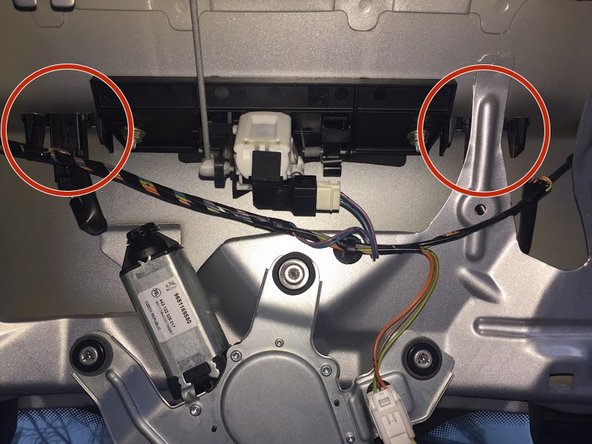
Commencer par déclipser le cache plastique pour y voir plus clair.
-
On s'attaque par ce coté (en rouge) car il n'y a pas d'attache et on accède aux premiers clips plus facilement.
-
-
-
Utiliser un tournevis plat ou tout outils plat mais résistant pour déclipser le cache.
-
Généralement les clipse se détachent facilement
-
-
-
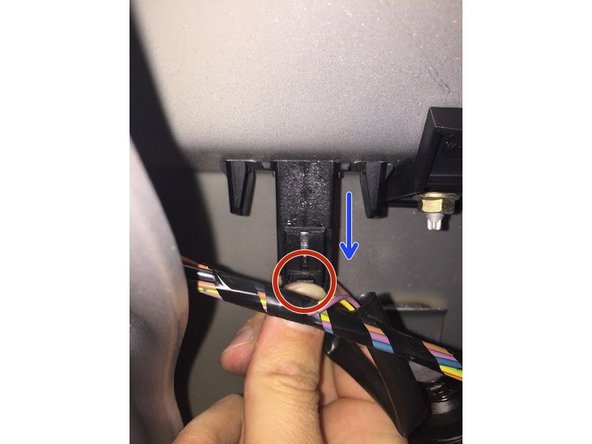
Voici de plus près le support
-
Il convient de le débrancher avant de le sortir (2eme photo), pour se faire appuyer sur la partie basse (en rouge) puis tirer (en bleu).
-
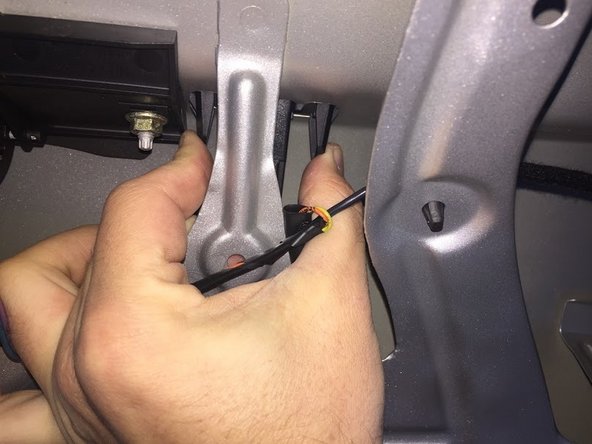
Une fois le connecteur retiré , le support est prêt à être enlevé
-
-
-
Pour retirer le support , presser les 2 pattes de maintient (parties bleu) pour liberer le support qui est tenu par les encoches (en rouge)
-
-
-
Pour le coté droit je conseil de laisser le câble branché car il n'est pas facile d'accès . L'enlever une fois le support enlevé.
-
-
-
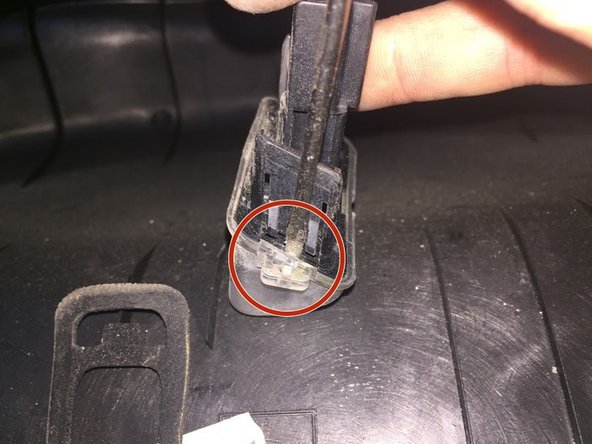
Une fois le joint déposé on s'attaque enfin à l'accès à l'ampoule .
-
-
-
Utiliser un tournevis plat assez (petit et fin) et le mettre dans la petite encoche.
-
Effectuer un léger levier pour détaché la partie noir de la partie transparente .
-
Effectuer avec peu de force sous peine de casser le plastique
-
-
-
Nous avons enfin accès à l'ampoule
-
L'ampoule peut être retiré sans problème en tirant doucement dessus
-
-
-
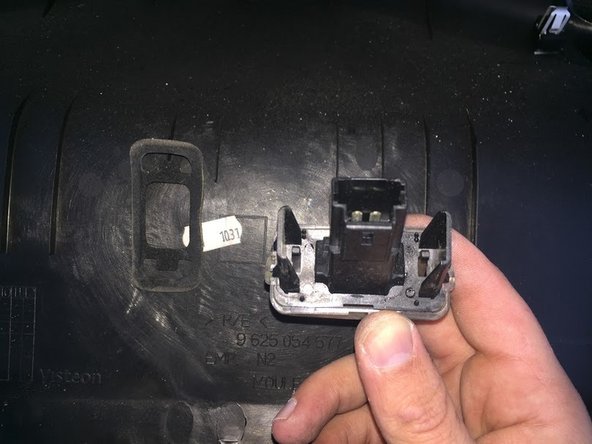
Voici l'ampoule défectueuse comparer avec la nouvelle ampoule
-
-
-
Une fois la nouvelle ampoule insérée, on vas emboiter les deux parties du support .
-
Pour se faire on va employer la même méthode que pour l'enlever . Effectuer un léger levier pour ré-emboiter les deux partie
-
Ne pas chercher à clipser sous peine de casser le plastique
-
-
-
Une fois les deux parties emboités nous pouvons tout remettre en place.
-
Veiller à bien remettre dans l'encoche le support et que le joint soit bien en contacte à plat .
-
Le support ce clipsera facilement une fois en place
-
-
-
Pour refixer le cache plastique noir du coffre , commencer par emboiter cette tige en plastique pour faciliter le remontage
-
Enfin reclipser les autres parties en tapant d'un coup sec chaque clips.
-


Annulation : je n'ai pas terminé ce tutoriel.
6 autres ont terminé cette réparation.
6 commentaires
Bonjour,
Il existe une méthode bien plus simple pour changer une ampoule d'éclairage de plaque sur 206 !
Je viens de changer une lampe avec cette méthode, cela m’a pris 1 minute, sans avoir besoin de démonter tout l’intérieur du hayon (au risque de casser un ou plusieurs clips).
Je n’ai pas fait de vidéo, mais je vous communique le lien d’une vidéo qui explique cette méthode :
f.karpathy - Résolu à la publication Réponse
Merci pour ce tuto super bien fait, et qui m’a très bien aidé dans ce changement que j’appréhendais, ne sachant par où commencer. MERCI.
Patrick NAVARRO - Résolu à la publication Réponse
Super tuto ! Opération effectuée en a peine plus de 5 m. Merci
julien etienne - Résolu à la publication Réponse
Super tutoriel. Merci beaucoup. Ça évite de forcer et de casser des pattes de fixation.
Sebastien Biciano - Résolu à la publication Réponse