


Introduction
Les symptômes d'une biellette défectueuse sont assez simples :
- Vous n'arrivez plus à passer une vitesse ou enclencher la marche arrière.
- Le levier de vitesse montre un jeu important, même avec une vitesse enclenchée.
Cela arrive souvent après des passages de rapports trop brutaux en conduite sportive.
-
-
Commencer par lever l'avant du véhicule avec un cric jusqu'à ce que les roues avant ne touche plus le sol
-
Placer des chandelles sous le véhicule pour le sécuriser
-
-
-
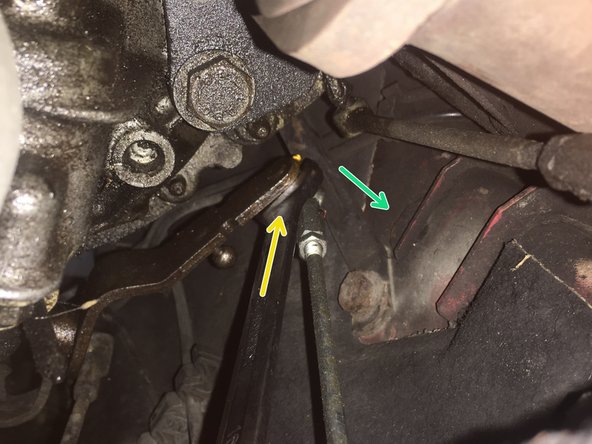
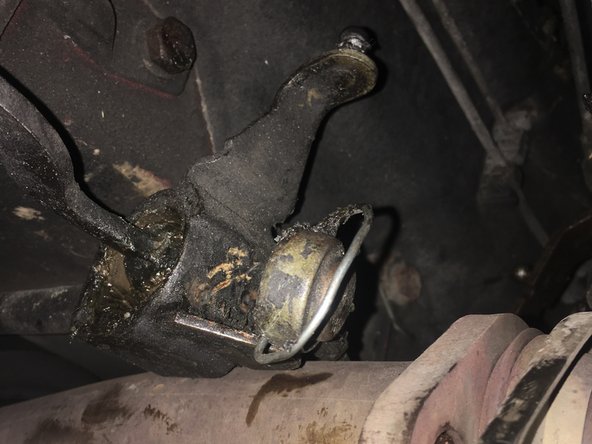
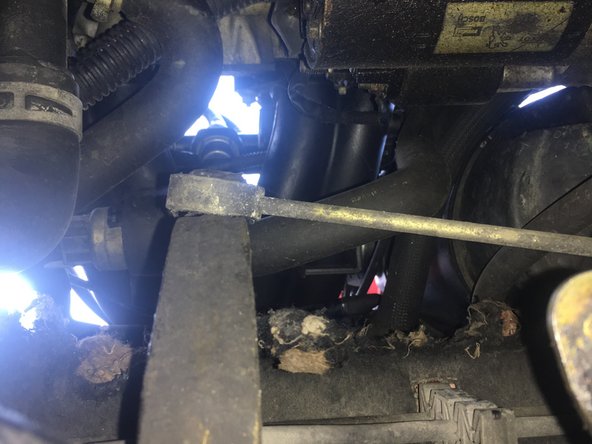
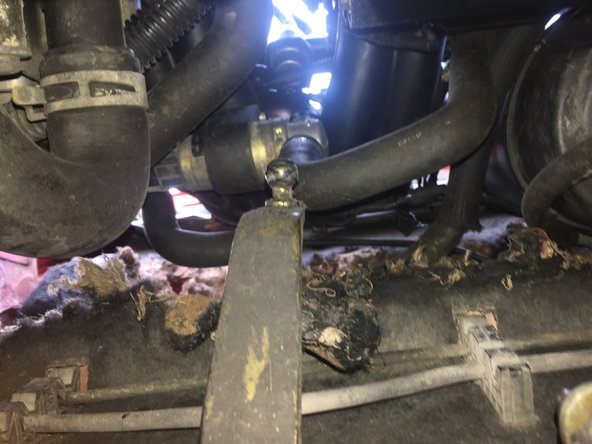
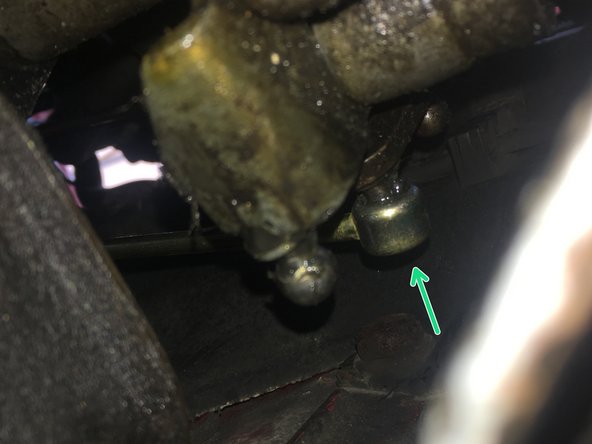
Les trois biellettes se situent entre la boite de vitesse et l'habitacle de la voiture, sous le moteur. Vous les trouverez facilement en suivant le chemin du collecteur d'échappement
-
Vous disposez d'un total de trois biellettes, ici, côté levier de vitesse
-
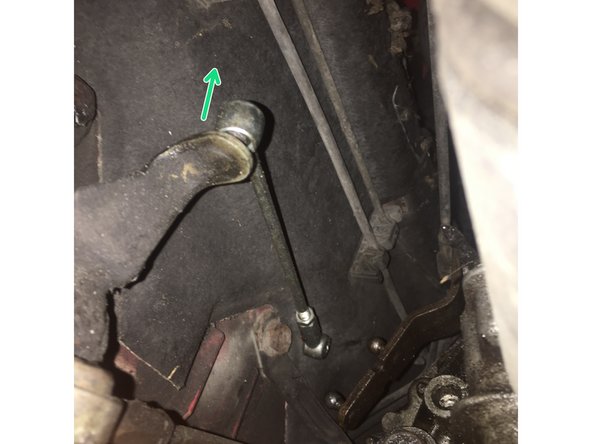
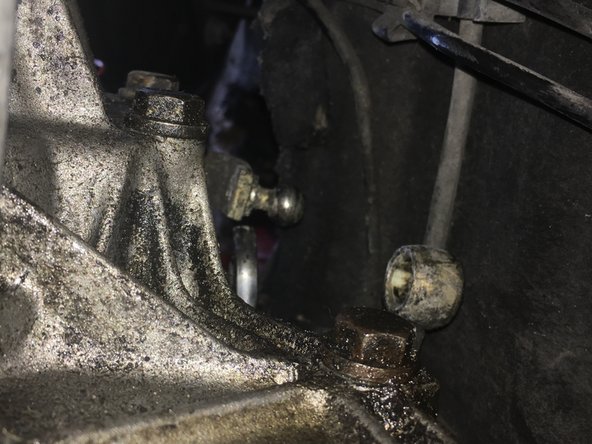
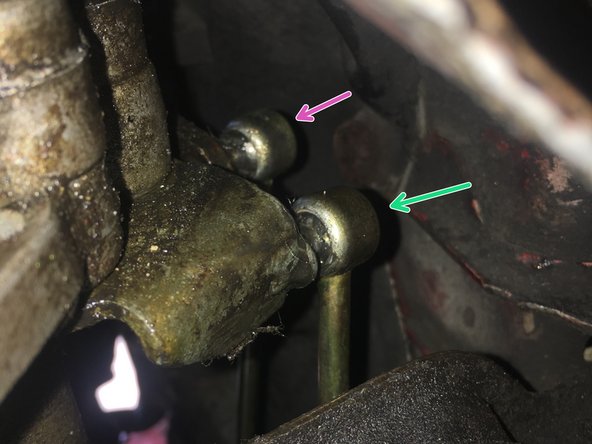
Ici, côté boite de vitesse
-
-
-
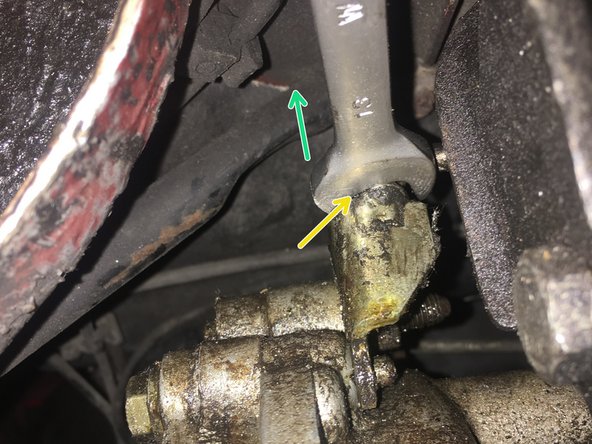
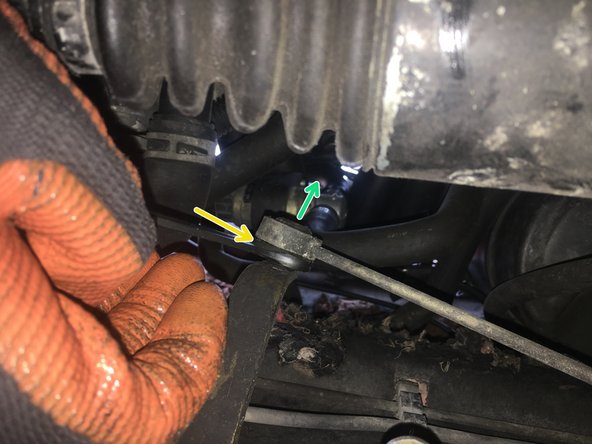
Pour les grosses têtes de biellette utilisez une clé plate de 17 afin de faire levier. Placez la clé plat entre la tête et son support
-
Faites levier pour décrocher la tête de la biellette
-
-
-
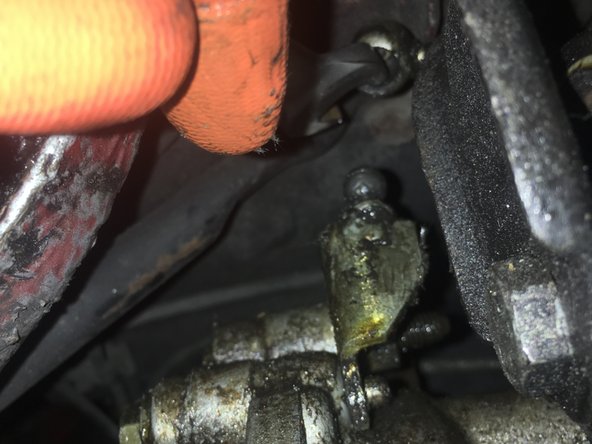
Placer la clé plate de 13 pour la petite tête de la seconde biellette
-
Faire levier et décrocher la biellette
-
-
-
Placer la clé plate de 17 entre la tête de la biellette et son support
-
Faire levier pour déposer la biellette
-
-
-
La troisième et dernière biellette est la plus longue et son emplacement plus haut (les deux premières sont en fait le même modèle de biellette)
-
Placer la clé plate de 13 entre la tête et son support
-
Faire levier pour déposer la première tête de la biellette
-
-
-
Placer la clé plate de 17 pour la grosse tête de la dernière biellette
-
Faites levier pour déposer la dernière biellette
-
-
-
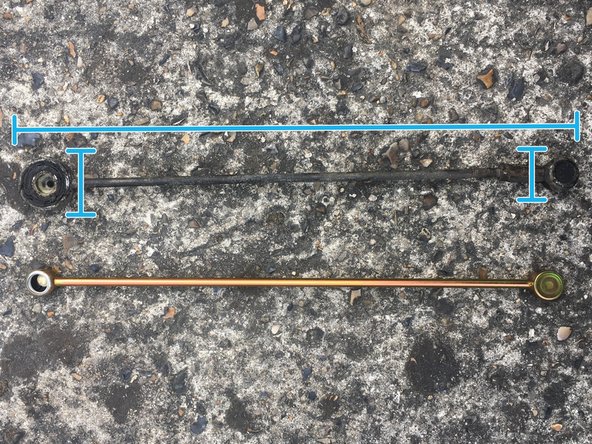
Une fois les trois biellettes déposés vous devez maintenant comparer les nouvelles biellettes afin de vous assurer de replacer les bonnes pièces
-
Parmi les trois biellettes déposées, une avait déjà été "réparée"
-
Pour la nouvelle biellette longue n'est pas semblable car elle ne possède par de grosse tête mais le diamètre du trou et sa longueur son semblables à l'ancienne
-
Toutes les biellettes sont semblables, je peux maintenant reposer les nouvelles !
-
-
-
Je commence par reposer la troisième biellette car il s'agit de la plus difficile d'accès et j'y aurait difficilement accès une fois les deux autres reposés
-
Il est conseillé de nettoyer/dégripper l'emplacement des biellettes avec un dégrippant. Vous devez ensuite y appliquer une noisette de graisse pour contribuer à sa longévité.
-
Pour reposer la biellette, rien de plus simple : emboîter la tête de biellette sur son support. Ne pas hésiter à forcer
-
-
-
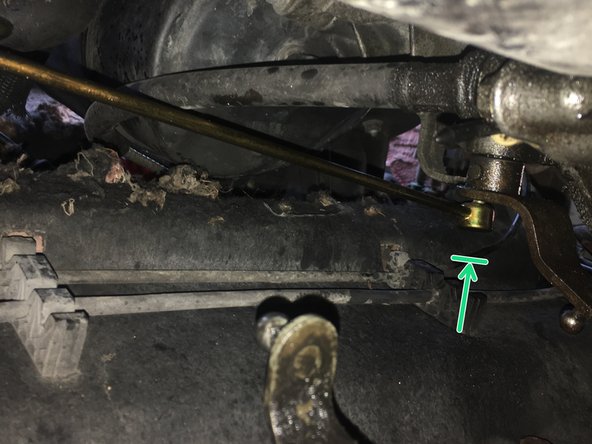
Replacer la seconde biellette de la même façon
-
La grosse tête de la biellette se place côté levier de vitesse
-
Ne pas se tromper d’emplacement du côté de la boîte de vitesse, un support de biellette est libre volontairement pour un réglage.
-
Photo 2 : côté boite de vitesse
-
-
-
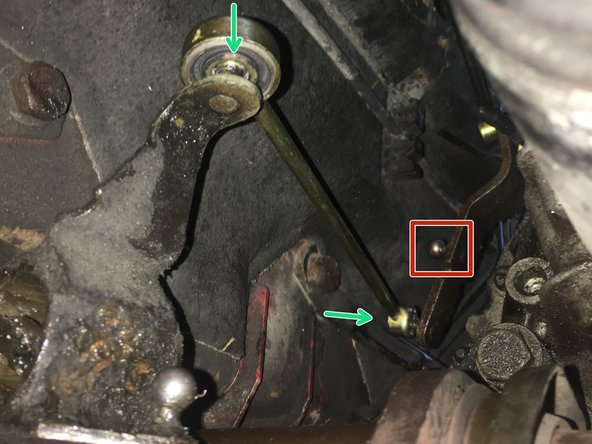
Replacer la première biellette de la même façon
-
La première biellette se place juste en dessous de la seconde
-
Biellette n°2
-
Photo 2 : Côté boite de vitesse
-
-
-
Vous venez de changer la tringlerie de boite de vitesse, voici un aperçu des trois biellettes montées.
-
Essayez le passage des vitesse y compris la marche arrière avant de prendre la route.
-


Annulation : je n'ai pas terminé ce tutoriel.
3 autres ont terminé cette réparation.

Équipe
