


Introduction
Étapes de démontage et remontage des amortisseurs avant sur Peugeot 3008 de 2010 - 1.6 HDi 16V FAP 110 cv
-
-
Repérer la position avant dépose
-
Déposer les joints de chaque coté puis le joint centrale
-
Déposer les bras d'essuie-glace
-
L'utilisation d'un extracteur de bras d'essuie glace ou d'un extracteur 3 griffes est généralement nécessaire pour éviter toute casse
-
-
-
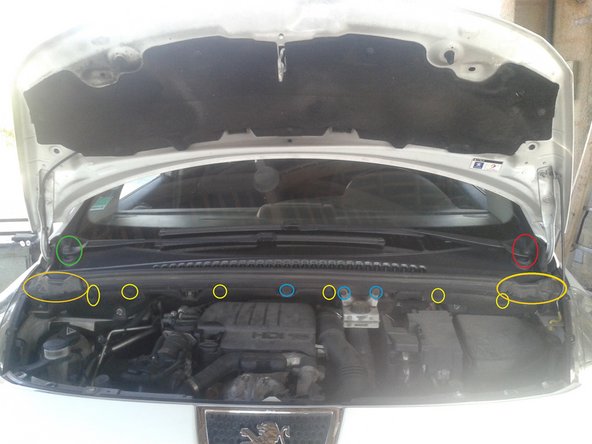
Déposer les 6 agrafes pour retirer la traverse
-
Déposer la vis centrale
-
Déposer les vis du bocal de liquide de frein
-
Déposer les vis de fixation de chaque coté
-
Attention de ne pas renverser de liquide de frein
-
Dégrafer les garnitures de pare-brise en les poussant vers le haut et l'extérieur en même temps.
-
-
-
Dégrafer et déposer la grille d'auvent
-
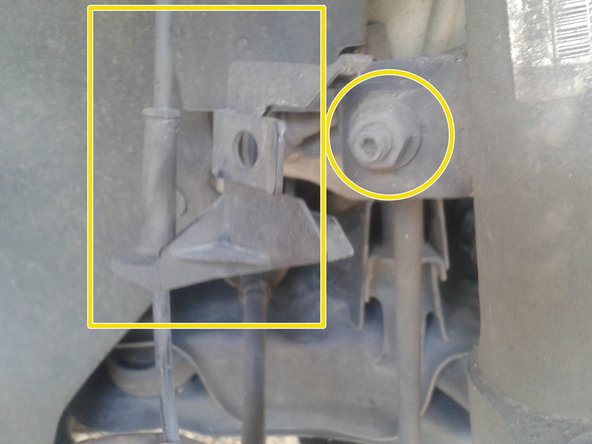
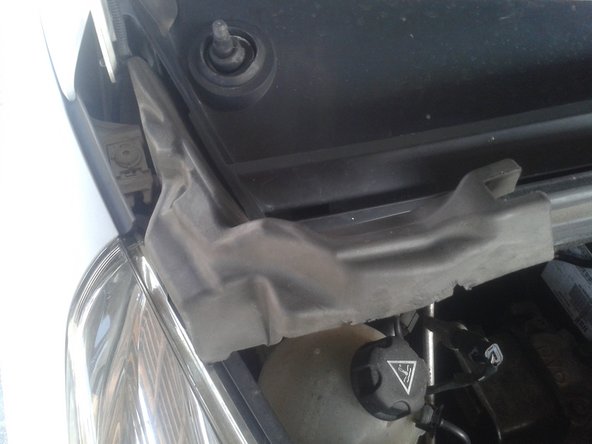
Extraire les durites d'évacuation d'eau dans les ailes, avants de chaque cotés
-
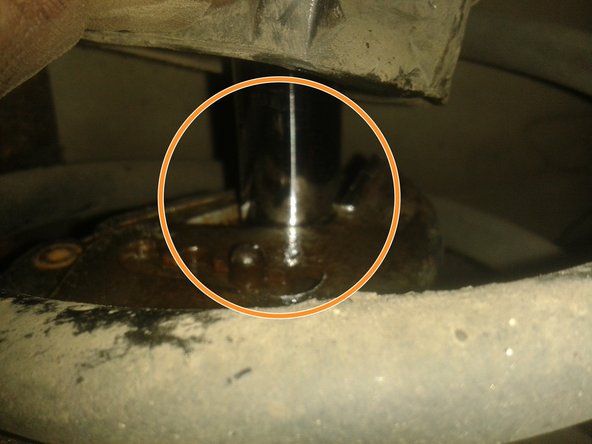
On aperçoit la vis de tête d'amortisseur
-
-
-
Démonter les roues en sécurisant l'auto sur des chandelles
-
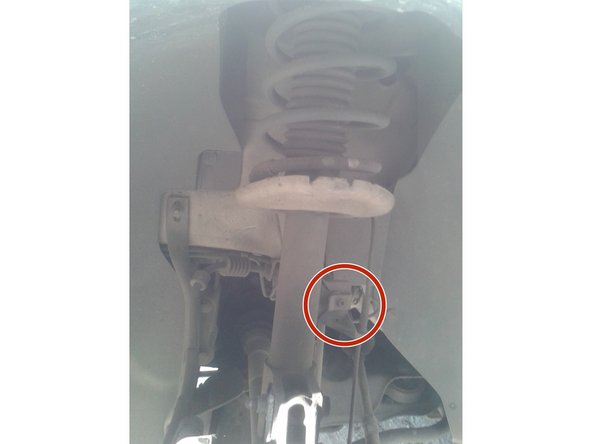
Dégrafer le support de câble du capteur ABS
-
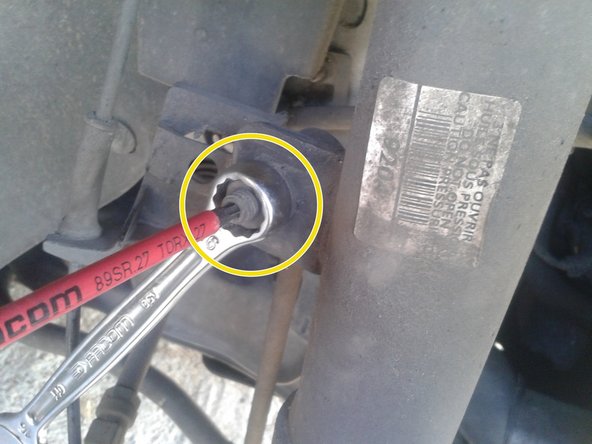
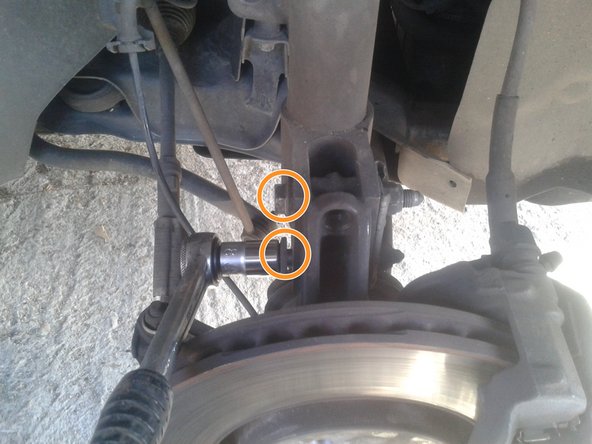
Dévisser a l'aide d'une clé de 16 et d'une clé Torx T30 l'écrou de la biellette de barre stabilisatrice fixer sur l'amortisseur
-
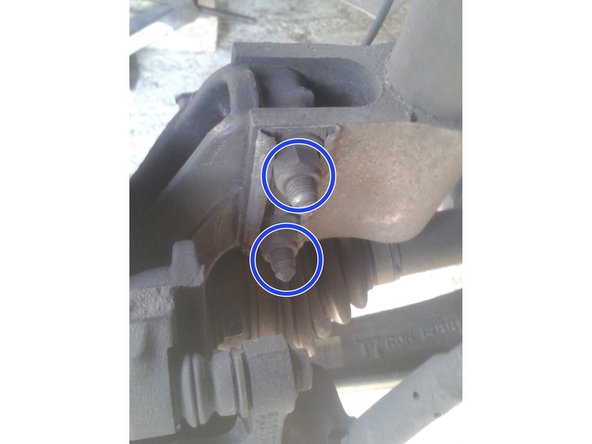
Dévisser les deux écrous avec une douille de 18, ne pas retirer les boulons
-
-
-
Compresser les ressorts d'amortisseur
-
L'utilisation d'un compresseur de ressort est obligatoire
-
Dévisser l'écrou de tête d'amortisseur avec une clé a oeil de 21 et une clé allen H7
-
-
-
Sortir l'amortisseur délicatement en faisant attention de ne pas tirer sur le câble de capteur ABS, sur le câble de frein et de ne pas percer le soufflet de cardan.
-
La clé allen "bas de gamme" ayant cassé lors du dévissage du premier amortisseur
-
Pour bloquer l'amortisseur j'ai utilisé une pince étau au niveau du bras d'amortisseur
-
-
-
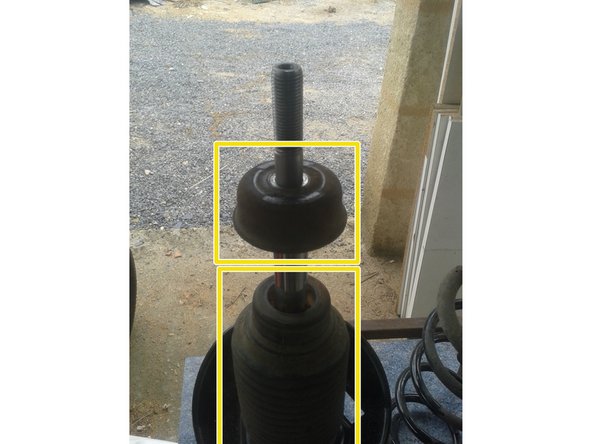
Dévisser le boulon qui maintien la butée en gardant le ressort en compression
-
Si le ressort n'est pas assez compressé, la butée risque de s'expulser avec puissance. NE PAS FAIRE CETTE MANIPULATION SANS COMPRESSER LE RESSORT.
-
Par souci de sécurité, en plus de mon compresseur de ressort , j'ai ajouté une sangle d'arrimage.
-
-
-
Placer la butée élastique sur le nouvel amortisseur
-
Rajouter le soufflet anti poussière avec sa bague, placer et compresser le ressort.
-
Placer la butée d'amortisseur et serrer l'écrou avec une clé a oeil de 21 et une clé allen H7.
-
-
-
Positionner la tête d'amortisseur puis visser légèrement la vis de tête de manière à laisser du jeu à l'amortisseur.
-
Visser les deux boulon de fixation de l'amortisseur.
-
Visser la biellette de direction, agrafer le support de câble du capteur ABS
-
Serrer complètement le boulon de tête d'amortisseur avec une clé à œil de 21 et une clé allen H7;
-
Vérifier qu'aucun câble ni soufflet de cardan est subi un dommage, si lors de la manipulation vous avez touchez vos disque, il est préférable de les dégraisser avant remontage de la roue.
-
-
-
Repose de la grille d'auvent (sens inverse de la dépose)
-
Repose du compartiment d'auvent et des joints (sens inverse de la dépose)
-
repose des bras d'essuie-glace (sens inverse de la dépose)
-
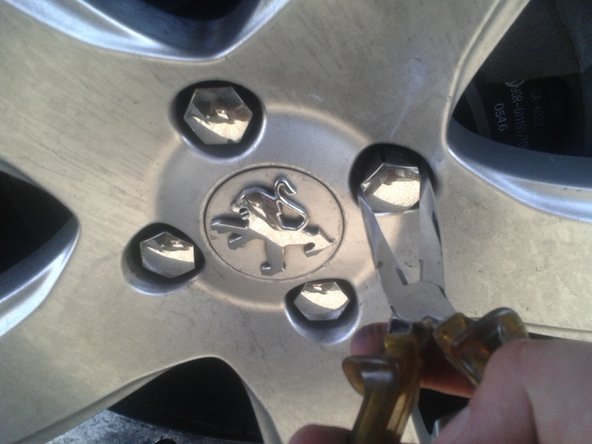
Repose des roues
-
Ne pas hésiter à changer les boulons antivol qui on tendance à s'arrondir et par conséquent impossible à dévisser.
-


Annulation : je n'ai pas terminé ce tutoriel.
14 autres ont terminé cette réparation.
26 commentaires
Comment le sortir de la jambe de force vous avec une astuce
frederic.garin91 - Résolu à la publication Réponse
très.bien expliqué et bien.equipe travail propre merci.cdlt maasch Marius
marius.maasch - Résolu à la publication Réponse
Bonjour . Il ne sert à rien de compresser le ressort sur la voiture.
L’écrou de tête de l’amortisseur doit être enlevé avant de lever le véhicule ça évite d’avoir à le tenir avec une clé allen de 7.
didier_lydia - Résolu à la publication Réponse