


Introduction
Motorisation du véhicule 1.6 HDi FAP 16V 110 cv
-
-
Il est nécessaire de déposer les bras d'essuie glace avant et les caches en plastique sous le pare brise pour accéder aux fixations supérieures des amortisseurs.
-
Utiliser une douille de 18 mm pour dévisser l'écrou et utiliser du ruban adhésif, comme point de repère, pour la position des bras d'essuie glace.
-
-
-
Utiliser une douille torx T20 pour déposer les fixations du réservoir de liquide de frein.
-
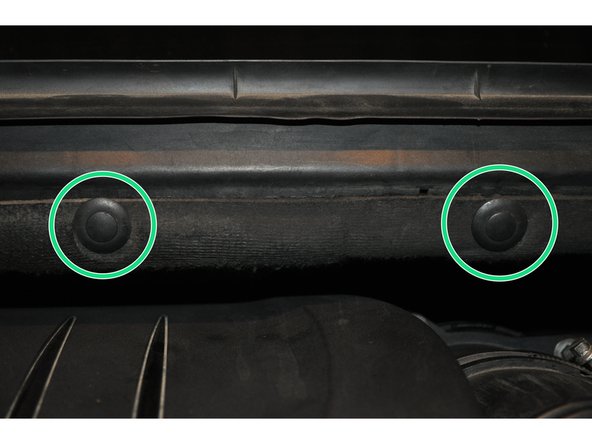
Pour les caches en plastique, commencer par les vis de 10 mm.
-
Puis à l'aide d'un tournevis, enfoncer le centre des agrafes et les retirer.
-
-
-
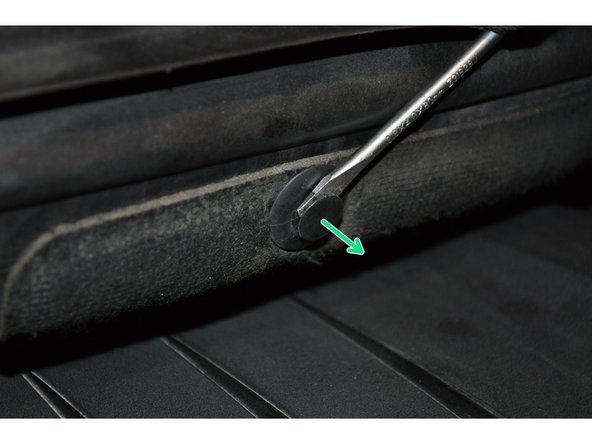
Continuer à dégrafer les attaches plastique avec un tournevis plat.
-
-
-
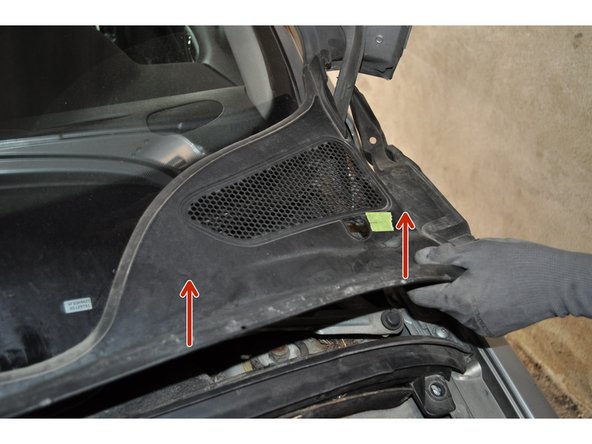
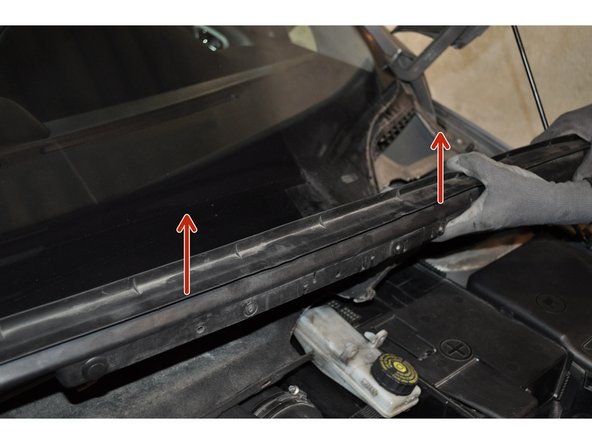
Soulever les caches en plastique pour finir leur dépose.
-
-
-
Lever et caler l'avant du véhicule. Déposer les roues avant.
-
Mise en sécurité du véhicule : démontage et remontage de la roue
-
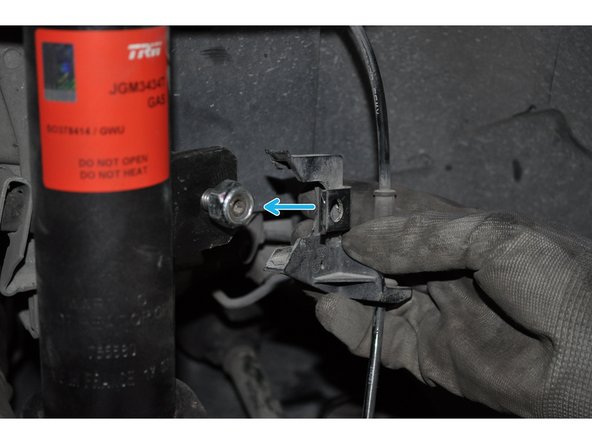
Retirer la fixation du câble d'ABS.
-
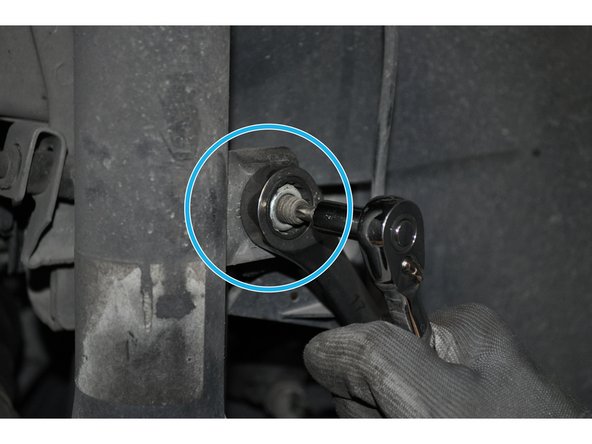
Utiliser une clé de 16 mm et un embout torx T30 pour déposer la rotule supérieure de la biellette de barre stabilisatrice.
-
-
-
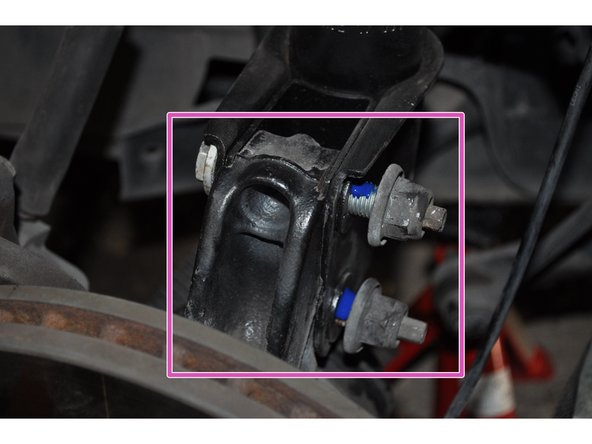
Utiliser une douille de 18 mm et une clé de 18 mm pour dévisser les boulons de fixations sur le moyeu de roue.
-
-
-
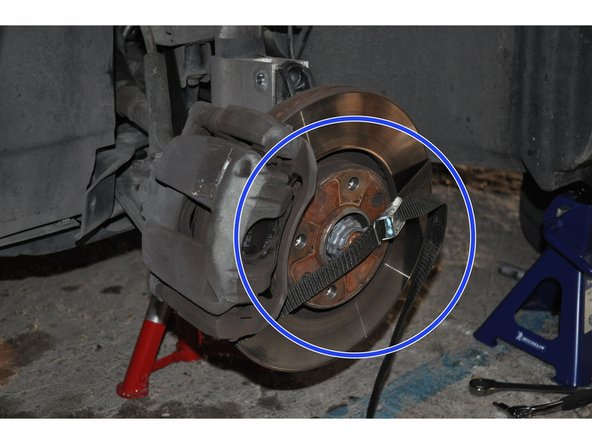
Avant de retirer les vis, placer une sangle sur le moyeu, pour ne pas déboîter l'ardre de transmission.
-
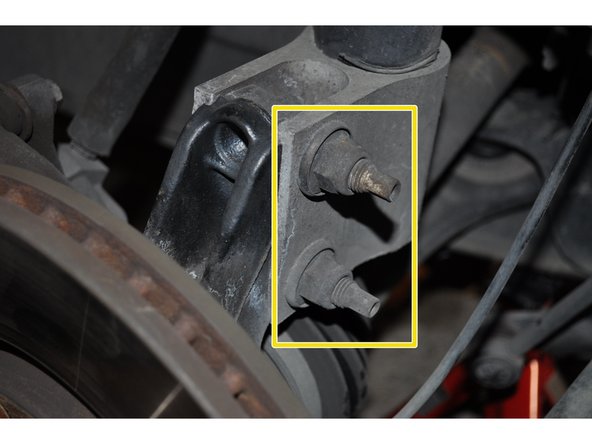
Déposer les vis et écarter le bas de l’amortisseur par rapport au moyeu.
-
-
-
Utiliser une clé contre coudée de 21 mm et un embout torx T30 pour déposer la vis de fixation supérieure.
-
Maintenir l’amortisseur par dessous avant de retirer complètement l’écrou.
-
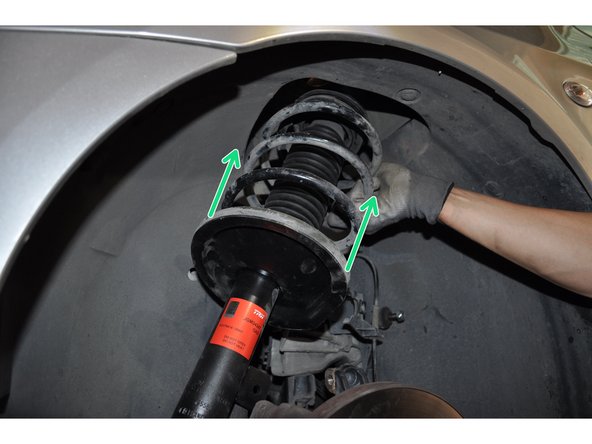
Déposer l’amortisseur. Si l’encombrement empêche la dépose, utiliser un compresseur de ressort.
-
-
-
Compresser le ressort de manière à séparer l’amortisseur du ressort. Plus vous vissez les crochets et plus le ressort sera comprimé ; il possède désormais du jeu.
-
L'opération est très dangereuse L'outil mal placé ou mal fixé sur les spires du ressort pourrait lâcher et risquer de vous blesser.Utiliser plutôt le compresseur de ressorts
-
Dévissez l'écrou central avec une clé torx et d'une clé à œil.
-
Vérifiez l'état des coupelles (ou butées). Le roulement se trouvant à l'intérieur ne doit pas être grippé et les caoutchoucs ne doivent pas comporter de fissures. Si c'est le cas, changez-les.
-
Assembler le nouvel élément de suspension sur le modèle de l'ancien.
-
-
-
Reposer le nouvel amortisseur et placer le patin plus l'écrou par dessus pour le maintenir en place.
-
-
-
Remettre en place les boulons sur le moyeu avec du frein filet. Serrer au couple.
-
Serrer également l'écrou de fixation supérieure.
-
-
-
Remettre en place la biellette et le câble d'ABS.
-
Reposer les caches en plastique et les bras d'essuie glace.
-


Annulation : je n'ai pas terminé ce tutoriel.
11 autres ont terminé cette réparation.

4 commentaires
Bonjour , je viens d'acheter un jeu d'amortisseur pour 307 1.6 hdi 90 cv sur oscaro .le montage s'est bien passer mais il y a une chose qui me chiffonne les deux trous sur les coupelles je me suis dis qu'ils devaient se loger dans des tetons de centrages au niveau du logement mais rien à quoi servent ils?. cordialement
CYRIL DECHAMBE - Résolu à la publication Réponse
Bonjour, désolé je ne suis pas sur de comprendre votre question. Cependant, il est très important de comparer au fur et à mesure de la dépose, l’ancienne et la nouvelle coupelle (et toute autre pièce de rechange). Il peut s’agir d’un repère de positionnement ou bien d’un détrompeur.
Bonjour, il est conseillé de faire contrôler la géométrie du train avant.
Cordialement.
hemissi-nizar - Résolu à la publication Réponse
Bonjour merci pour le tuto
Faut il refaire un parallélisme suite au changement de ressort avant d'un côté ?
Merci de répondre sur topytop@hotmail.fr
Cordialement
turgay avvuran - Résolu à la publication Réponse