


Introduction
Après avoir vidangé le liquide de refroidissement, on retire l'ancien thermostat, on nettoie son emplacement, et remonte le nouveau. Enfin on rempli le circuit de refroidissement avec du liquide approprié. Il ne faut pas oublier de chasser l'air du circuit : c'est la purge du liquide de refroidissement.
-
-
Récupérer le liquide de refroidissement dans un bac et le jeter en déchetterie.
-
Pour le remplissage il faut compter environ 5 litres de liquide de refroidissement.
-
Repérer le bouchon de remplissage.
-
Repérer le thermostat et la durite qui y est raccordée.
-
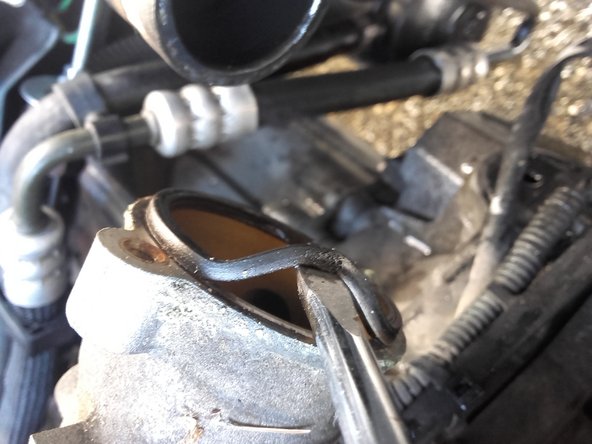
Défaire le collier qui tient la durite en utilisant la pince multiprise.
-
Attention à ne pas abîmer le radiateur qui se situe à proximité.
-
-
-
Reculer le collier, et retirer la durite.
-
Si le démontage est difficile faites tourner la durite sur elle même plutôt que de tirer dessus.
-
Retirer les 2 vis de 10.
-
-
-
Retirer le boitier de thermostat.
-
Ne pas oublier de retirer l'ancien joint.
-
Pour une vidange complète du circuit de refroidissement vous devez ouvrir la vis de purge qui se trouvent sous votre radiateur coté conducteur.
-
-
-
Placer le nouveau boitier de thermostat avec son joint neuf.
-
Serrer modérément les vis de 10 (carter en aluminium, il ne faut donc pas "foirer" les filetages).
-
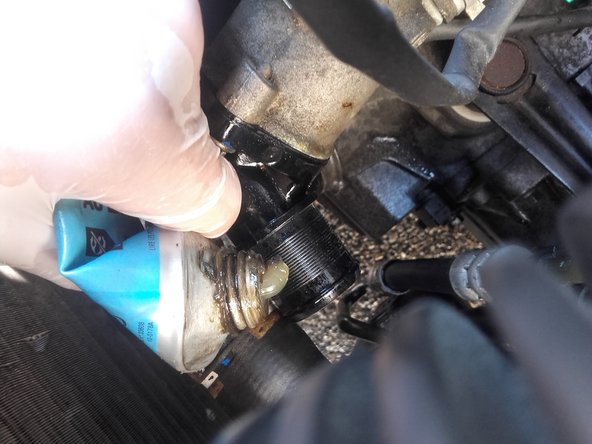
En appliquant un peu de graisse avant de remonter la durite vous facilitez le prochain démontage.
-
Remonter la durite et son collier.
-
-
-
Ouvrir les 3 purgeurs :
-
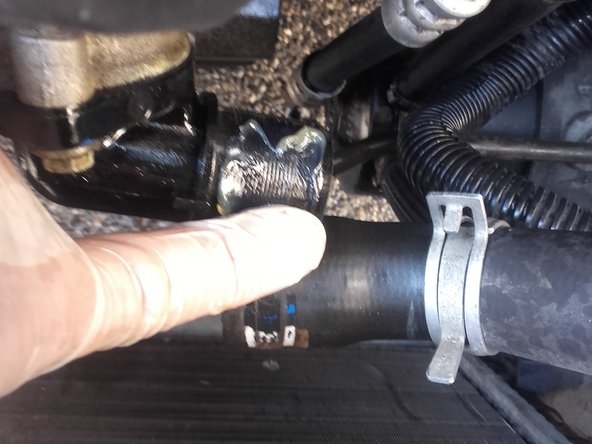
Sur la durite de chauffage (coté passager).
-
Sur le boitier de thermostat (Attention vis fragile ne pas serrer fort ! lors de la fermeture).
-
Sur le haut du radiateur, robinet "quart de tour".
-
Remplir avec du liquide approprié par le bouchon de remplissage et fermer les purgeurs un par un lorsque ces derniers débordent et que l'eau s'écoule de façon fluide (signe que toute les bulles d'air on été chassés).
-
-
-
Ne pas dépasser le niveau max lors du remplissage.
-
Rouler quelques minutes (jusqu'au déclenchement des ventilateurs du radiateur).
-
Attendre que le moteur soit froid (20 à 30 minutes).
-
Compléter le liquide jusqu'au niveau max.
-


Annulation : je n'ai pas terminé ce tutoriel.
10 autres ont terminé cette réparation.
3 commentaires
Bonsoir, tuto bien réalisé. Je me permets juste 2 remarques: 1) Lors de la 1ère mise en température, il vaut mieux à mon sens faire tourner le moteur à l'arrêt à un ralenti accéléré (1500-2000 trs/min) pour éviter des surrégimes malheureux en roulant et surtout pouvoir couper juste après la mise en route du ventilateur // 2) Pas de graisse pour emmancher la durite (attaque le caoutchouc), plutôt du savon ou du LDR. Cordialement, Xavier.
Xavier BIGAND - Résolu à la publication Réponse
Bonjour Sabine . Je suis un bricoleur averti de 58 ans et je trouve votre tuto trés clair et précis . J ‘ai bien aimé les chapitres avec leurs détails de professionnel , les 3 photos de très bonnes qualité , la liste d’outils etc.. La vraiment , on ne peut pas se louper . J ‘aurai juste aimé voir un peu plus d’explications sur une mauvaise purge et ses conséquences sur le moteur , peut etre aussi voir un lien utile ( genre comment tester le thermostat d’eau avant son remontage ).. .. Merci pour votre travail ..cordialement René
Rene BOURGEON - Résolu à la publication Réponse
Dans la revue technique ils disent qu'il faut un cylindre de charge pour faire la purge, dans la pratique c'est compliqué à avoir, un bidon coupé à l'envers et du scotch PTFE d'étanchéité peut le remplacer. Ils disent qu'il faut 0,5L mini dedans pour la purge. Est-ce que ces préconisations sont juste ou bien une purge uniquement comme indiqué dans le tuto suffit ?
Cécile Lanne - Résolu à la publication Réponse