


Difficulté
Difficile
Étapes
11
Temps nécessaire
01:00:00 - 04:00:00

Ce tutoriel a été créé par la communauté
User contributed
Introduction
Le changement de la poulie peut prendre du temps lors du de-serrage de la poulie, celle-ci étant montée au frein filet, il est plus facile d'être 2 personnes pour réussir cette étape uniquement.
-
-
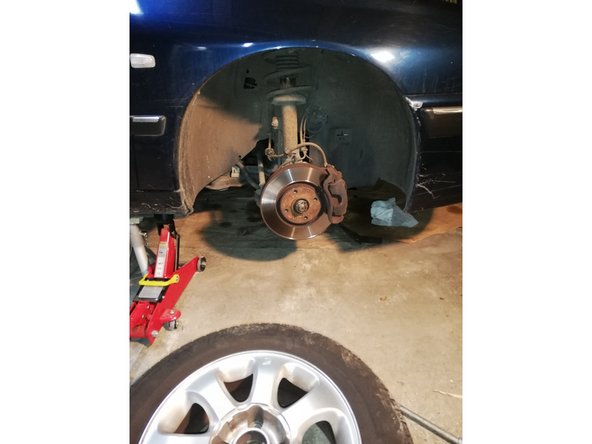
Levage et mise en sécurité (chandelle) de la voiture
-
Dépose de la roue
-
-
-
Déposer les caches plastiques à l'aide d'un tournevis Torx, il y a plusieurs vis dont notamment 5 sur le bas des protections plastiques à ne pas oublier
-
Faire attention à bien déloger les durites de l'emplacement sans les débrancher.
-
Les caches plastiques se dépose en douceurs sans forcer
-
-
-
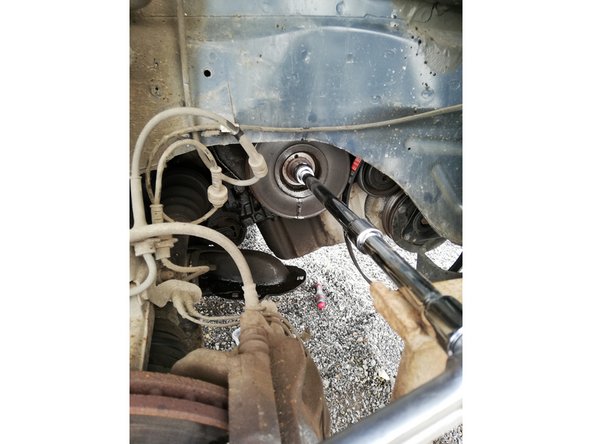
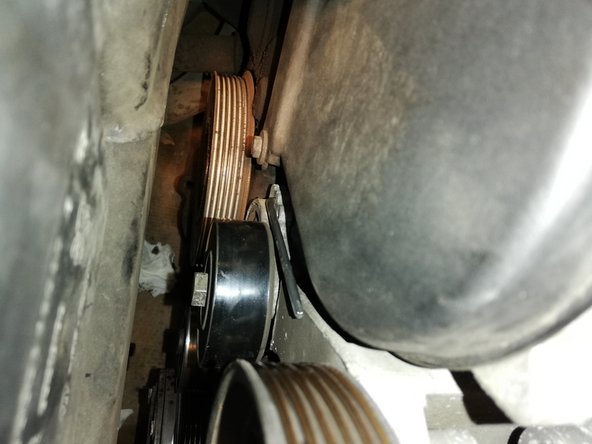
Voici la poulie du villebrequin (la poulie la plus grande à gauche)
-
-
-
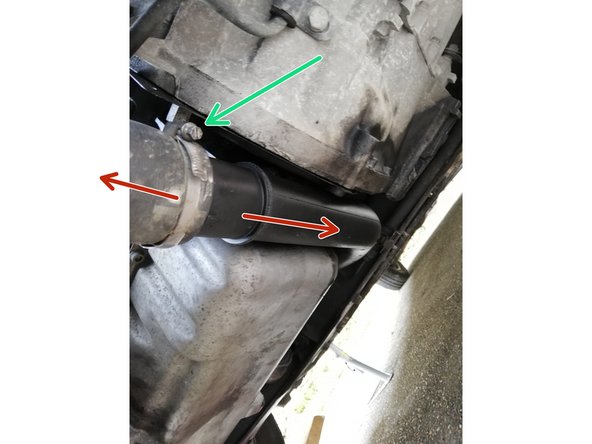
Commencer par retirer l'écrou de maintient de la durite de turbo
-
Desserrer le collier
-
Désemboiter la durite de turbo au niveau du collier
-
Il n'est pas nécessaire de retirer entièrement la durite, il suffit juste de la séparer au niveau du collier pour pouvoir la décaler sous le carter d'huile, ceci permet d'avoir plus de place pour la suite
-
-
-
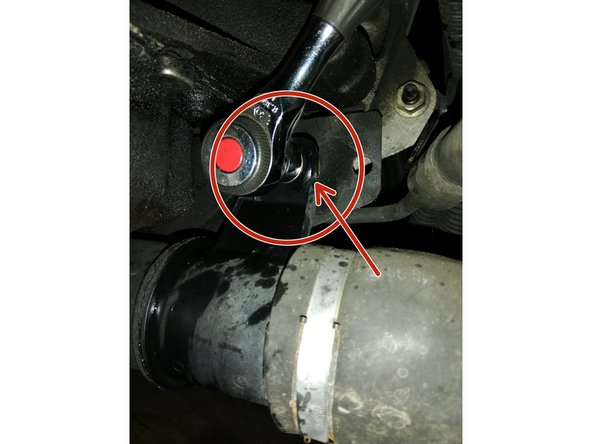
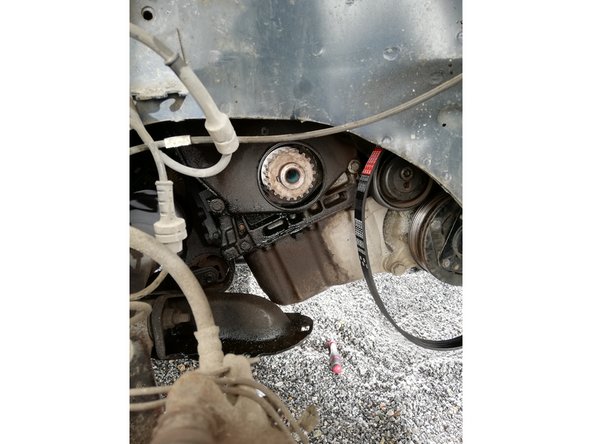
Retirer les 2 boulons de maintient (repérés en orange) du carter de volant moteur (fléché en vert)
-
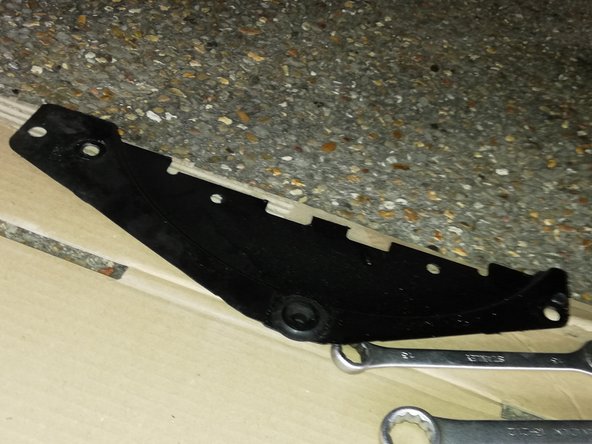
Déposer le carter du volant moteur
-
-
-
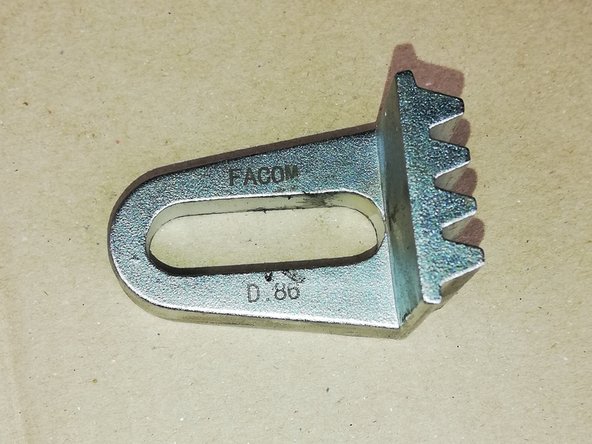
Procéder au blocage du volant moteur (à l'aide d'une pige ou d'un bloc volant moteur)
-
Placer le bloque volant en face du boulon supérieur (où était maintenu la durite de turbo) puis replacer le boulon d'origine et serrer le jusqu'à ce que le volant moteur soit bloqué
-
Si vous n'utilisez pas l'outil spécial "bloque volant moteur", mais une simple pige placée dans le volant moteur, attention à ne pas casser celle-ci en forçant lors du démontage de la poulie. L'outil de blocage volant est plus efficace et évite ce genre de problème
-
-
-
Bien repérer et noter le schéma de la courroie pour ne pas être pénaliser lors du remontage (passage et chevauchement des poulies) et noter le sens de rotation de la courroie si réutilisation.
-
Détendre le galet tendeur à l'aide d'une clef de 15 en agissant sur le boulon au centre du galet (cercle orange)
-
Tout en détendant le galet, insérer une pige (ou petite clef torx ici) dans le trou le plus éloignée sur le galet tendeur (flèche bleu) jusqu’à ce que la pige (ou clef) s'insère complètement et vienne bloquer le galet
-
Une fois le galet tendeur bloqué, il faut détendre le galet enrouleur, pour cela munissez-vous d'une grosse clef Allen et dévisser celui-ci jusqu'à ce que la courroie soit détendue
-
-
-
Cette étape est particulièrement difficile si vous n'êtes pas équipé un minimum (poignée articulée et rallonge ou pistolet pneumatique puissant...), le boulon étant très résistant et monté avec du frein filet
-
Munissez vous d'une douille de 22mm et d'une ou plusieurs rallonges, ici j'ai posé la rallonge sur une autre chandelle pour avoir un appui
-
Utiliser du dégrippant et laissez agir si nécessaire
-
Dévisser le boulon et sortir la poulie
-
-
-
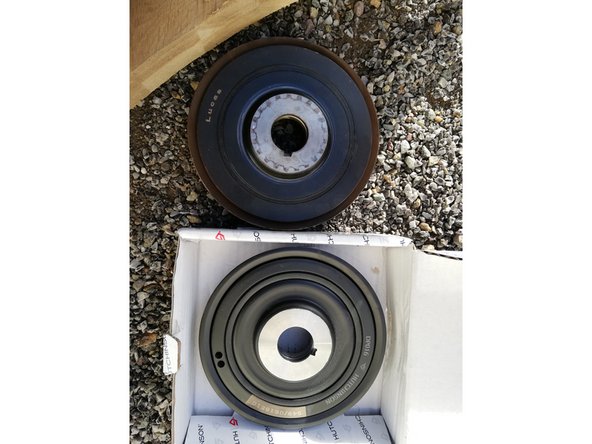
Comparer l'ancienne et la nouvelle poulie
-
Comparer l'ancien boulon et entretoise avec les nouveaux (si achat de nouveaux) ou procéder au nettoyage et à l'ajout de nouveau frein filet sur le boulon.
-
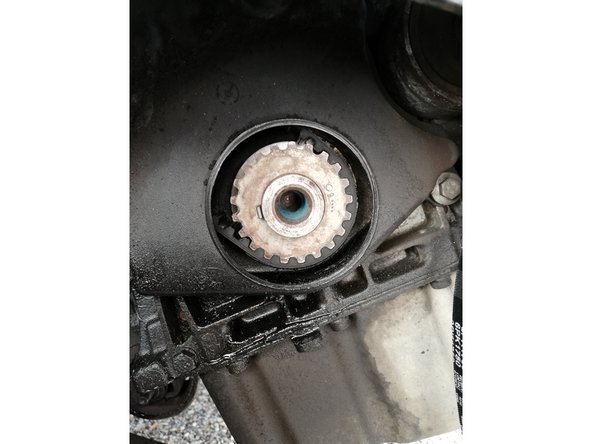
Nettoyer les résidus de frein filet dans la seconde poulie du vilebrequin toujours en place (coté courroie de distribution)
-
Monter la nouvelle poulie et la serrer au couple prescrit dans la RTA de votre véhicule
-
-
-
Bien vérifier que la courroie soit correctement placée dans les gorges des poulies et qu'elle ait le bon cheminement
-
Procéder à la tension du galet enrouleur à l'aide d'une clef allen et d'une clef carré (dimension d'un carré de porte) jusqu'à ce que la pige du galet tendeur se débloque d'elle même
-
Il est préférable d'être 2 pour cette opération, une personne tend le galet enrouleur, et l'autre personne surveille le déverrouillage de la pige dans le galet tendeur
-
A cette étape vous pouvez débloquer le volant moteur (surtout ne pas oublier avant cette étape avant d'allumer le moteur - risque de casse)
-
Effectuer quelques tours de vilebrequin pour mettre la courroie bien en place et contrôler la tension à l'aide de la pige (celle-ci doit s'insérer dans le galet tendeur et ressortir sans difficultés)
-
Se référer à la revue technique du véhicule si la méthode de tension est différente
-
-
-
La poulie étant changée il faut maintenant remonter les protections dans le sens inverse du démontage (protection du volant moteur, durite de turbo, pares roues...)
-
Remontage de la roue
-


Opération assez difficile à réaliser tout seul, mais possible, le dé-serrage de la poulie est très difficile sans bras de levier ou sans pistolet pneumatique puissant.
Opération assez difficile à réaliser tout seul, mais possible, le dé-serrage de la poulie est très difficile sans bras de levier ou sans pistolet pneumatique puissant.
Annulation : je n'ai pas terminé ce tutoriel.
2 autres ont terminé cette réparation.
2 commentaires
super tuto avec quelques différences pour le placement de l'outil pour mon 2.1l td ,mais sinon très bien expliqué juste faire attention au diamètre intérieur et extérieur ainsi qu'a la forme arrière de la poulie damper je ne peux que te dire un grand merci a toi pour ce développement de ce sujet bien conseillé et bien documenté par tes photos .
nono du 42
Ce guide m’a bien aidé; il m’a permis de repérer l’outillage (que j’ai acheté) pour bloquer le volant moteur et de bien me préparer pour desserrer la poulie (grand bras de levier et appui sur un tabouret en bois à la même hauteur que l’axe de la vis). SUPER.
Marc ANDREOTTI - Résolu à la publication Réponse