


Difficulté
Modérée
Étapes
10
Temps nécessaire
01:00:00

Ce tutoriel a été créé par la communauté
User contributed
Introduction
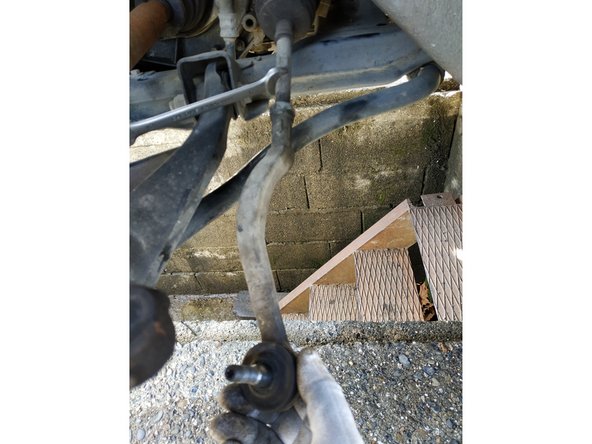
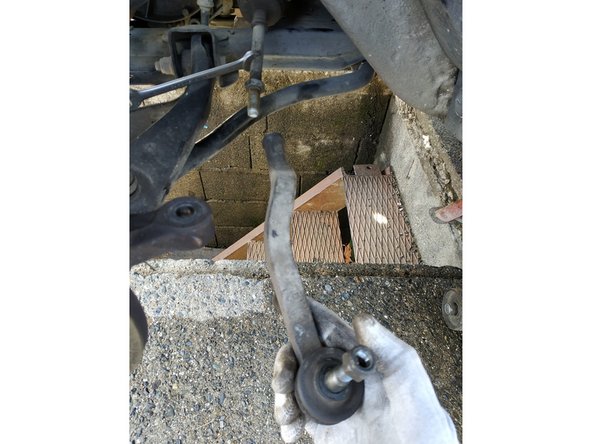
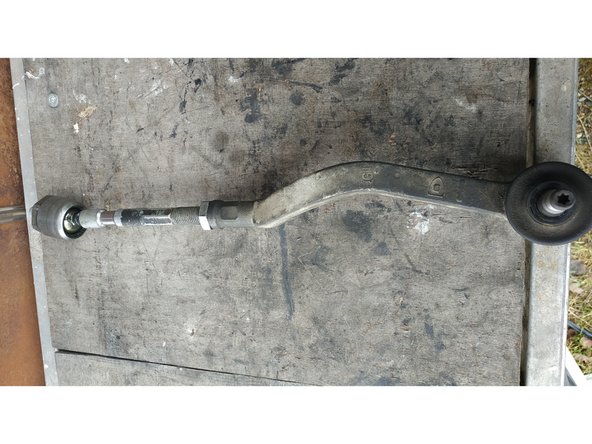
La biellette de direction comprend une rotule intérieure (ou rotule axiale) et une rotule extérieure. On peut tout-à-fait changer la biellette entière (c'est ce que je conseille) mais il est aussi possible de ne changer que la rotule intérieure. C'est ce que nous allons voir ici.
Nous faisons le côté gauche mais la procédure est la même pour le côté droit.
-
-
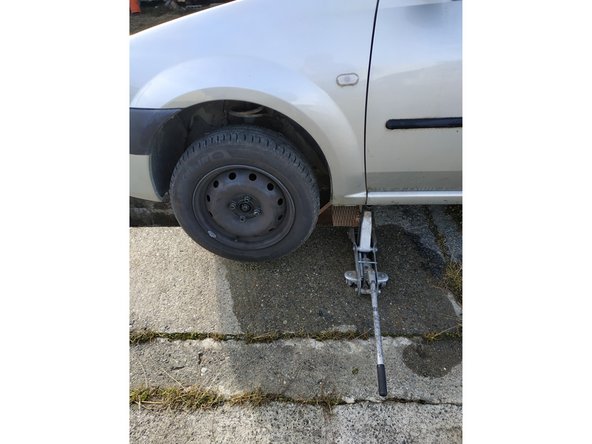
lever la voiture côté avant gauche à l'aide du cric
-
placer une chandelle sous le longeron
-
et dévisser les 4 goujons à l'aide d'une clé de 19mm (ou de la manivelle fournie avec le cric) pour retirer la roue
-
On aura préalablement débloqué les goujons avant de lever la voiture, à moins d'avoir une clé à choc comme c'est le cas ici.
-
-
-
débloquer l'écrou de verrouillage de la rotule extérieure à l'aide d'une clé plate de 21mm (on peut utiliser une clé plate de 13mm pour immobiliser la rotule intérieure si nécessaire)
-
On ne fait que le débloquer. Une fois qu'il est libre, on le remet dans sa position initiale, bien à fleur de la rotule extérieure.
-
dévisser l'écrou de la rotule extérieure à l'aide d'une clé de 16mm
-
taper sur le côté à l'aide d'une massette pour libérer la rotule du cône
-
-
-
tenir la rotule intérieure à l'aide d'une clé plate de 13mm si la rotule extérieure n'est pas déjà libre
-
et dévisser la rotule extérieure en prenant soin de compter le nombre de tours (17 tours et demi dans mon cas, ceci à titre purement informatif)
-
retirer l'écrou de verrouillage de la rotule extérieure
-
-
-
couper le collier en plastique qui maintient le soufflet
-
retirer le soufflet
-
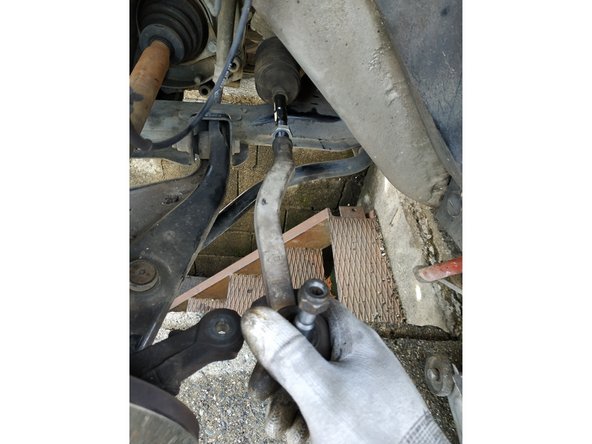
dévisser la rotule intérieure à l'aide d'une clé plate de 32mm et la retirer
-
-
-
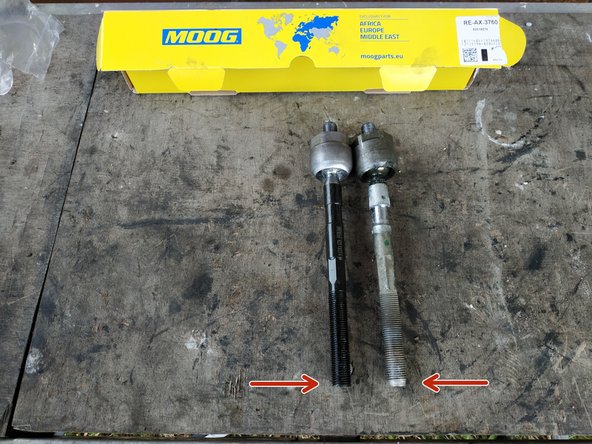
Les rotules font la même longueur mais on remarque que le filetage est plus long sur la pièce neuve. Même en vissant la rotule extérieure de 17 tours et demi sur la rotule neuve, le réglage ne sera vraiment pas bon.
-
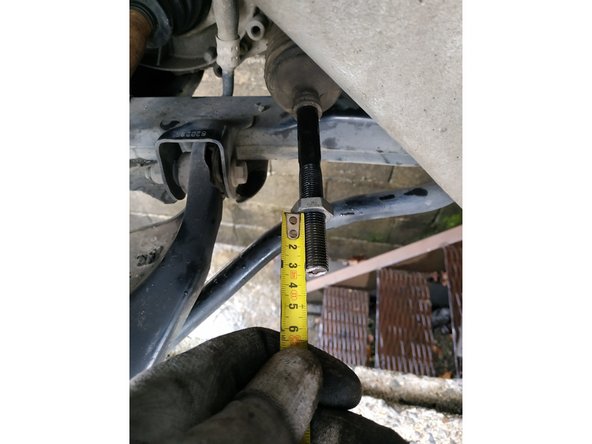
Du coup, on va remettre en place l'écrou de verrouillage sur l'ancienne rotule intérieure, visser la rotule extérieure en comptant le nombre de tours et positionner l'écrou bien à fleur.
-
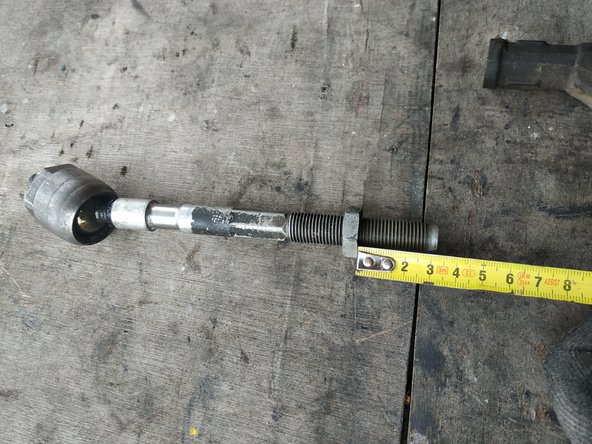
Puis retirer la rotule extérieure (on laisse bien l'écrou à sa place) et mesurer la distance entre l'écrou et le bout de la rotule : 33mm dans mon cas. On reportera cette mesure sur la pièce neuve.
-
On aurait bien entendu pu prendre cette mesure lors de l'étape 3 mais je me suis rendu compte de la différence entre les 2 pièces au moment de la comparaison.
-
-
-
visser la rotule neuve et la bloquer à l'aide de la clé plate de 32mm
-
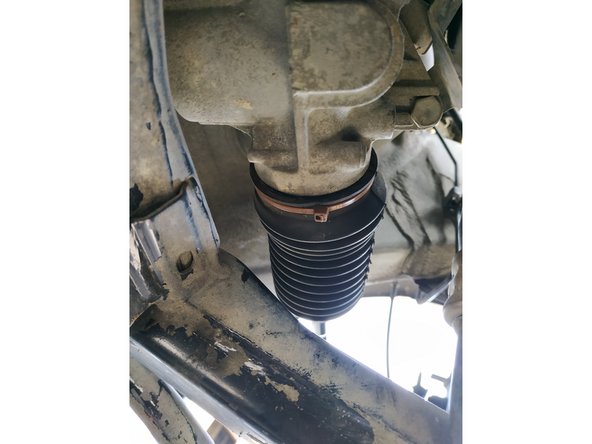
remettre en place le soufflet
-
Ces rotules intérieures sont déjà graissées. On peut rajouter de la graisse si on le souhaite mais ce n'est pas indispensable.
-
poser un collier neuf et couper l'extrémité
-
-
-
mettre en place l'écrou de verrouillage de la rotule extérieure
-
reporter la mesure prise, 33mm dans mon cas
-
visser la rotule extérieure
-
J'avais 17 tours et demi sur la rotule d'origine et 20 tours et demi sur la nouvelle
-
-
-
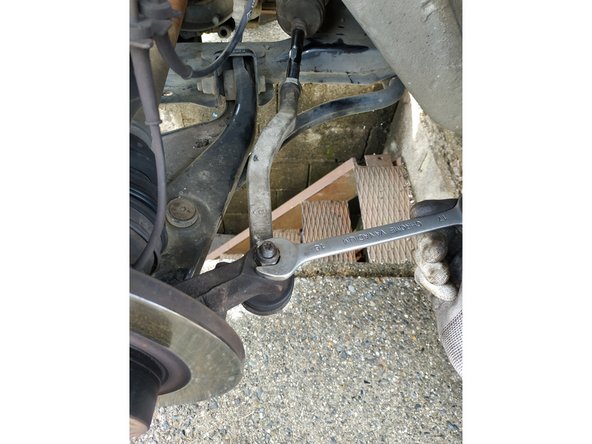
insérer la rotule extérieure dans son logement dans le porte-moyeu et serrer à l'aide d'une clé de 16mm (couple de serrage 37N.m)
-
si l'écrou tourne dans le vide, on peut bloquer la rotule en insérant une clé Torx T30 à son extrémité
-
bloquer l'écrou de verrouillage à l'aide d'une clé de 22mm, on peut immobiliser la rotule intérieure avec une clé plate de 13mm au besoin
-
L'écrou neuf se serre avec une clé de 22mm alors que celui d'origine demandait une clé de 21mm. Ce genre de chose arrive très souvent et ne signifie pas que les pièces sont incompatibles.
-
-
-
remonter la roue (couple de serrage des goujons 105N.m) et retirer la chandelle et le cric
-
-
-
Il faut impérativement faire régler le parallélisme chez un professionnel ; je conseille de prendre rdv avant de faire l'intervention. Le réglage que l'on a fait lors du montage est provisoire uniquement, le temps de se rendre au garage en faisant attention.
-


Annulation : je n'ai pas terminé ce tutoriel.
Une autre personne a terminé cette réparation.